GT Chucker XS1 - Updated 11/07/16 - PG 12
Comments
-
GT-Arrowhead wrote:buddy_club wrote:I'm probably the only one to say this, but I love the colours

Cheers
Id go mental with the colours on this if i had the money.
A pair of those red anodized hope floating discs
Red brake hoses
Red narrow wide Raceface chainring
Panaracer Fire XC Pros, purely because they have red on them
White rims with red nipples and white spokes, and a red anodized hub
A red anodized crankset
A new seatpost of some sort as mine is faded
Red anodized pedals
Change every single bolt on the bike to red anodized stainless steel ones.
Oh, and some new red anodized dustcaps, as the anodizing on mine have faded a bit after 3 years.") , So much bling! Im slowly buying green bits and bobs for the Voodoo, think that floating rotors will be next - in green of course , and then slowly do all the bolts. Money is the only thing stopping me right now
, So much bling! Im slowly buying green bits and bobs for the Voodoo, think that floating rotors will be next - in green of course , and then slowly do all the bolts. Money is the only thing stopping me right now  . Framebuilder
Handbuilt Steel 29er https://goo.gl/RYSbaa
Carbon Stumpjumper https://goo.gl/xJNFcv
Parkwood:http://goo.gl/Gf8xkL
Ribble Gran Fondo https://goo.gl/ZpTFXz
Triban:http://goo.gl/v63FBB0 -
The thing that tends to cause stiff shifting most is the grit and grime in that last bit of cable that curves out from the frame and goes into the back of cheap Shimano derailleurs. It's why SRAM and higher end Shimano use direct pull designs instead. Used to be you could eliminate the problem by buying a Avid Rollermajig before they stopped making them. I had two fitted to my bikes and they made shifting flawless from then on, no matter how grotty the cables and outers got. Only similar thing they make these days is Rose bikes WCW Easy Roller...
 0
0 -
smart, you've done a good job...0
-
Ouija wrote:The thing that tends to cause stiff shifting most is the grit and grime in that last bit of cable that curves out from the frame and goes into the back of cheap Shimano derailleurs. It's why SRAM and higher end Shimano use direct pull designs instead. Used to be you could eliminate the problem by buying a Avid Rollermajig before they stopped making them. I had two fitted to my bikes and they made shifting flawless from then on, no matter how grotty the cables and outers got. Only similar thing they make these days is Rose bikes WCW Easy Roller...
Or you could use an old V brake noodle....0 -
*AJ* wrote:Ouija wrote:The thing that tends to cause stiff shifting most is the grit and grime in that last bit of cable that curves out from the frame and goes into the back of cheap Shimano derailleurs. It's why SRAM and higher end Shimano use direct pull designs instead. Used to be you could eliminate the problem by buying a Avid Rollermajig before they stopped making them. I had two fitted to my bikes and they made shifting flawless from then on, no matter how grotty the cables and outers got. Only similar thing they make these days is Rose bikes WCW Easy Roller...
Or you could use an old V brake noodle....
Which is no different than a cable outer, so would suffer from the same problem.0 -
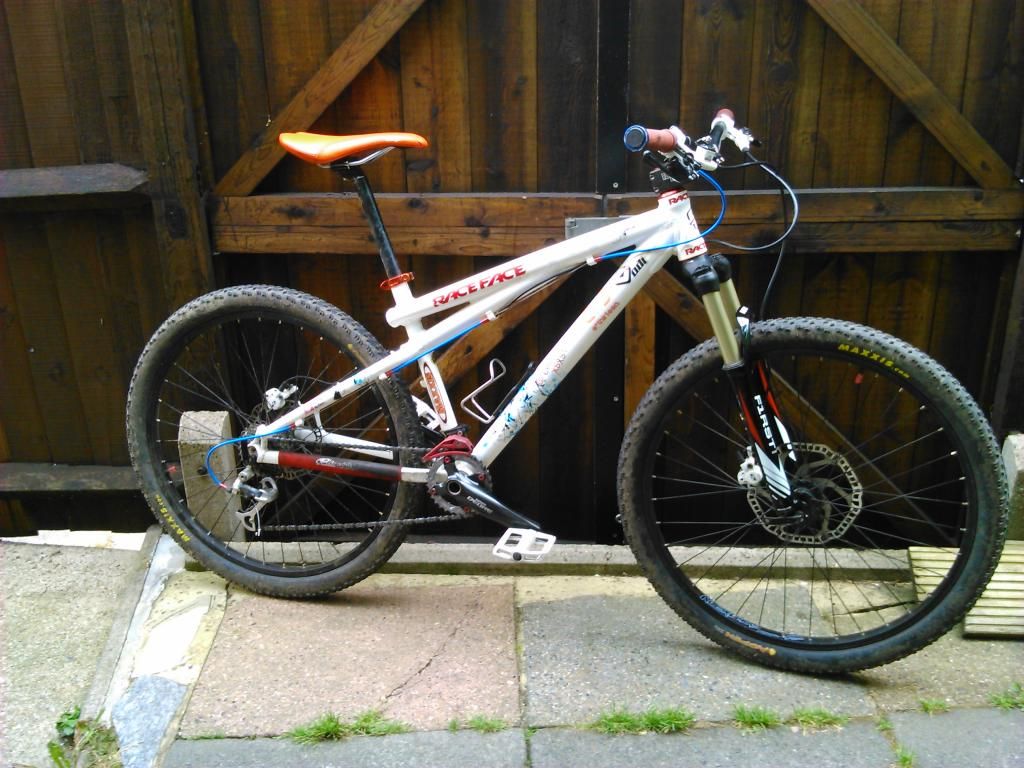
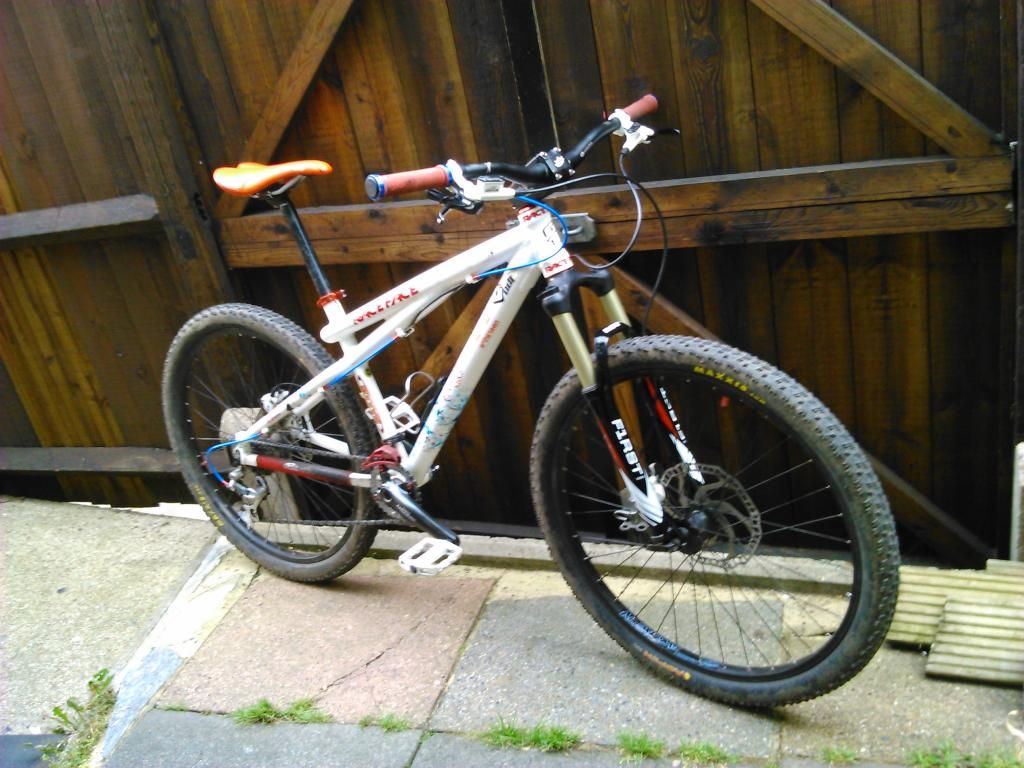
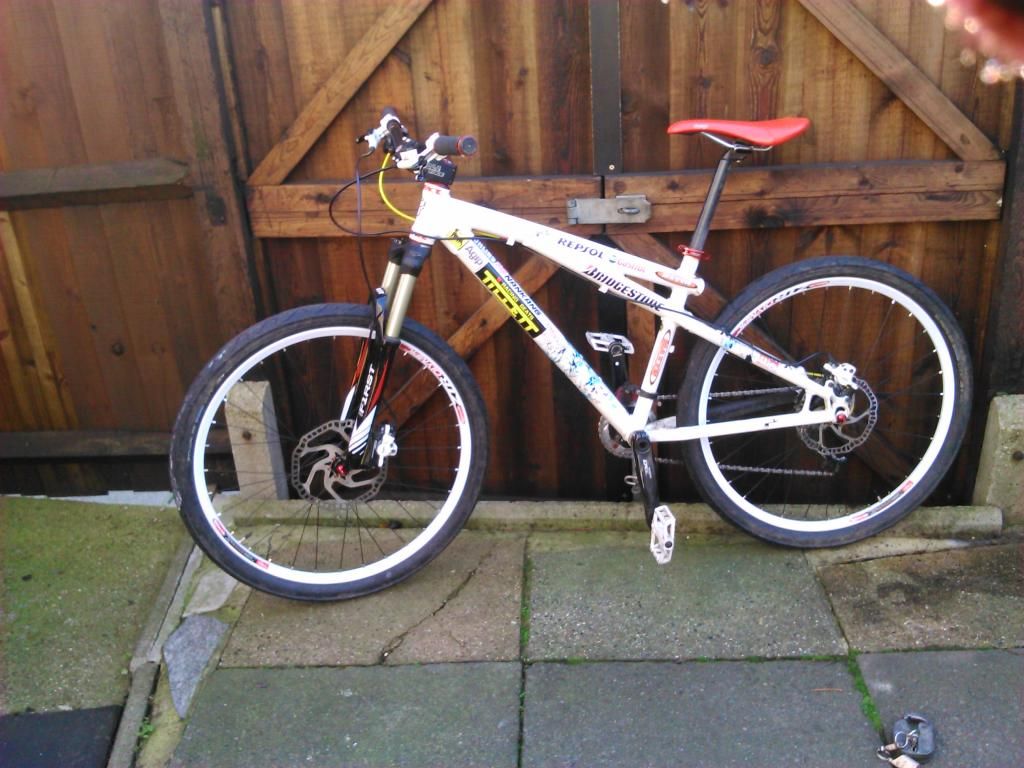
Long while since ive updated this and indeed been on this website! A thread update was due...
Had a few important updates fitted since the last post.
I have put the rigid fork away now for the summer, and i have put the suspension fork back on. It feels excellent both on and off road. Felt a bit weird after riding on the rigid for so long, but i soon got used to it.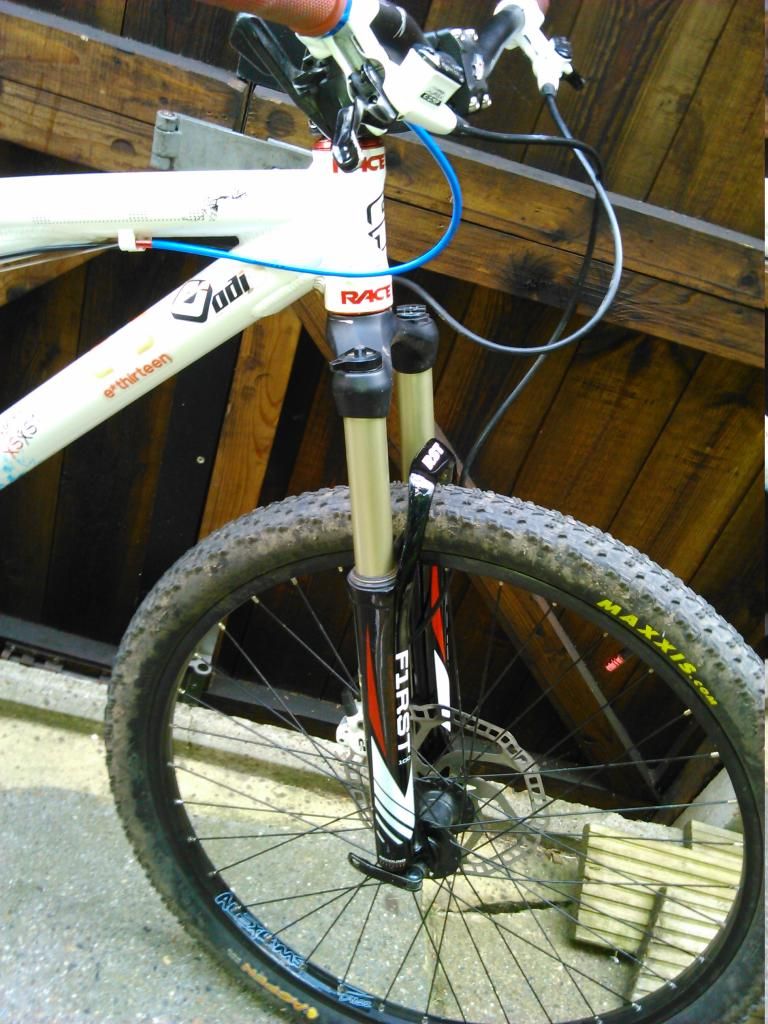
I also got myself some cheap bars ages ago on the CRC sale. Crank Brothers Iodine 1s - 30mm rise, 700m long. That is 10 degrees more rise and 40mm (IIRC) wider than my previous Raceface bars. Once i had fitted them it felt awefully weird, and i was contemplating changing back. I got used to it after a while, and that too turned out to be a useful upgrade.
I also finished changing my old square taper Alivio chainset to my new Deore Hollowtech II cranks today. I somehow managed to get about half of the forest i ride, into my bottom bracket. The amount of crap that came out of the BB and the BB shell on the frame was shocking. God knows how it got in there. The fact that the mud was of a very very fine consistency leads me to believe that it got through the seals, got whirled around along with the bearings, then got deposited in the shell through the small gaps in the BB. I did exactly what i planned to do though. Run my square taper into the ground, and get a new fresh one on when the weather gets nice
Had trouble fitting the cranks. Put them on with no spacers and found about 2-3 cm of spline sticking out. After consulting the manual and reading online, turns out you do need the supplied spacers after all. I also managed to mangle part of that plastic shaft thing that links both BB cups together. It doesnt look like it has much use, so i didnt get too pissed off about it, and bent it roughly back into shape and fitted it all together. The test ride went well. Feels pretty good. Just a bit stiff for some reason? When i fit a new square taper, it spins like a demon. Maybe it needs to be bedded in?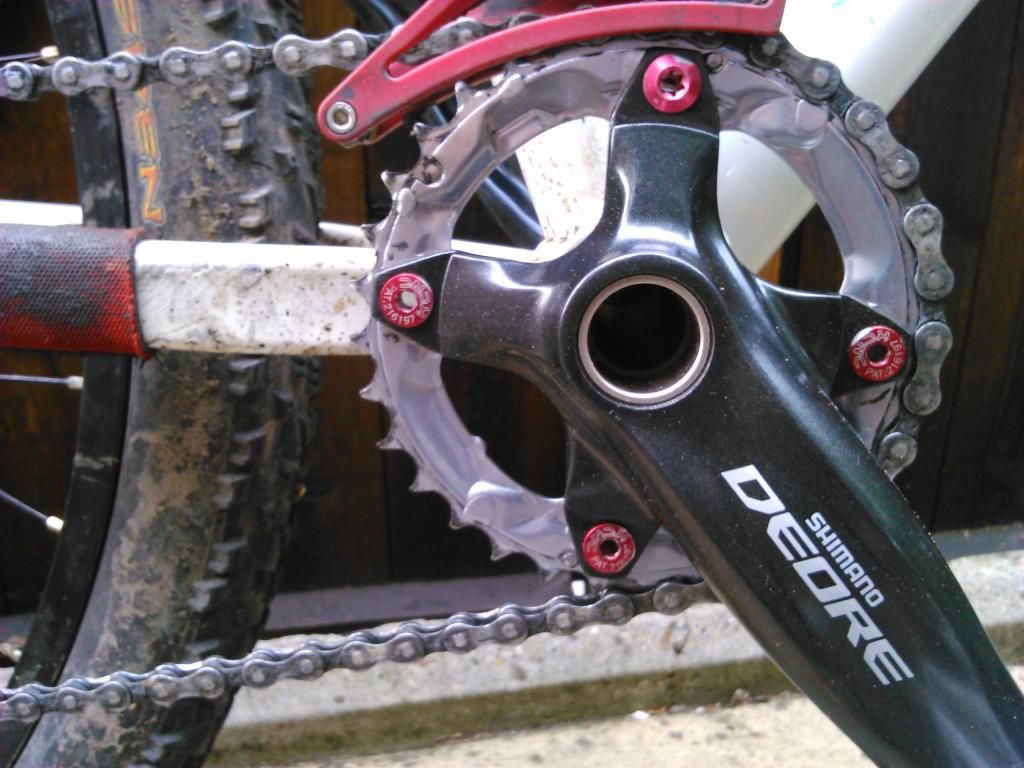
Does anyone know if there is supposed to be some sort of cap supplied to cover that hole in the middle of the crank? You can see right the way through it. All that is on the other side is that sort of plastic preload bolt thingy. There was nothing else in the box.
And finally, a couple of stickers, one either side. Bought a few stickers for a project i have going, and these two ones came along with the bigger versions, so i thought why not.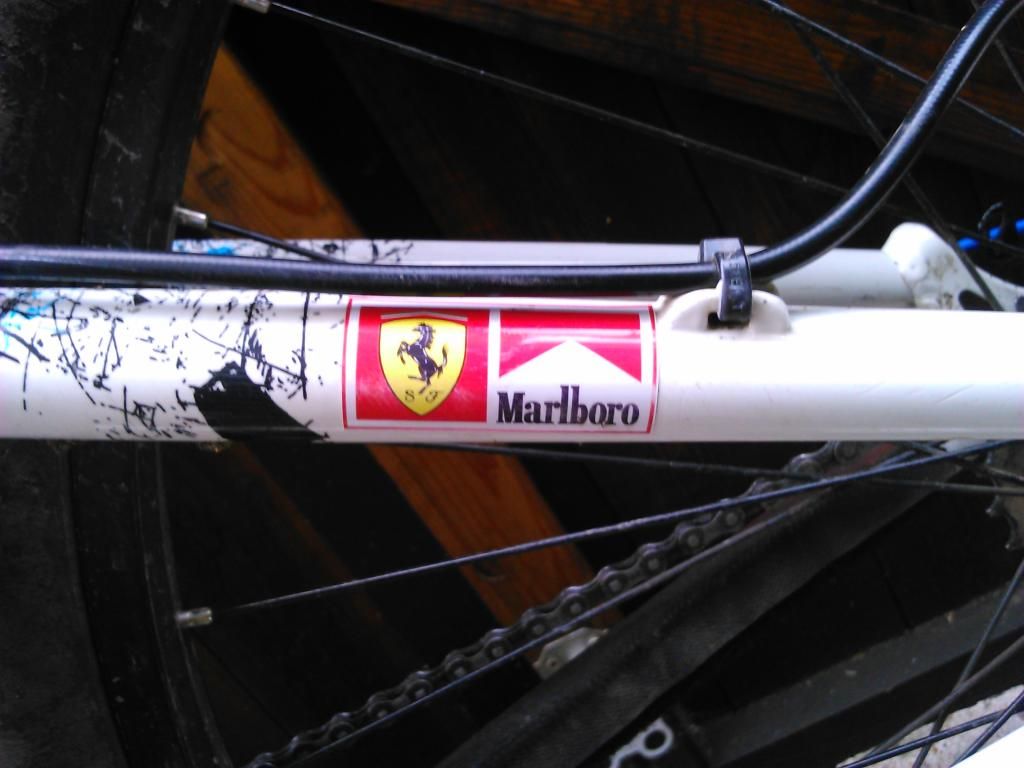
 0
0 -
I have also swapped pedals with my commuter, as these are in better shape, are lighter, and are thinner (rock clearance etc).
Also replaced all the fluid in the rear brake as i got a bit of air in them by squeezing the lever with the wheel/disc out. Spent 6 quid on a litre of mineral oil, just to use around 25ml... :roll:0 -
Looks good mate, pretty sure that's meant to be open, but don't believe everything on the internet - but yeah the bike looks good, love the colour of the fork stantions - looks similar to the colour on BOS forks? Looks expensive anyway hahha Framebuilder
Handbuilt Steel 29er https://goo.gl/RYSbaa
Carbon Stumpjumper https://goo.gl/xJNFcv
Parkwood:http://goo.gl/Gf8xkL
Ribble Gran Fondo https://goo.gl/ZpTFXz
Triban:http://goo.gl/v63FBB0 -
It's meant to be open on the one side.
Looks good pal. But loose the stickers the bike is starting to look like a panini sticker album. Not cool0 -
Looks great, apart from the stickers... I'd be interested to know what you think of the fork.Cube Analog 2012 with various upgrades.0
-
Thanks for the replies
Good to hear its meant to be open on one side.
About the stickers, i think everyone on here hates them, haha! But i like having loads of stickers. I think its just something thats developed along with my love of motorsport, looking at pictures of all sorts of racing cars covered in sponsors and stickers. Im thinking to ditch the ones at the top of the downtube, as all but one have had their colours faded quite badly.
Lewis, the fork has been perfect so far. It handles XC rides brilliantly, and even when you go over ruts and large roots on downhill sections pretty quickly it still performs really well. Ive also done loads of small-ish jumps and drop offs on it and it is more than capable for that too. Never bottomed it out once, and it didnt have the pogo stick effect of springing you back into the air either.
I think the only very minor problem with it is that i may be too light for the fork? The preload setting is on the maximum negative setting, and im barely getting the fork to sag at all once i get on the bike. But other than that, no complaints.
Bare in mind though, this is the only decent fork ive ever owned, so people who usually ride expensive forks and what not would probably find this pants in comparison. But its fine for me 0 -
I dont think youre too light for the fork, its either not set up properley, or not running properley a.k.a something internally isn't right.
Looks nice though you've done a good job. Dont think the stickers look too bad, but it would look better in all white0 -
The preload cap should stay in one end of the cranks - you dont take it out after preloading (or at least I dont). If the cranks aren't running too smooth make sure you havent over tightened anything (eg the preload cap) or that your mangled plastic tube thing isn't dragging on the crank axle. Not sure how you mangled that and its definitely worth reading the instructions that come with shimano stuff before trying to install it.....
Lose the stickers and maybe read the manual for the fork too.Closet jockey wheel pimp whore.0 -
I imagine he put both ends of the BB cups on without any spacers and then screwed them all the way in so that the central plastic tube got crushed/buckled?
But, yeah, should turn smoothly unless you overtighten the preload or the cups aren't sitting perfectly aligned with each other because the bottom bracket shell hasn't been faced. Also worth mentioning that you'll need to take the non drive side crank arm off after 50 odd miles and retighten after the bearings have worked their way loose.
And if you get any clicking noises after a while, it's usually the cups having loosened up slightly on the threads and not the bearings that are shot (replaced a few HTII BB's before realizing this).0 -
GT-Arrowhead wrote:Also replaced all the fluid in the rear brake as i got a bit of air in them by squeezing the lever with the wheel/disc out
qué? How could that get air in the system?"Why have that extra tooth if you're not using it?" - Brian Lopes
Votec V.SX Enduro 'Alpine Thug' 2012/2013 build
Trek Session 80 -
Pesky Jones wrote:I dont think youre too light for the fork, its either not set up properley, or not running properley a.k.a something internally isn't right.
Looks nice though you've done a good job. Dont think the stickers look too bad, but it would look better in all white
Thanks
The fork should be fully functional as i recieved it in mint condition with not even a scratch on it, and i havent whacked it anywhere, and the worst weather/conditions it has seen has been rain. Not a great deal of miles on it either.paul.skibum wrote:The preload cap should stay in one end of the cranks - you dont take it out after preloading (or at least I dont). If the cranks aren't running too smooth make sure you havent over tightened anything (eg the preload cap) or that your mangled plastic tube thing isn't dragging on the crank axle. Not sure how you mangled that and its definitely worth reading the instructions that come with shimano stuff before trying to install it.....
Lose the stickers and maybe read the manual for the fork too.
Yep, i left the preload cap in, and it probably is rubbing on the shaft a small bit. Im going to take it all out on the weekend and reinstall it, this time i wont tighten the preload cap as hard as i did, and i might do away with the plastic tube. As far as i can see, it doesnt really have any purpose anyway?
The fork came with no manual as i got it 2nd hand, but im going to look online later on and see if i can find one.Ouija wrote:I imagine he put both ends of the BB cups on without any spacers and then screwed them all the way in so that the central plastic tube got crushed/buckled?
But, yeah, should turn smoothly unless you overtighten the preload or the cups aren't sitting perfectly aligned with each other because the bottom bracket shell hasn't been faced. Also worth mentioning that you'll need to take the non drive side crank arm off after 50 odd miles and retighten after the bearings have worked their way loose.
And if you get any clicking noises after a while, it's usually the cups having loosened up slightly on the threads and not the bearings that are shot (replaced a few HTII BB's before realizing this).
Yep, that is exactly what i did. No spacers + tightened = crushed! I watched a video online of someone installing it, and he didnt install or mention spacers at all. Just put the cups on. and boom. (but his cranks werent wasnt all that smooth either?) Then after i found out i mangled the tube, i looked online, and it said only road bikes dont need to use spacers. Then it all made sense, as in the video he was installing it on a road bike.
Cheers, ill make sure to do that if i get clicking.felix.london wrote:GT-Arrowhead wrote:Also replaced all the fluid in the rear brake as i got a bit of air in them by squeezing the lever with the wheel/disc out
qué? How could that get air in the system?
To be honest with you i dont even understand it either! I pumped the brake lever a few times to check if my pistons were working okay (quite stupid i know), but i made sure that i didnt squeeze the lever hard enough so the pistons hit eachother or any of the pistons came out, as i knew that would mean an air leak. So i did it, and no contact between pistons, and no pistons popping out. No seals popping out either. So i pushed them back in, and put the wheel and pads back on. Went for a test ride, and i had the lever coming all the way to the bar and next to zero power. The only thing i could think of is that air somehow got in through the pistons.
I changed the fluid (pushing the new in through the caliper, and the old coming out at the lever) and i saw some air bubbles coming through with the last bits of the fluid, which means that the air got into the caliper. After the new fluid/bleed, it was back to normal.0 -
Small update. I got myself some Cro-mo Halo Hex Bolt lock on skewers. The original skewers on here were god awful. Rear one worked itself loose once. So in the interests of safety and in the interests of having red anodizing, it was an essential upgrade And if i ever decide to take this out and lock it up somewhere i can be pretty sure the wheels wont get nicked. Unless a theif-mechanic walks past :shock:. I was going to use them for my commuter originally, but i figured id just use a D lock (have one already) with one of those long thingys that you go through your wheel with, then lock up with your D lock.
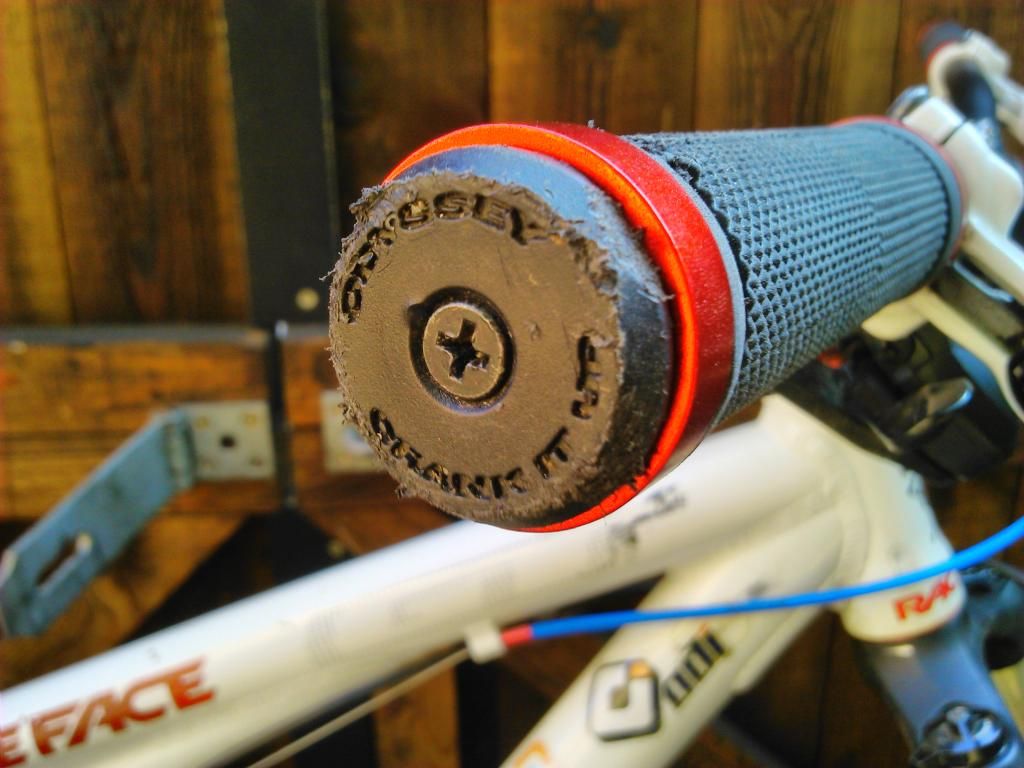
I also took the old red grips off this and put them on the Raliegh, and i put these brand new black ones on. I needed some bar ends, so i got these Odessey ones from my dads old GT which we split because the frame got mangled when someone reversed into it. They are quite cool, you screw it up and it tightens. I also took the red Charge Spoon off this for my Raleigh and put the saddle from there onto here. Made sense since this wont be getting much riding unfortunately Plus i intend to get a black saddle for this (probably another Spoon).
I never paid much attention to just how much difference the angle and how far back/forward your seat is makes to how the bike feels and handles. My seat was pointing down slightly, and i adjusted it, moving it further forward and made it straight and it instantly felt alot better. Something i will definitely pay alot more attention to in the future.
Hex Skewers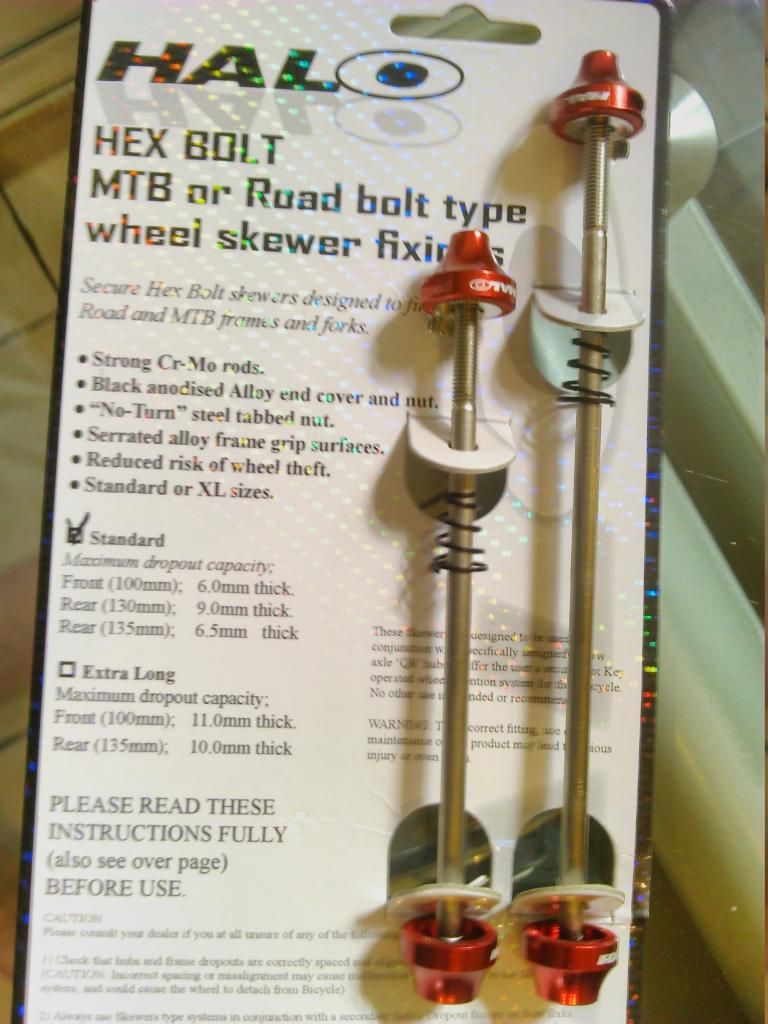
Oiiii there. Look at that bling 8) 8)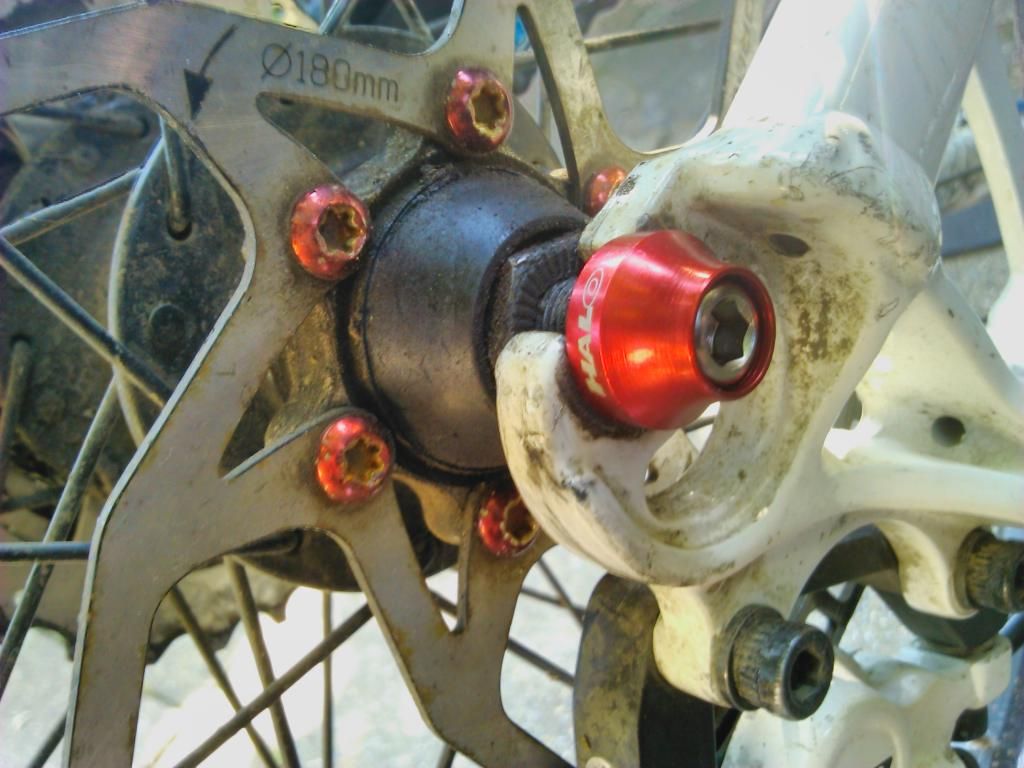
Grips + ends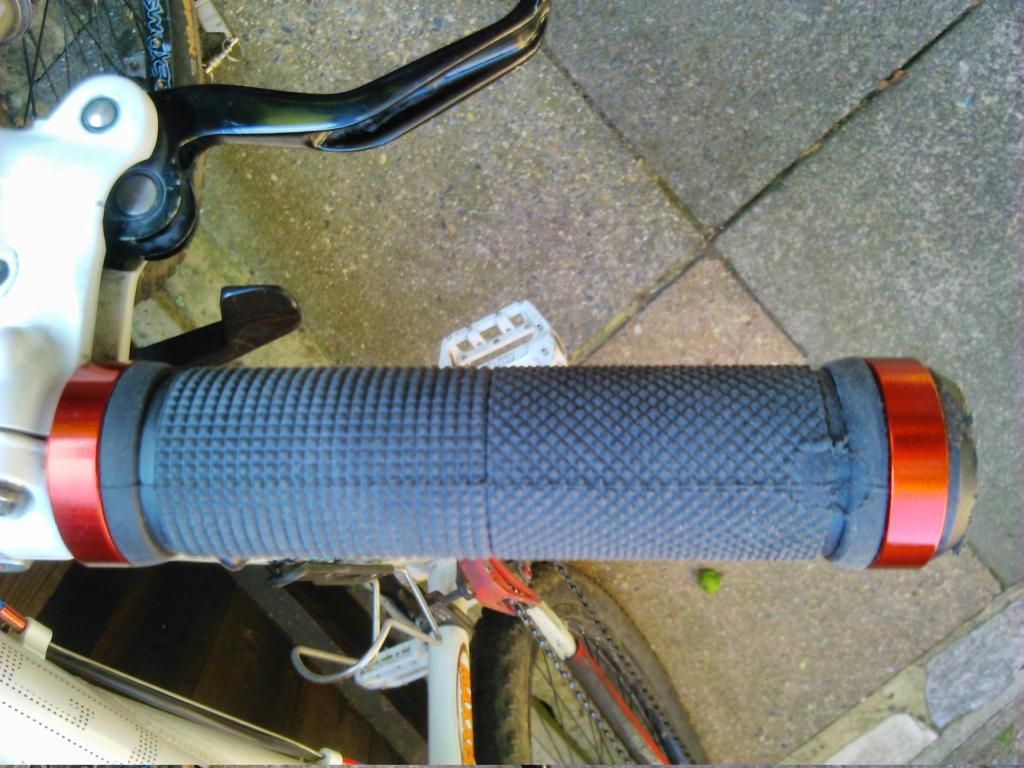
Saddle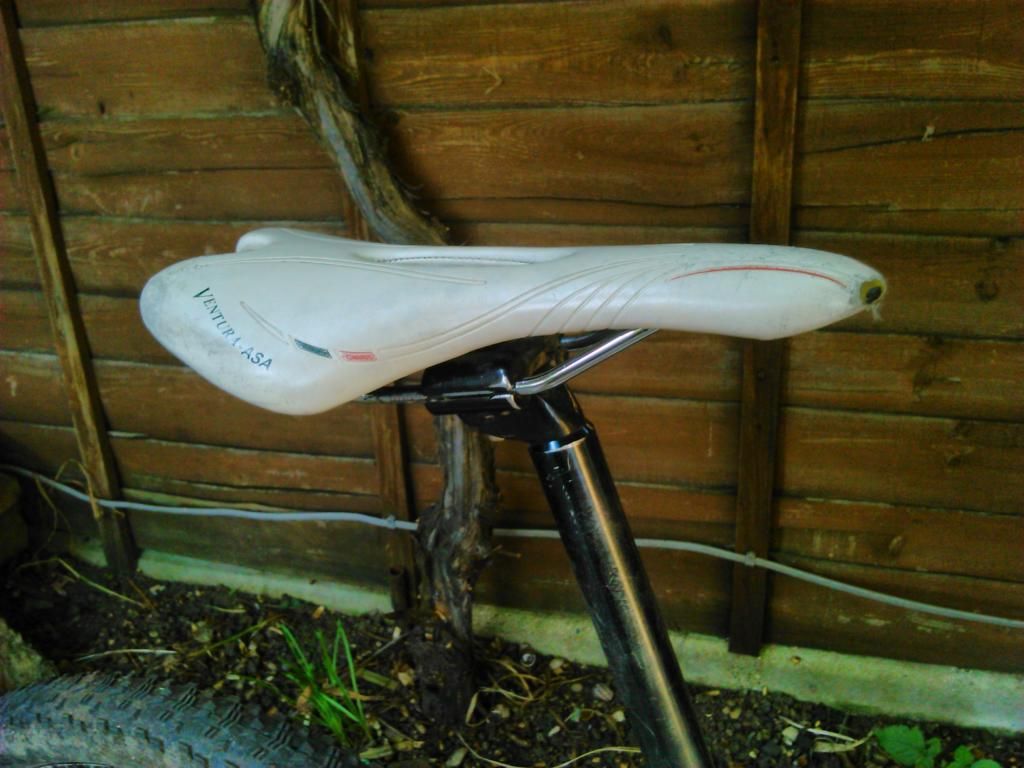
Playing around with the focus thingy on my phone. I found out how take clearer pictures with it now too. Like the bar end picture. Thats quite a nice picture in terms of detail. Pressing the touch screen button for taking a picture makes it clearer than using the actual physical button on the side of the phone. I think they operate the camera differently some how?
 0
0 -
GT-Arrowhead wrote:I never paid much attention to just how much difference the angle and how far back/forward your seat is makes to how the bike feels and handles. My seat was pointing down slightly, and i adjusted it, moving it further forward and made it straight and it instantly felt alot better. Something i will definitely pay alot more attention to in the future.
Lol. After how much piss taking about your seat angles in all your pics in the various threads over the last year? I'm feeling slightly smug.... 0
0 -
Ouija wrote:GT-Arrowhead wrote:I never paid much attention to just how much difference the angle and how far back/forward your seat is makes to how the bike feels and handles. My seat was pointing down slightly, and i adjusted it, moving it further forward and made it straight and it instantly felt alot better. Something i will definitely pay alot more attention to in the future.
Lol. After how much wee-wee taking about your seat angles in all your pics in the various threads over the last year? I'm feeling slightly smug....
Hahaha. I used to view the saddle as just something thats there to stop you sitting the frame. Then i realised how important the height of the seat was, and now i understand why people say the position of the saddle on the actual seatpost itself is very important. Though it wasnt through people taking the piss, it was just a bit of experimenting 0 -
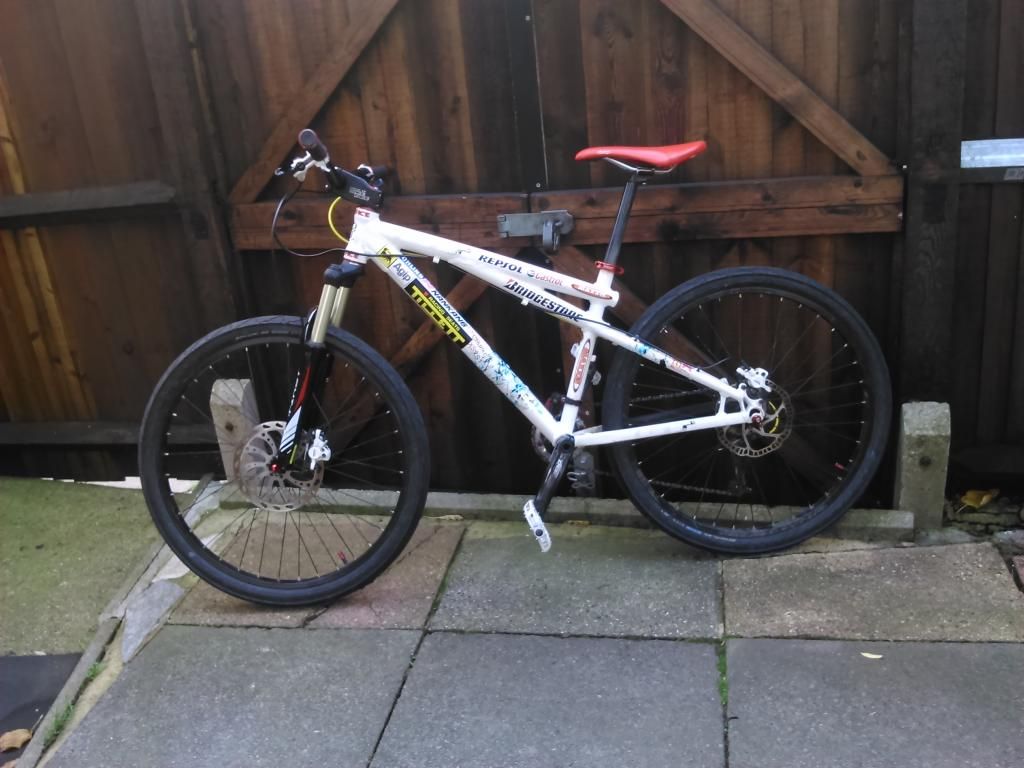
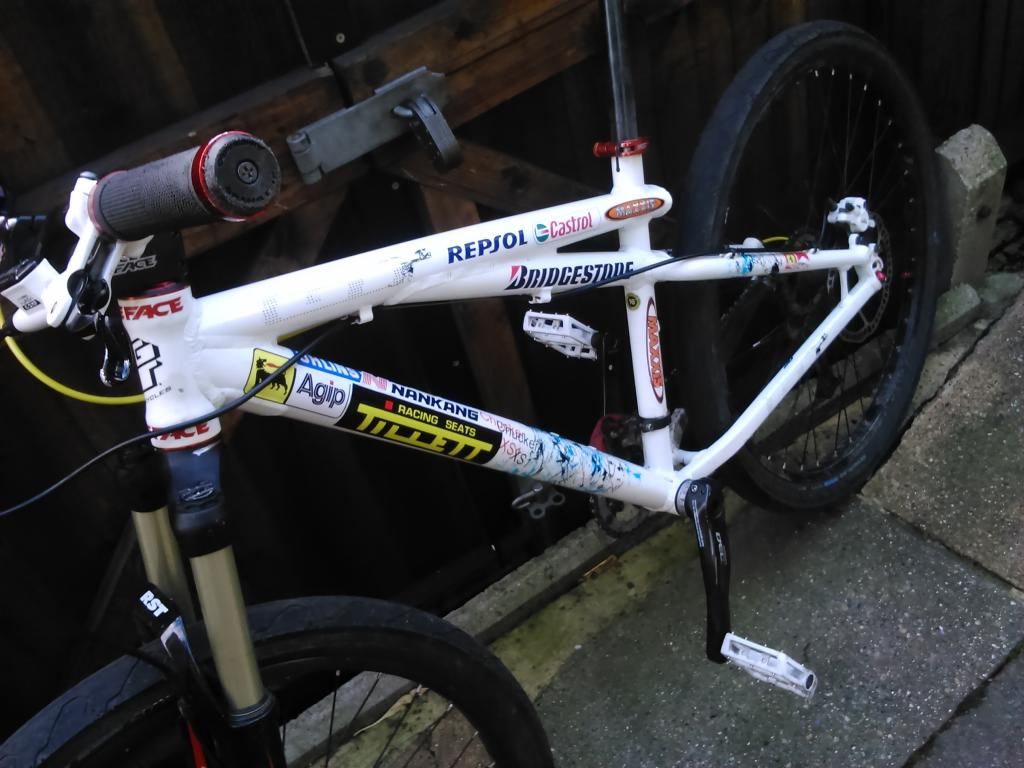
Most recent changes:
An absolute sh*t load of stickers, none of which have any relevance to cycling, but can be excused as i am a big motorsports fan, and sticker fan.
A new headset. A nice red anodized Windspeed one. I had to replace, as the bottom bearings on my old set were really stiff, and ive had a dodgey feeling with the steering because of it for ages. The top set was near enough as good as it was 16 odd months ago, so i kept it for spares. This new headset as replaceable cartridges, so thats alot better than my old one.
Swapped the Maxxis Aspens for Schwalbe City Jets as ive had a few long trips to college on this, and will be riding canal paths + up hills on the road alot more.
Sintered to brand new Organic pads in an attempt to get a better break feeling + more power, but barely made any difference.
A different (not new) 203mm front disc with with steel bolts rather than the red aluminium ones in an attempt to stop a faint clicking noise i get when braking sometimes:
Thanks to Step83 for the disc!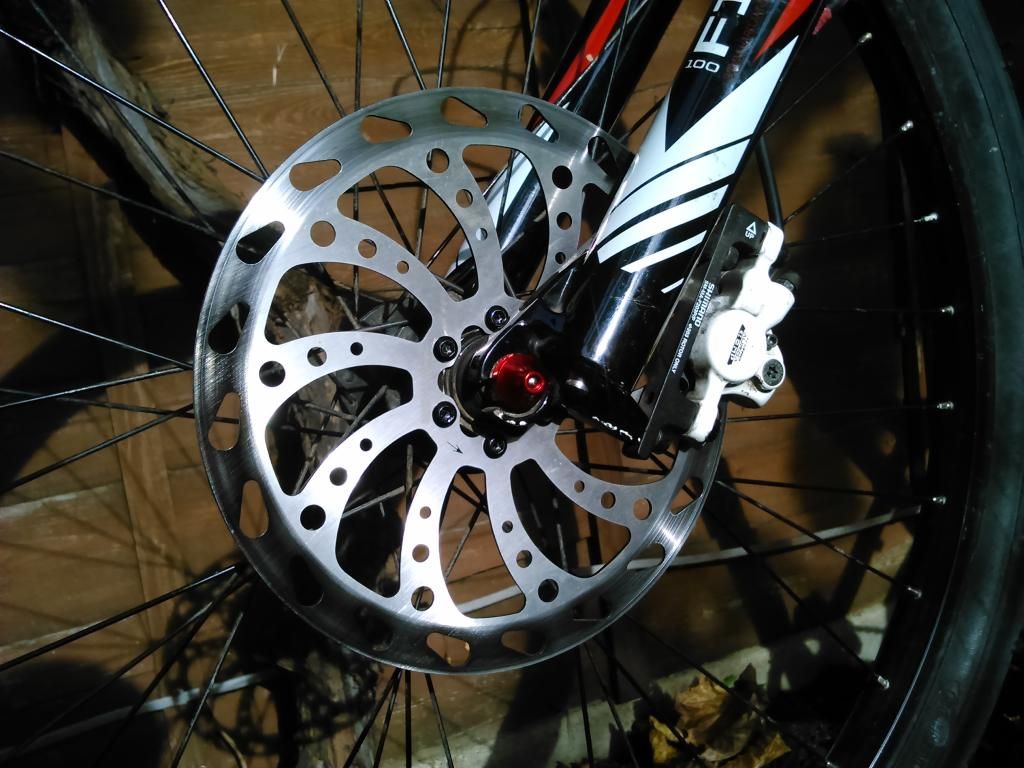
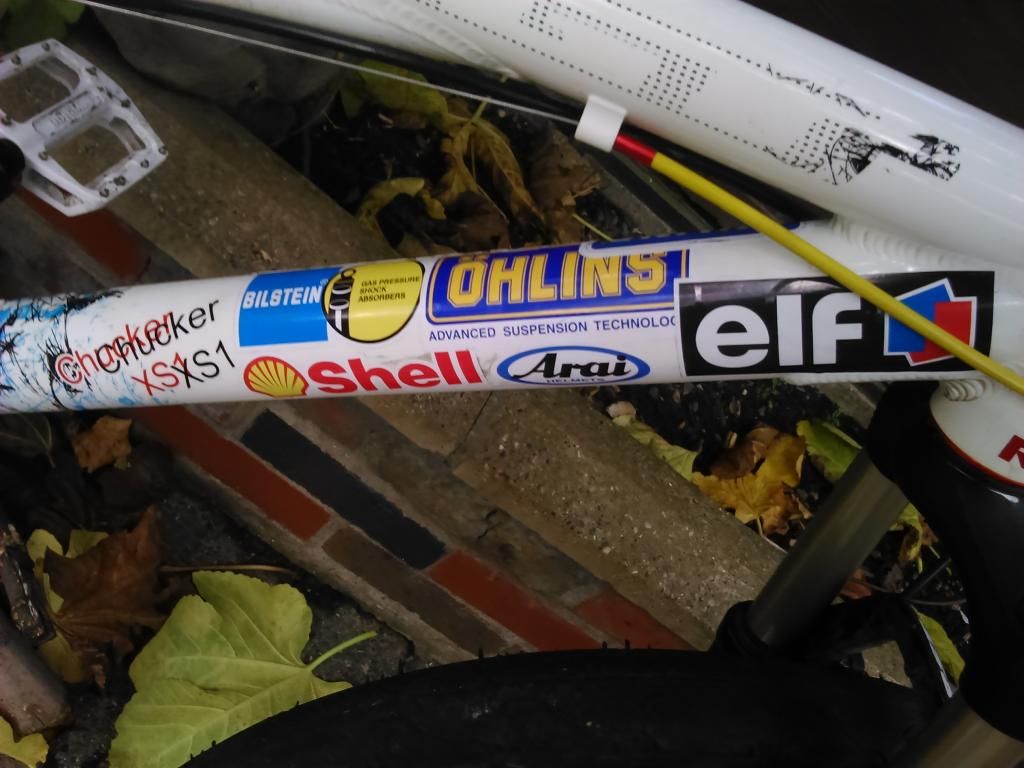
Kowalski would be pretty fond of that Arai sticker if he is still around, "lol"
I want to get a new set of wheels soon as my freehub is getting pretty bad now and i cannot replace it!0 -
Oh, and a new gear cable. In Yellow!0
-
Why have you got loads of engine oil stickers on your bicycle? It's like something a ten year old would do.Transition Patrol - viewtopic.php?f=10017&t=130702350
-
Loose the stickers, less is more......Currently riding a Whyte T130C, X0 drivetrain, Magura Trail brakes converted to mixed wheel size (homebuilt wheels) with 140mm Fox 34 Rhythm and RP23 suspension. 12.2Kg.0
-
Ill be honest and say that the whole sticker thing didnt turn out as good as i expected. Maybe if the stickers were really small and i could have loads of them, it would look alot more "stickerbomby". I am still keeping the stickers for the time being. Maybe once i get new wheels ill take all the stickers off and go for a cleaner look.I am kind of missing this look:
And im also going to fit my rigid fork, in the not too distant future and im thinking to polish it up as its aluminium to give a shiny look. But then again i think the stickerbomb wrap looks quite cool.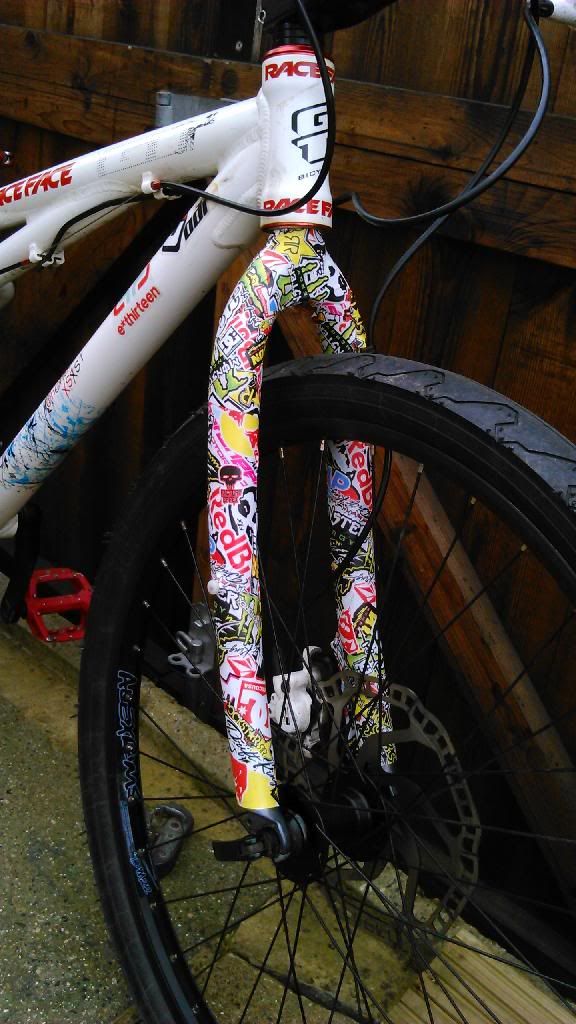 0
0 -
White frame and stickerbomb fork would look OK, not sure about polished to be honest.Currently riding a Whyte T130C, X0 drivetrain, Magura Trail brakes converted to mixed wheel size (homebuilt wheels) with 140mm Fox 34 Rhythm and RP23 suspension. 12.2Kg.0
-
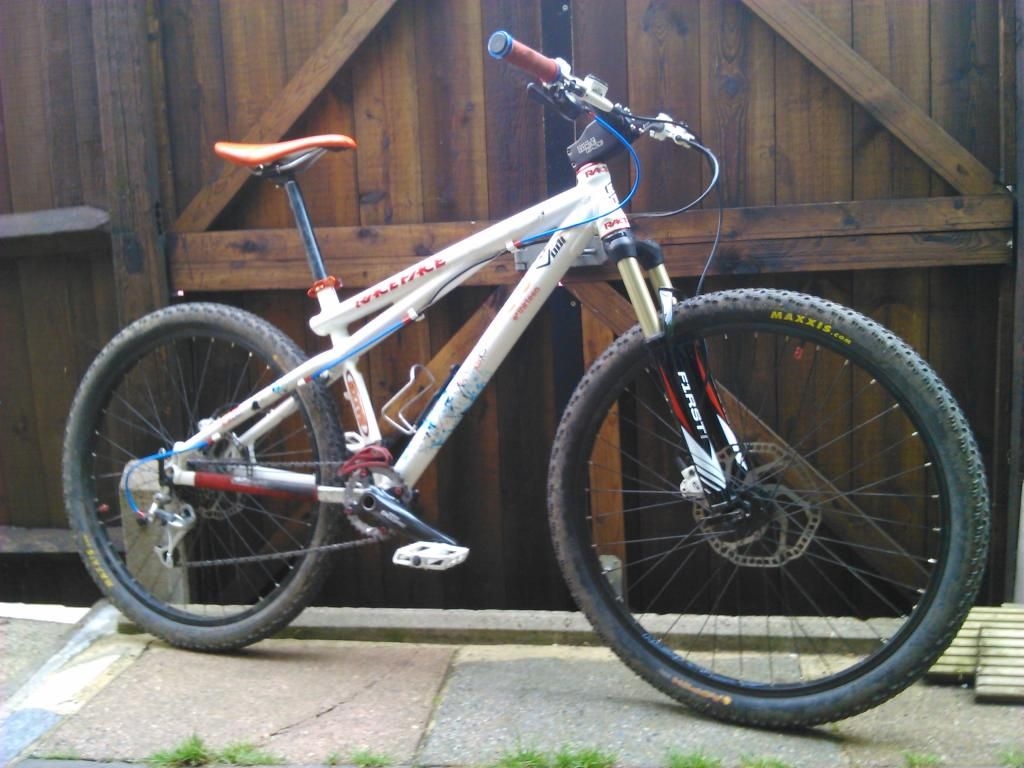
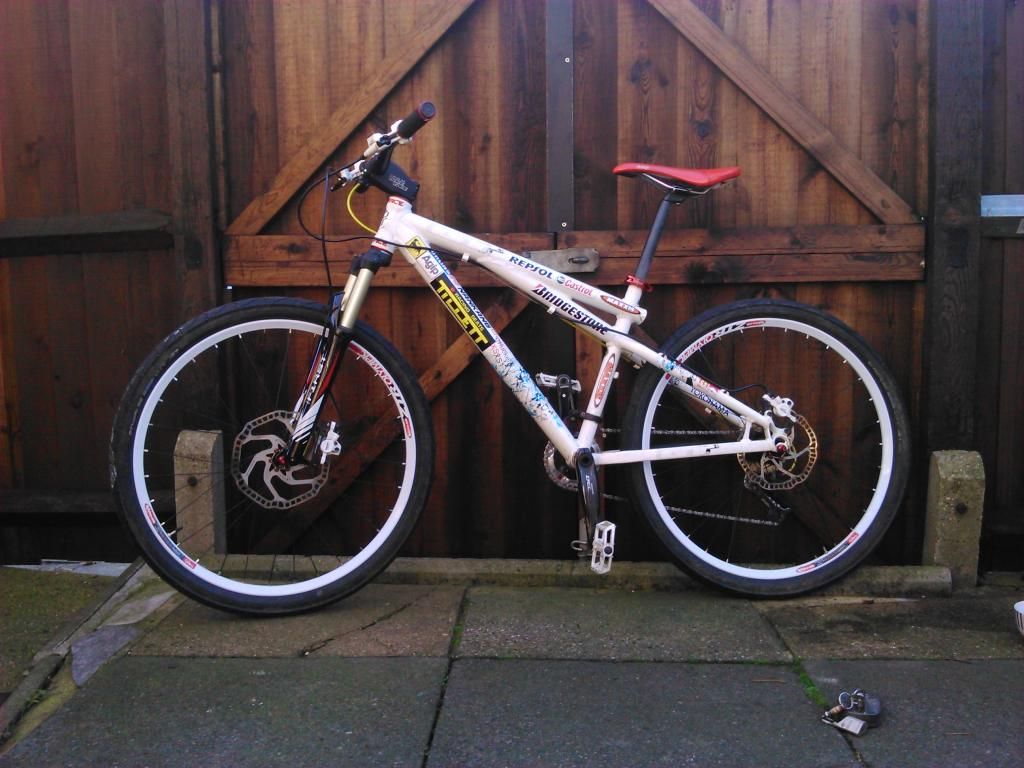
Glad to announce that i have got myself some pretty nice wheels!
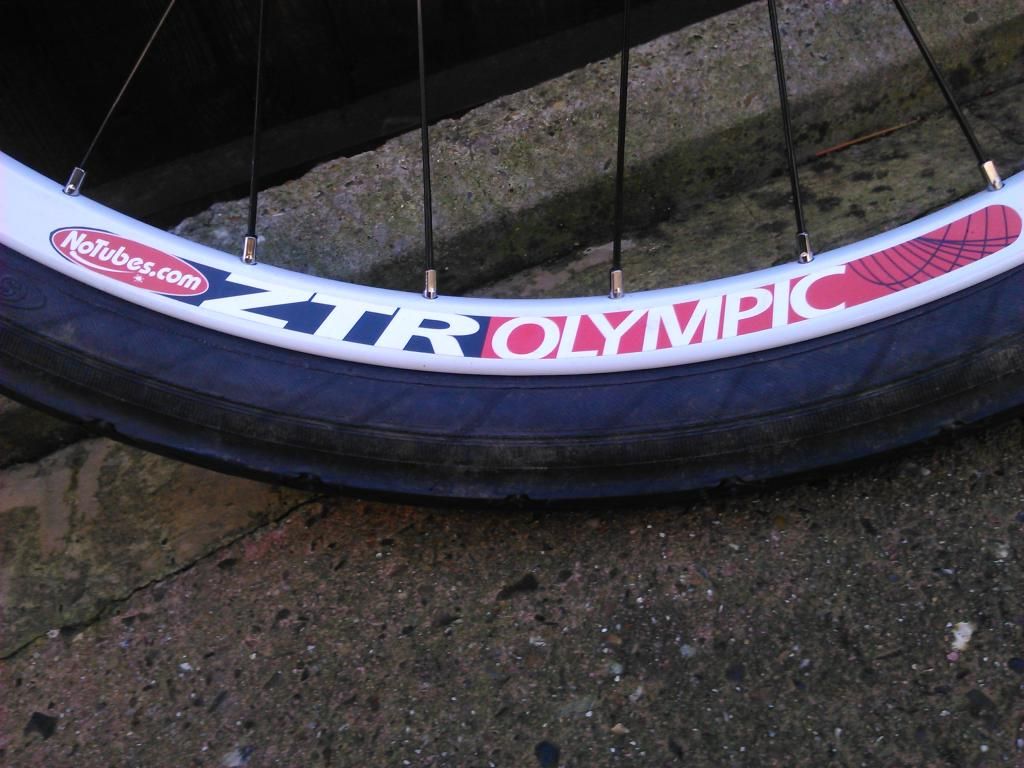
ZTR Olympic rims
ACI stainless steel double butted spokes
Shimano Deore 525 hubs
With a bit of saving up (one half the money) and some convincing (parents for the other half) i managed to get myself £150 together for a new set of wheels. I was originally looking at a set of Superstar wheels for £150 after looking around at various different websites. Then after asking on the buying advice section i got sent a link for a wheelset on Merlins Cycles which was the best deal ive seen so far. Credit to Supersonic on that one!
My old wheelset was getting really really poor with the freehub. It was wobbling around, making dodgy noises and just feeling crap. The rims and spokes on it were excellent though (Alex DM22 rim, dont know about the spokes). But i the a wheelset upgrade is just what my bike needed as i am happy with everything else on it.
I could have gone straight ahead and fitted my wheels straight away, but since i was going to be taking the cassette off my old wheelset, i thought id do a full on drivetrain clean, which i actually enjoy doing.
The cleaning consisted of a white spirit bath for both the chain and cassette to loosen off the main bits of hardened gunk: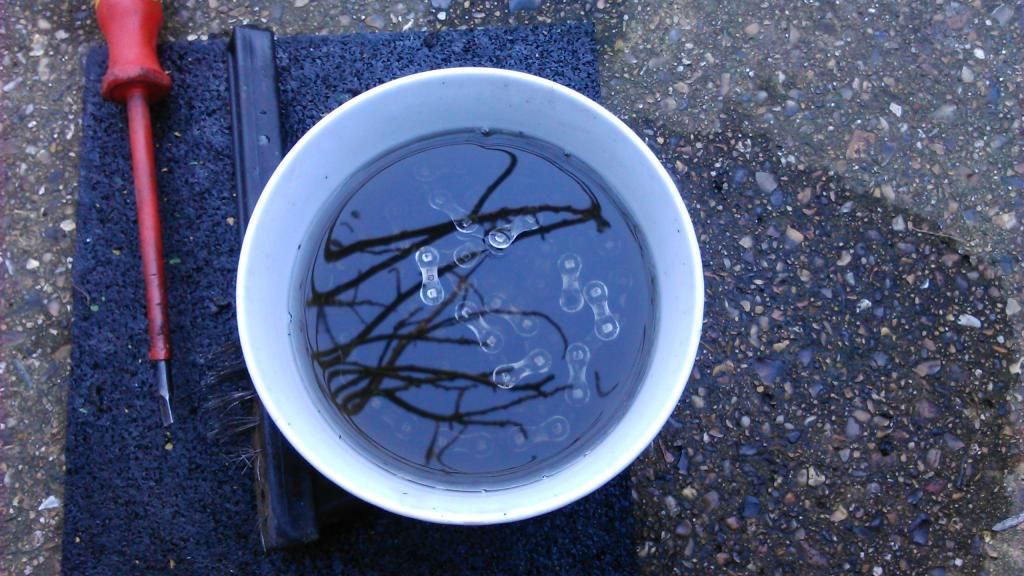
I removed and softened up loooooads of gunk with the white spirit. I took the cassette out and flicked out loads of crap with a flat head screwdriver before giving it another 5 minutes in the spirit. After both chain and cassette had a white spirit bath, there was still some gunk on them, so i gave them a very large dose of spray-on engine degreaser with very positive results showing up after washing them under a strong current of water.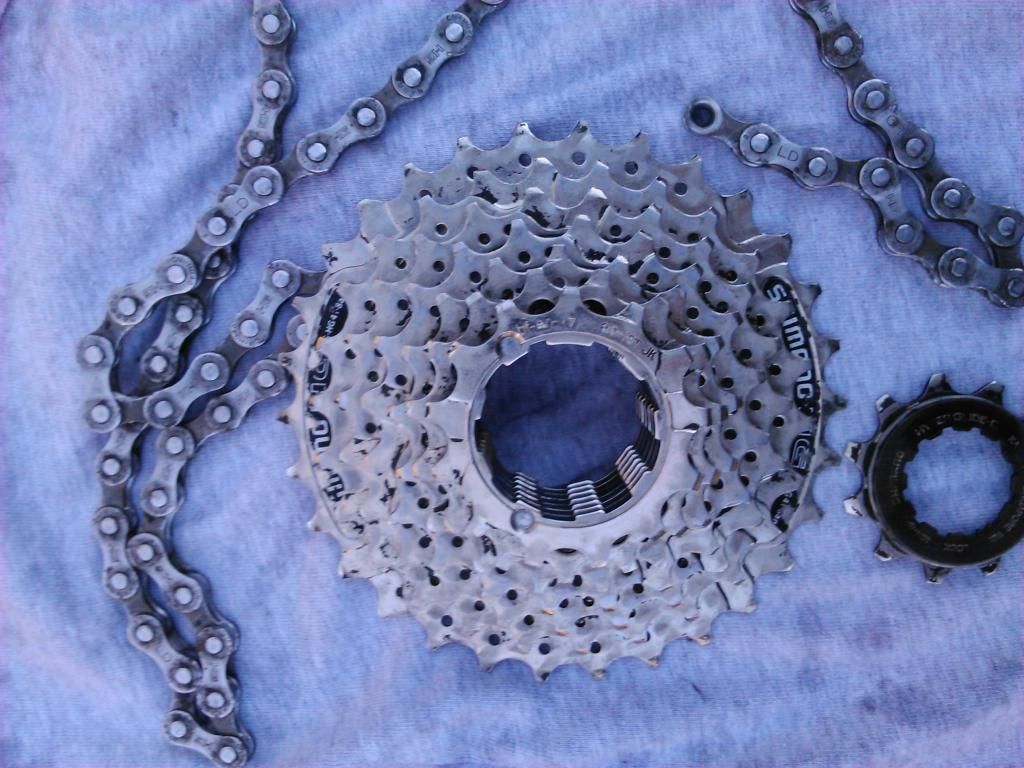
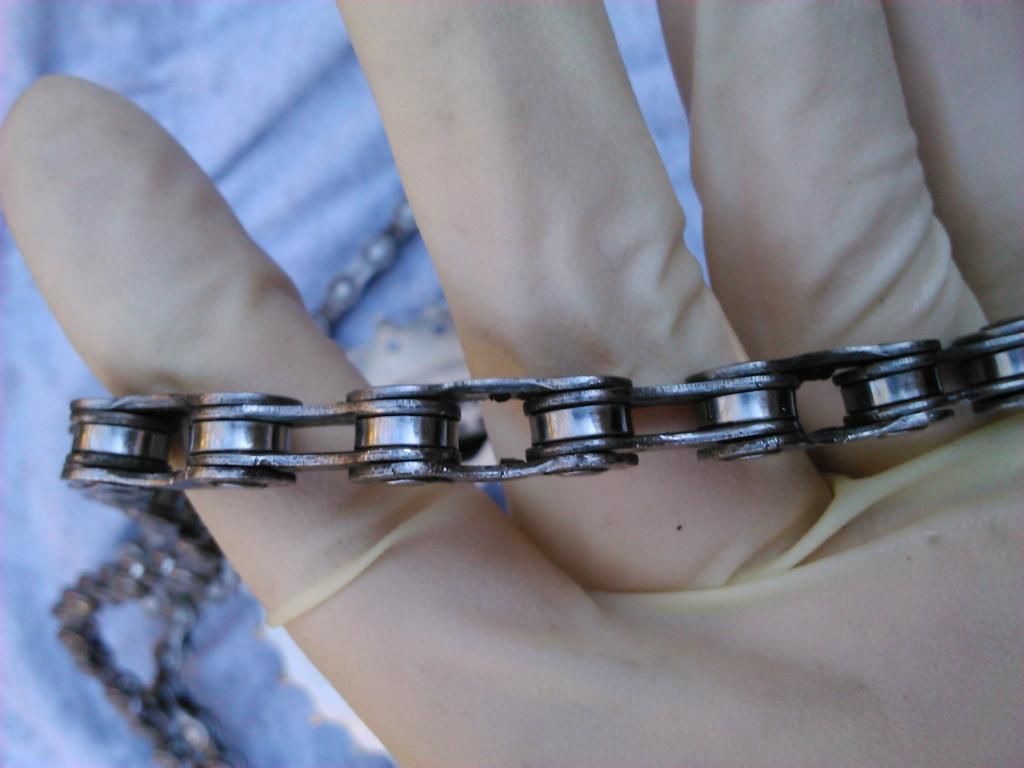

It has been a veeeery long time since i have seen my cassette looking anywhere near that shiny! As for the chain, it came out so cleaned up, that it sounded like a bag of loose ball bearings ...which is probably a sign that it needs replacing, but ill start doing that when i start getting slipping gears.
Even the jockey wheels got a strip down + clean, with a bit of grease added around the bushes. I also realised that the upper jockey wheel on my Deore XT rear mech has a ceramic bush which is quite cool. The standard lower bush looked to be untouched on one side, and pretty badly worn on one side...
After i got everything cleaned, i fitted the chain and jockey wheels. Then it was on to finally getting tyres on to my new wheels. I was kinda stopped in my tracks when i got my electrical tape/rim tape (bodge lol) fitted. Then when i got to poke a hole through the tape for the valve hole, i realised i needed presta MTB tubes...so i jumped on the roadie and blasted down to Halfords. Could have gone for a cheaper halfords set, but i decided that would be an insult to my ZTR rims, so i went for the Contis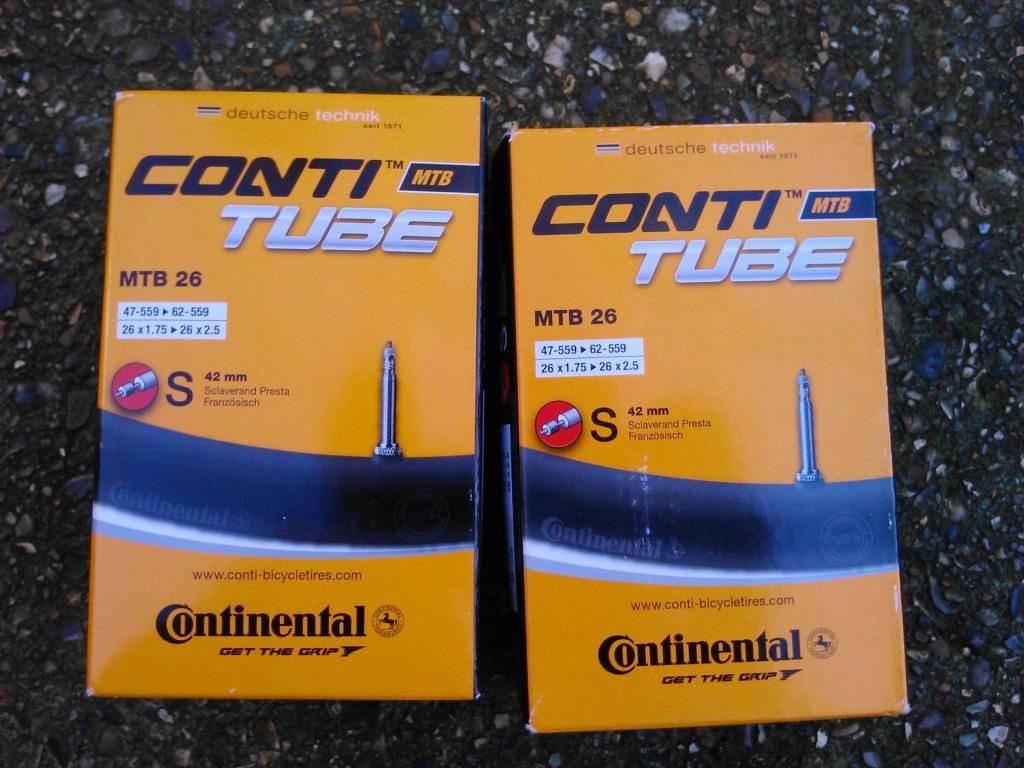
I got stuck with my tyres and couldnt get them on for shyte, but i took a break and researched. I watched an old geeezer on youtube fit a tight tyre, and i found the secret to fitting a tight tyre. Push the bead into the well of the rim. Genius!
Fitted cassette and discs, and they looked great!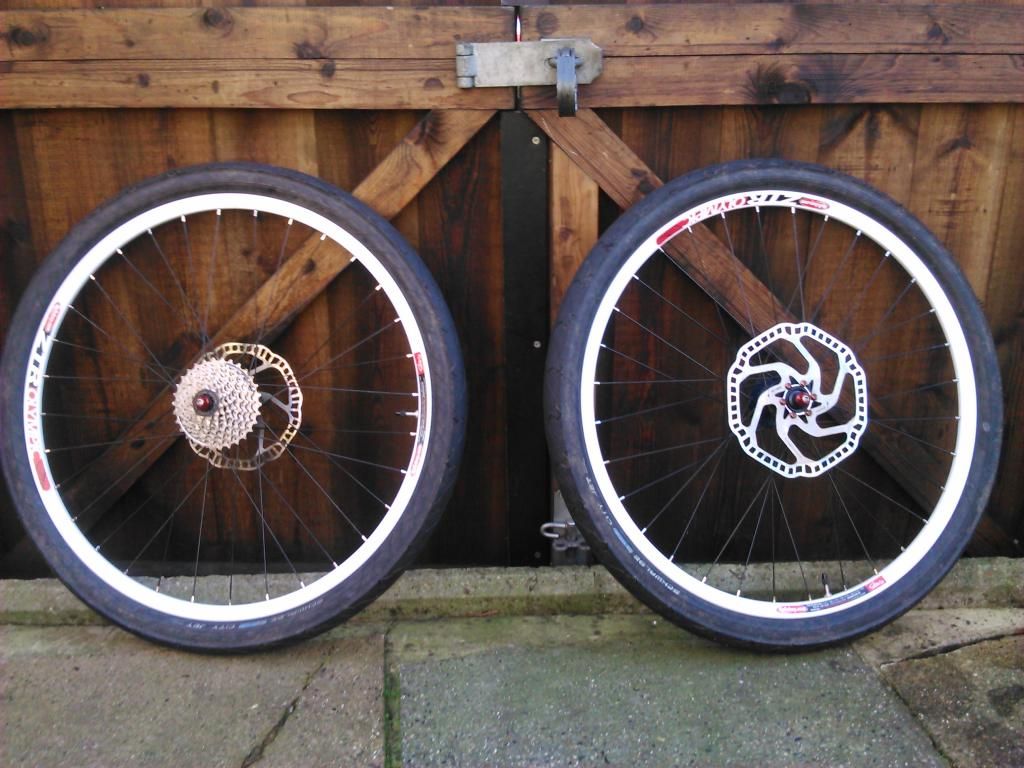
Put them on, lubed up the chain and jumped straight on it for a ride. Inital thoughts of the new wheels are that they are faaar lighter than my old set. I weighed them up, and it came to nearly 600 grams difference!!! And to think i payed a similar price for both wheelsets! You can definitely feel a more sort of "direct" feel when you accelerate in comparison to the old wheels. From a stand still you cant really feel the difference as much, but going from cruising to high speed you can certainly feel a difference. I need to find a new balance point with my wheelies, as i keep over doing it now
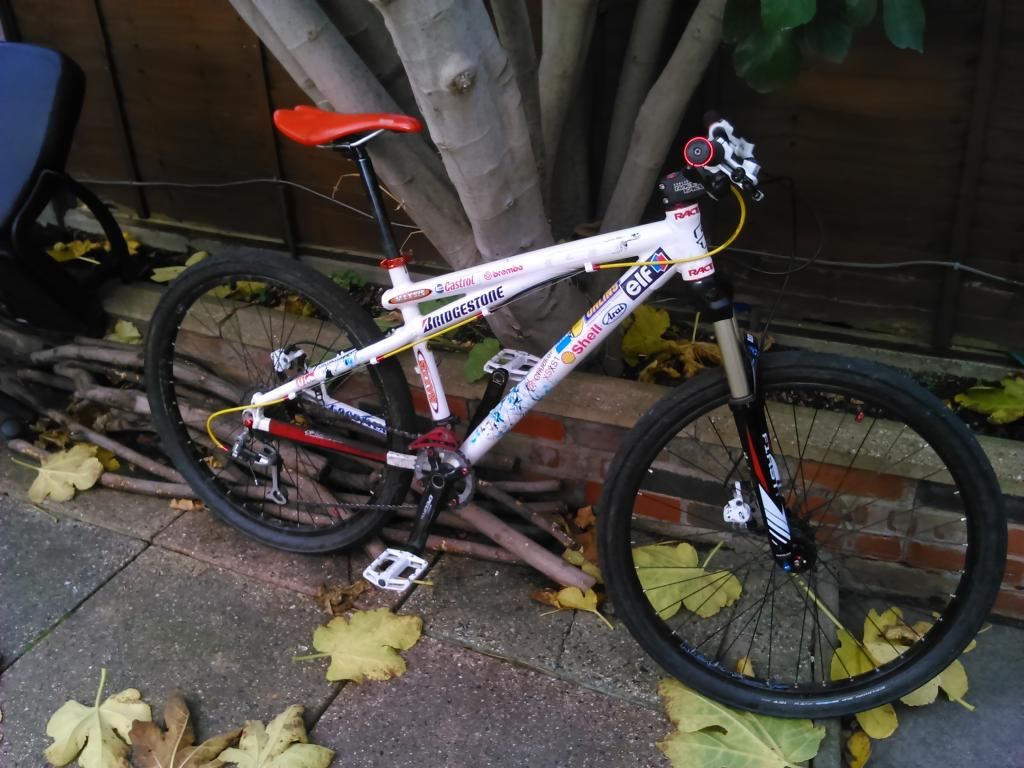
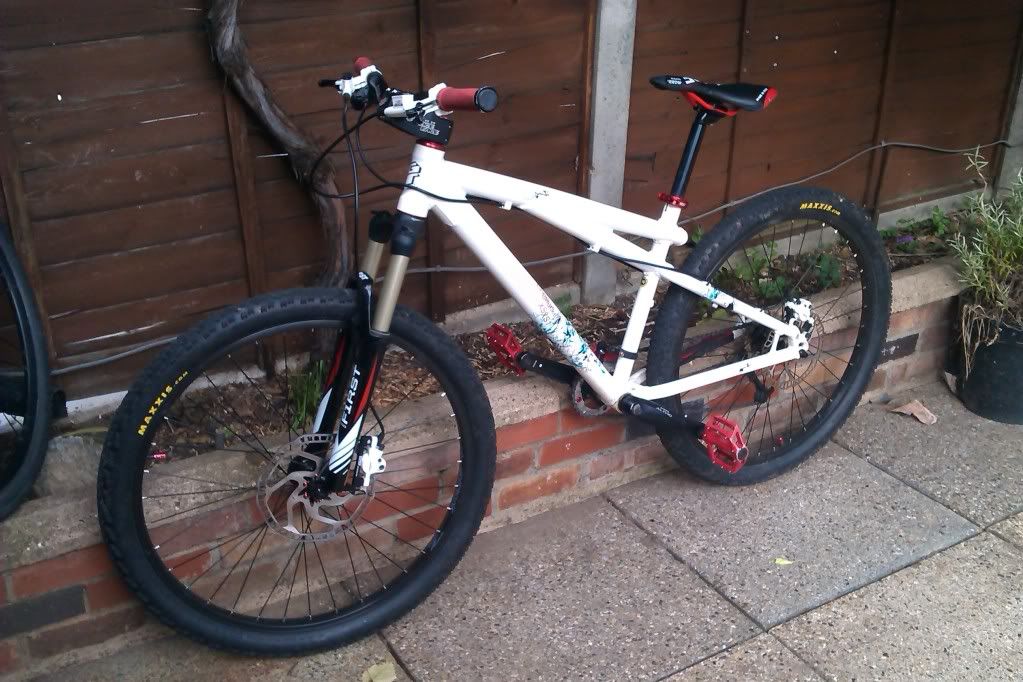
All in all a great update, and i think the bike really does look miles better now with white wheels. Much better than the black wheels. And i think i am going to be losing every one of the stickers once i find the time to take them all off. Ill be going for a nice clean look. Maiden proper ride for the new wheels will be tomorrow. Just a canal path ride and tackling a few monster hills on the road. Very much looking forward to it. Need to get my fitness back... and i have gained 4KG since summer. :?0 -
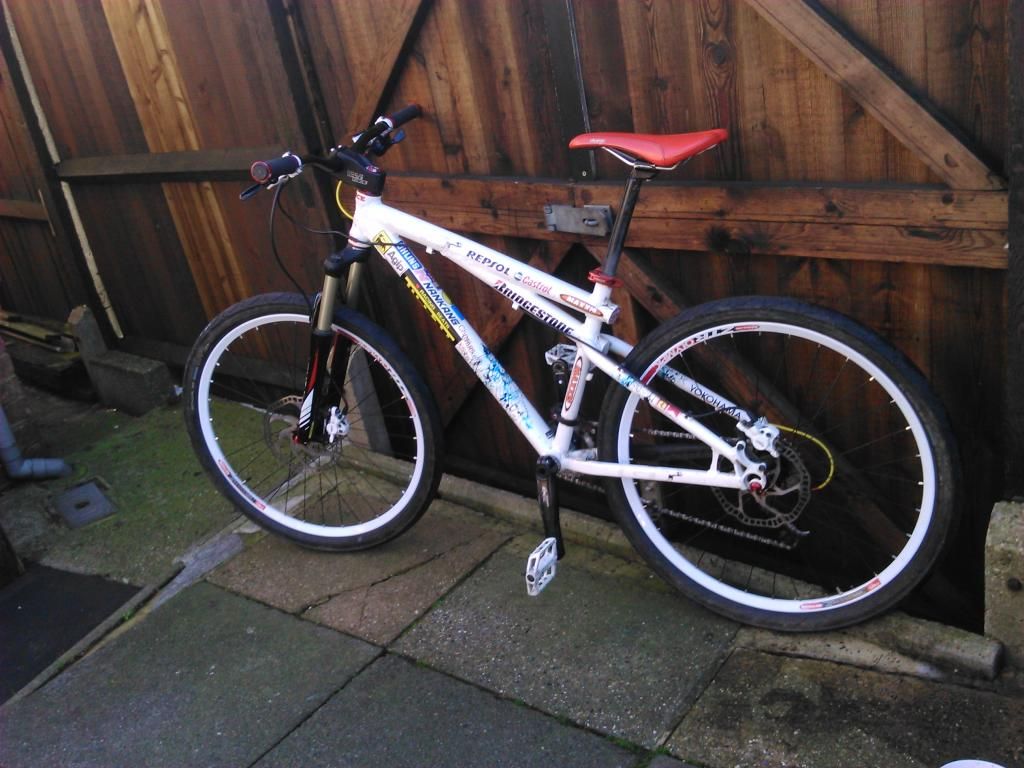
A few pics of the bike, and my calcs of the weight difference. Was just curious!
 0
0 -
That looks good, not usually a fan of white rims but work well with the (nearly) white frame, just lose the stickers (tee hee) and it will look a lot better and be another 200g lighter!Currently riding a Whyte T130C, X0 drivetrain, Magura Trail brakes converted to mixed wheel size (homebuilt wheels) with 140mm Fox 34 Rhythm and RP23 suspension. 12.2Kg.0
-
Had to get white as black was sold out, but wasnt too bothered as i knew white would look great on here.
I shall be losing the stickers tomorrow hopefully.
I went for a hour and a half ride today. Canal paths and a bit of road, + i decided to add some forest fire road in there aswell. Happy with the wheels. And boy have bunny hops become easier!
Wasnt really that far off the best pace i set in many of my strava segments. But i had a shocker on the big mile long hill that i do. A whole minute down on my personal best!!! My fitness is quite poor at the moment... today sort of revealed that. Endurance wise im not too bad but i cant keep a fast pace for too long. And i think riding XC properly in the muddy forest for anything more than an hour will see me crossing over into the point where you are no longer enjoying it because you are so unfit So ill stick to some canal path riding for a week or two.
Rigid fork will go on this weekend maybe. Then i can go and try and get 1st place on some of the strava segments, as in some cases im only 20 odd seconds off.0 -
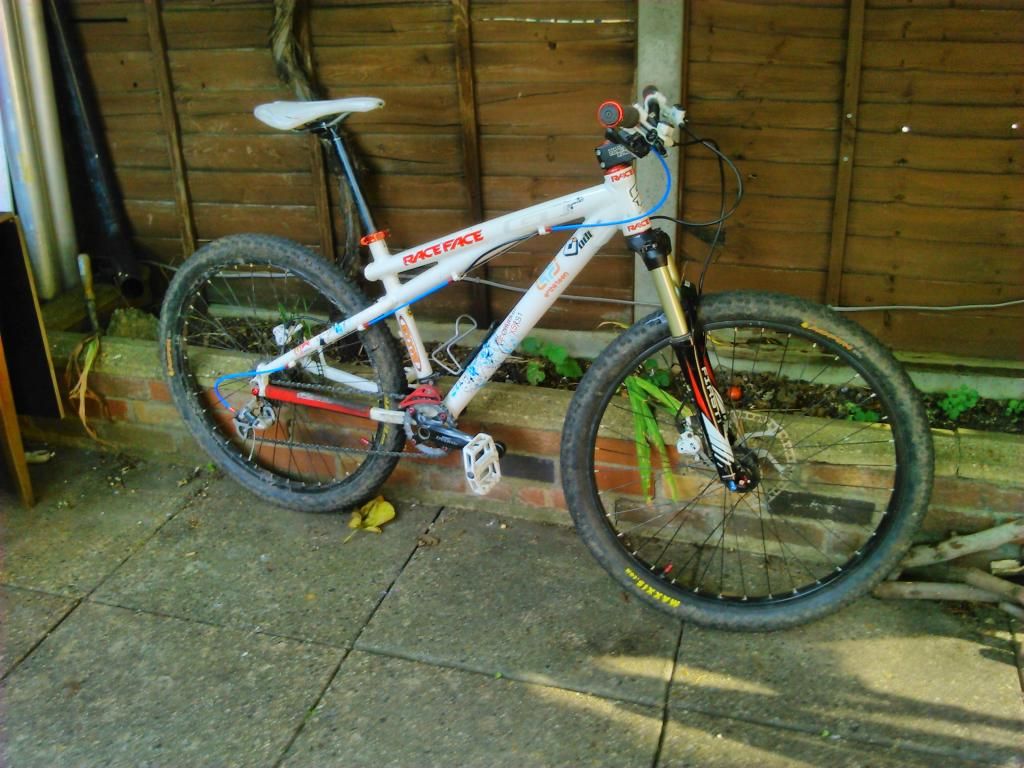
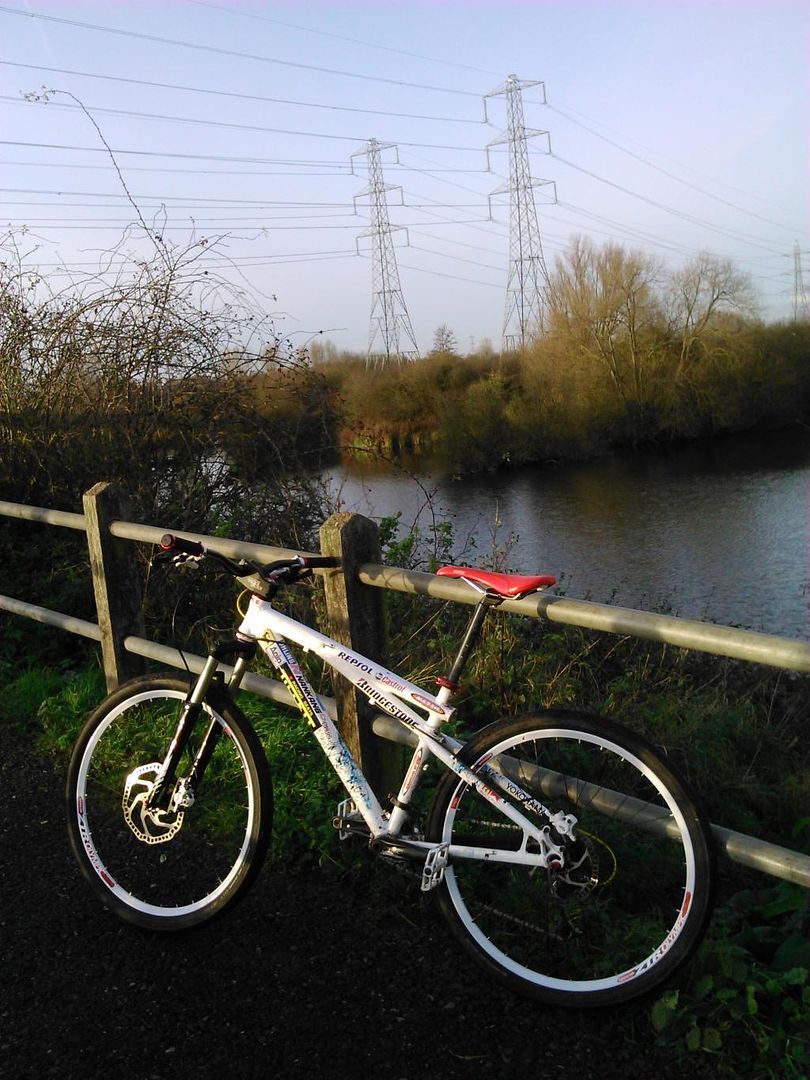
A quick snap taken during a short break:
 0
0


