Handbuilt Road Bike - Update 6!
Comments
-
Hi, I am planning on building the forks aswell. I havn't decided on paint yet. My last frame I sprayed myself but it was just one colour. I'd like to do this in a light colour with the lugs in a contrasting colour. Whether I paint it myself or get it done professionally depends on how well it comes out!0
-
This is likely to be my thread of the year, I will follow your work in awe of what you are doing !
Chapeau sir !!!Enigma Esprit Di2 - Go tI ! Summer !0 -
Lovely lugs
") 0
0 -
-
Thanks everyone for the great comments.
Here's todays work!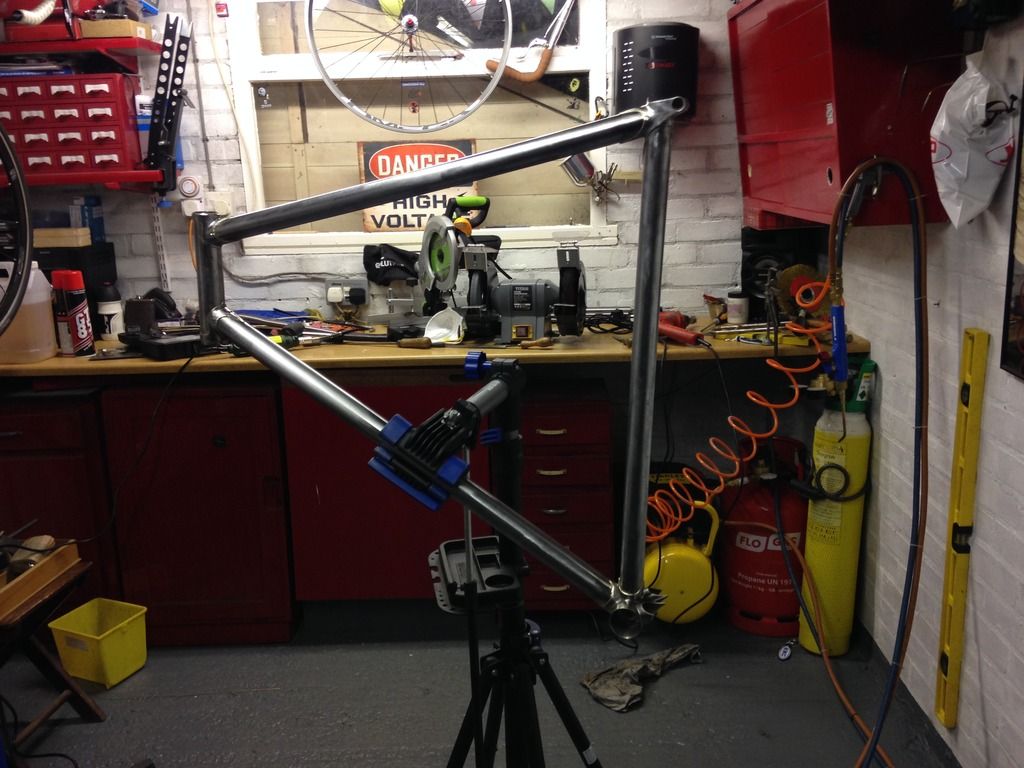
The front triangle is now complete (camera makes the angles look strange!)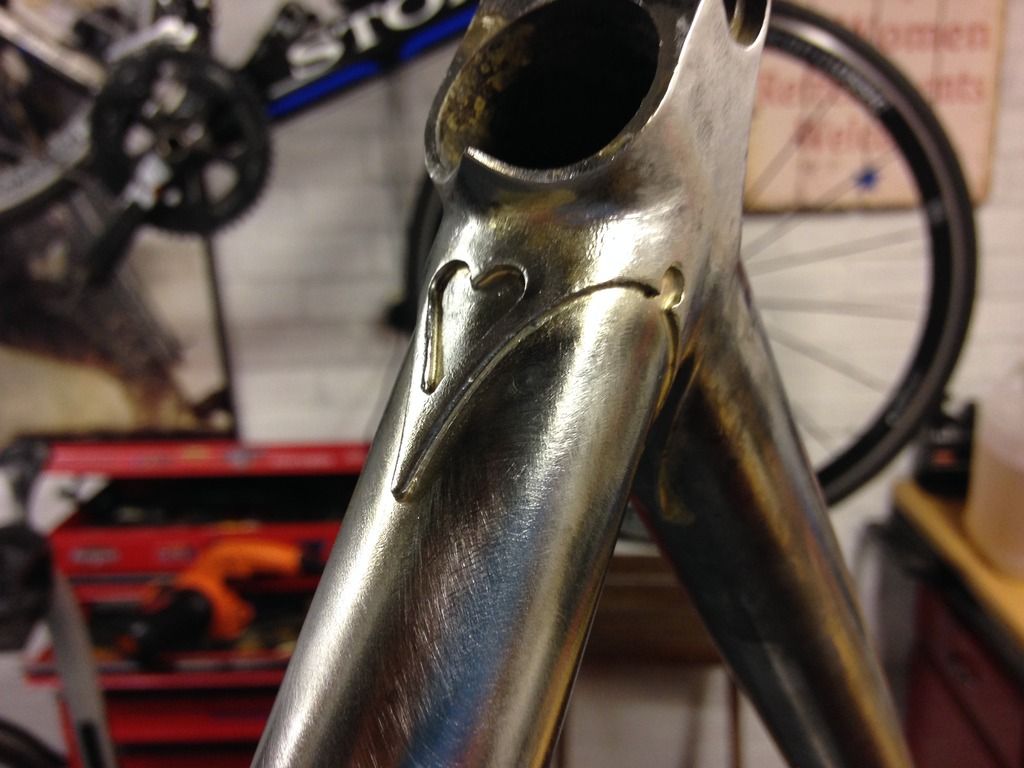
The brazed seat lug.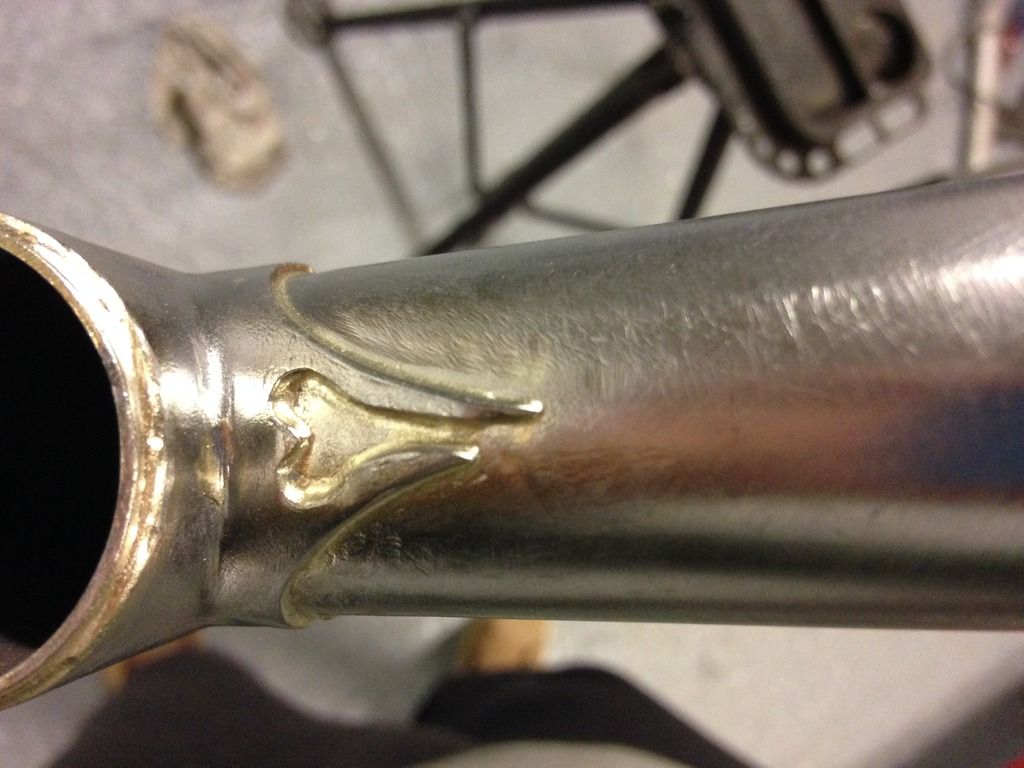
The brazed top head lug.
Today I spent roughly an hour cleaning and preparing the joints for brazing, roughly 45 minutes brazing the joints and approximately 9 hours cleaning and filing!!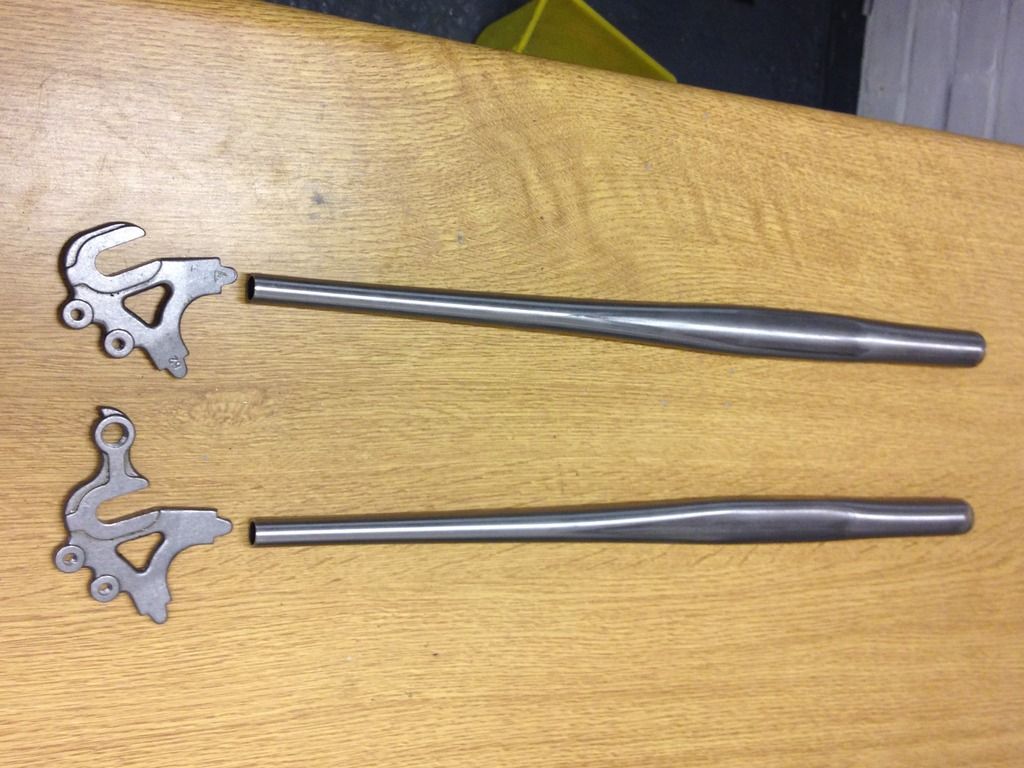
Will be starting on the chainstays and dropouts next week.
And just remembered that I said I would put a photo of my previous effort up, so here it is!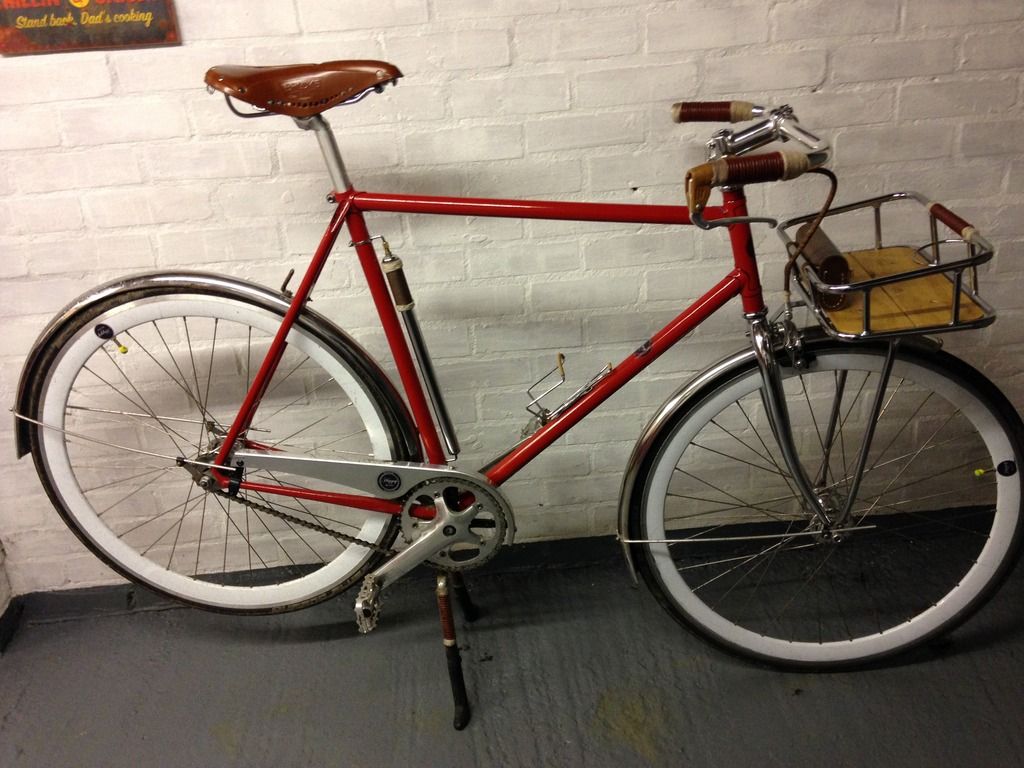
It's nicknamed "The sausage bike" for obvious reasons! It's actually just a fixie with Porteur bars and a basket. It gets some funny looks when I'm out and about especially when people see how quick it is! I'm toying with the idea of doing the Norwich 100 on it in June!0 -
Both of those look great. I'm watching with interest as I'm starting to think about doing a frame build at home. Where did you get all your info from to start you off?0
-
-
Yep great thread - and at this rate, your frame will be built up faster and being ridden before the other guy's thread on the Pegoretti.. 0
-
Superb work. You'll be taking orders soon!0
-
Blimey, only just found this, and am now following with great interest. (subscribed too!)
Absolutely wonderful work - keep it up.
Good luck with the rest of the build.
Steve0 -
Hi all, once again thanks for the great feedback.Paul 8v wrote:Both of those look great. I'm watching with interest as I'm starting to think about doing a frame build at home. Where did you get all your info from to start you off?
I kind of made the decision about a year ago to give this a go, and then spent a while accumulating tools. The biggest outlay has been the brazing kit, although if it was a complete failure the resale cost is very good, and gas and oxygen cylinders have a deposit! I then read, read, read, and read some more and the same with videos. There is a huge amount of info online. Next step was to practice brazing and I spent ages doing this. Steel is fairly cheap, especially odd shapes and off cuts - anything will do, and then just practice brazing them together, over and over and over, until you are getting results you are happy with. Find a local course although I couldn't with out travelling far. Speak to people who can braze and ask if you can watch, take all the little tips and hints and find your own way. Then practice some more. I got to a point where I was ready to try a frame, But a bit like going to a casino, you have to be prepared to lose!! Although not perfect my first bike is solid(I have rigorously tested it!) and it now gets plenty of use, especially in the summer when I am now a bit less speed speed speed. Sometimes it's nice to just go out with no garmin or route and just poodle around. It's a great feeling doing it on something which you built with your own hands too! One other very important lesson I have learned is to never ever braze in flip flops as molten brass on the foot really really hurts. I nearly burnt my garage down that day!
Again thanks for all the support and hopefully others are encouraged to give it a try.
The only other thing you need is time, and lots of it, and I'm fairly lucky at the moment and have every other week off.
Cheers, Danny.0 -
Thanks Danny, looks like I'm going to have to start collecting. I have a few bits already...0
-
Great thread. This is easily top of my list of cycling related things to do (aside from cycling of course!).Kinesis Racelite 4s disc
Kona Paddy Wagon
Canyon Roadlite Al 7.0 - reborn as single speed!
Felt Z85 - mangled by taxi.0 -
Wow impressive stuff!0
-
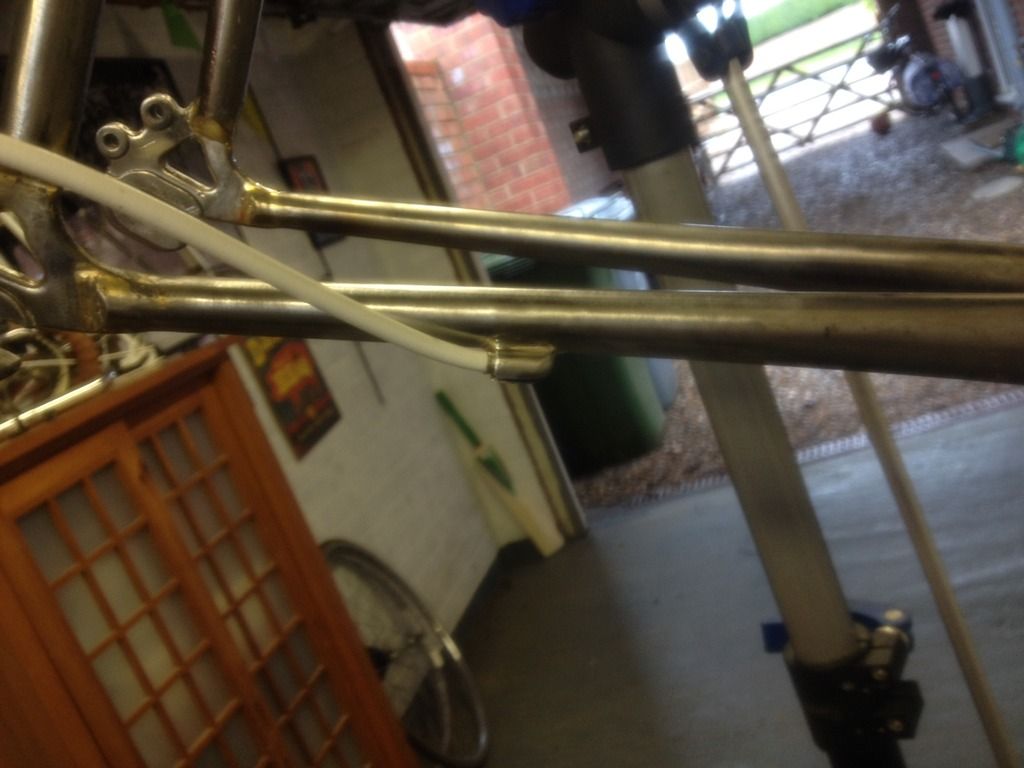
Back onto the build after a few days away!
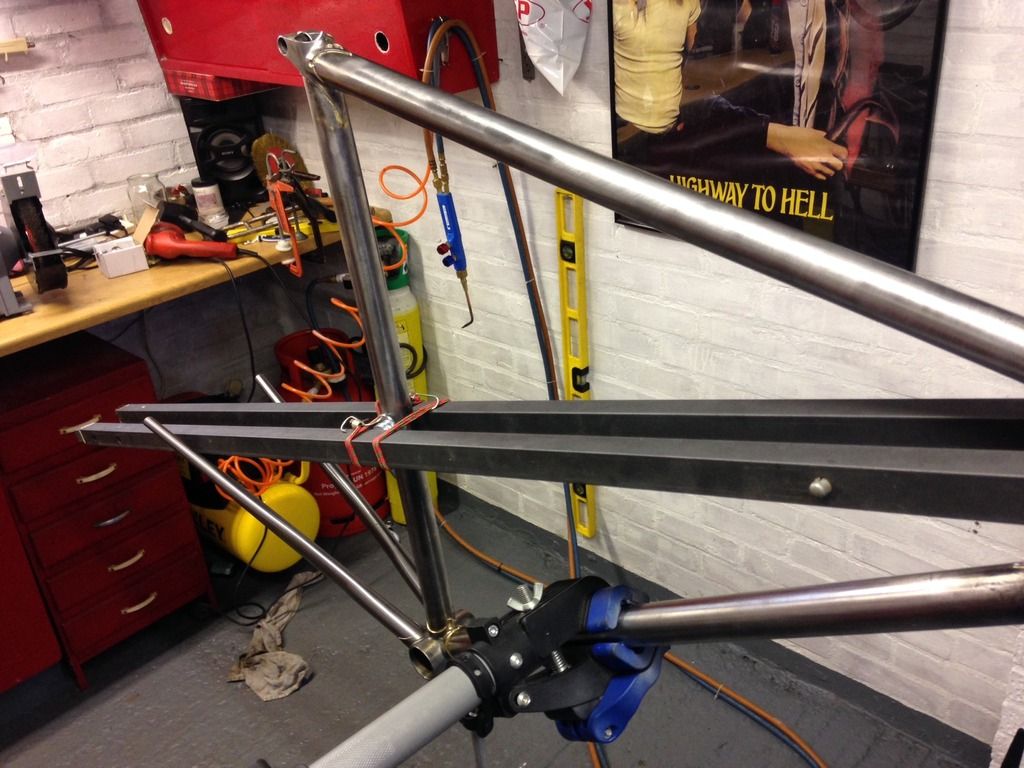
The completed front triangle with the chainstays pushed into the slots. Some straight edges to help with alignment.
Aiming to get the dropouts fitted, in line with the down, and top tube.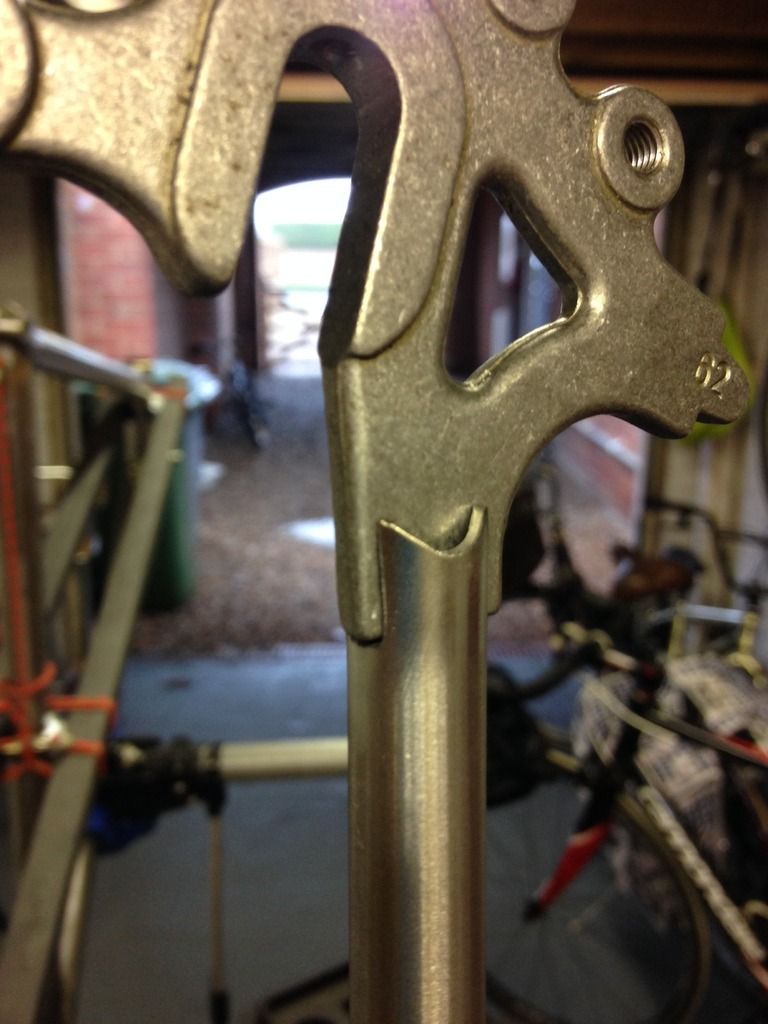
The dropout slotted into the chainstay. Hopefully the filed curve should look a bit neater when brazed.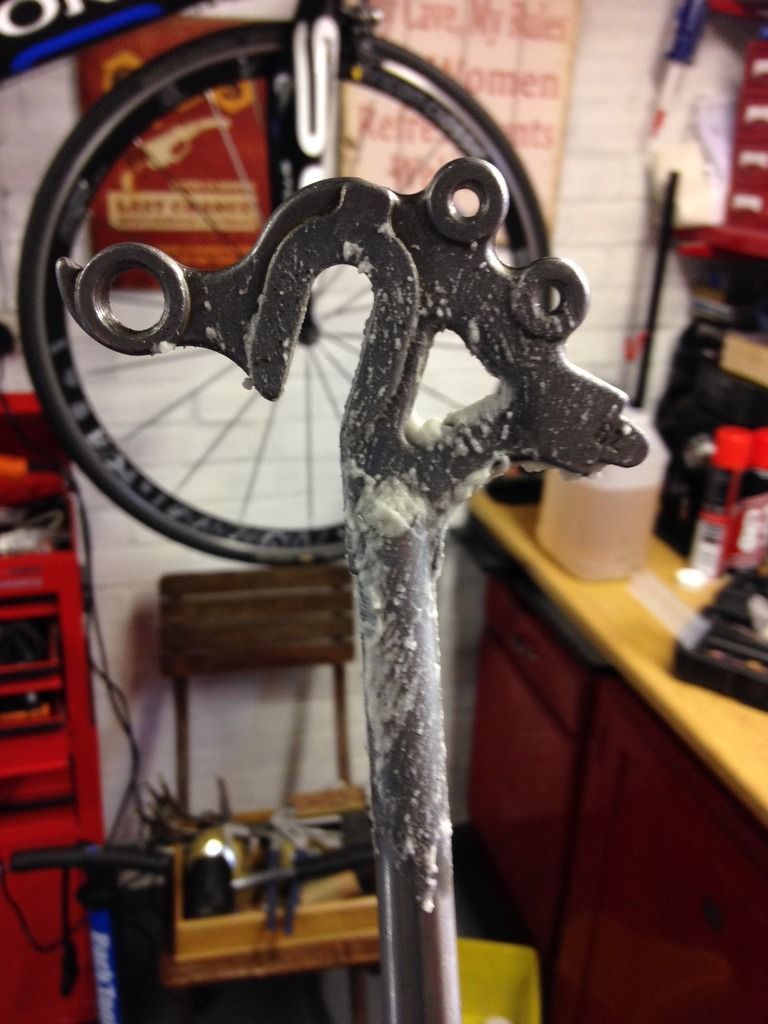
Cleaned and fluxed, ready for brazing.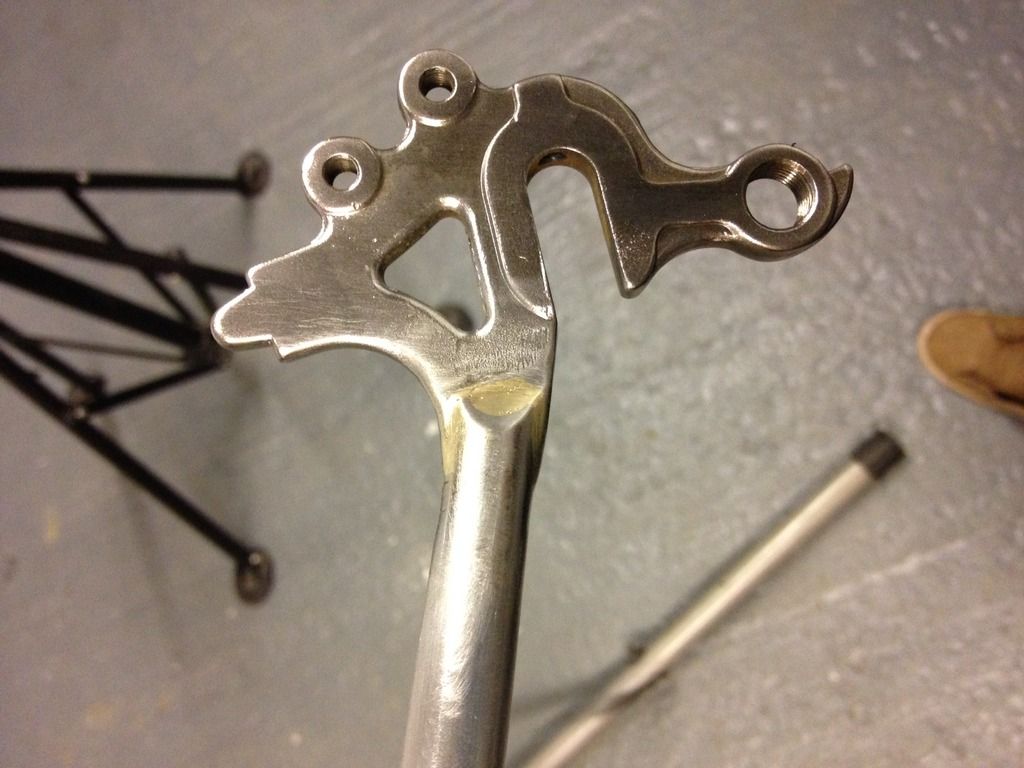
Brazed cleaned and filed.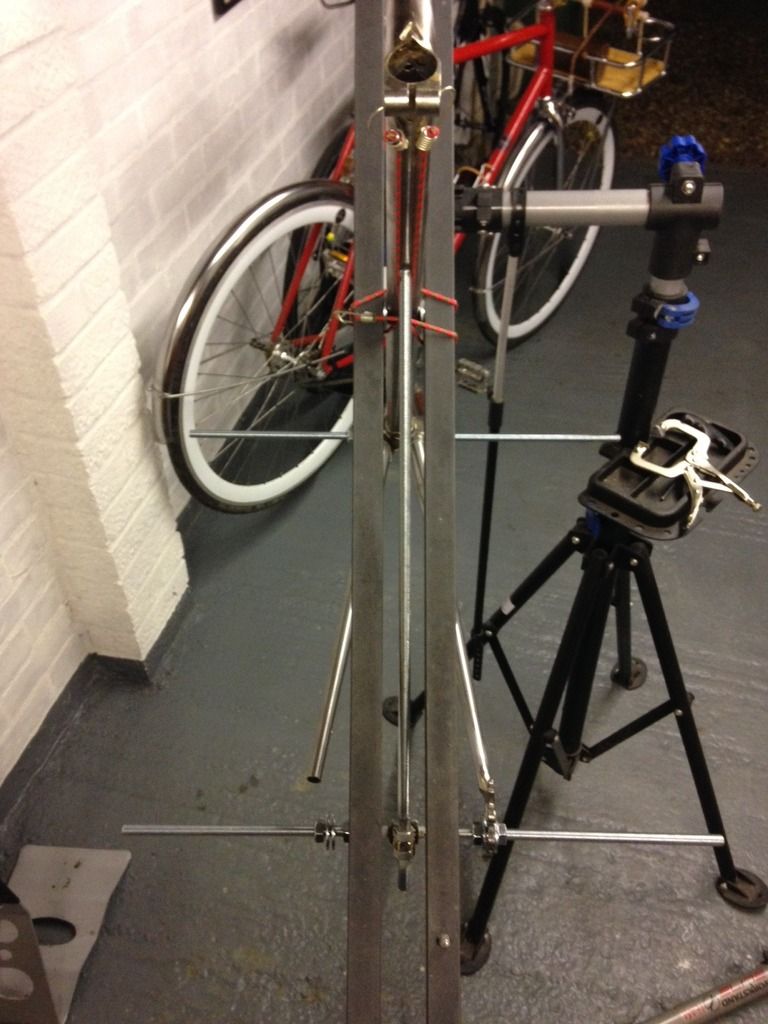
Slotted into place, the chainstay has not been brazed to the bottom bracket yet. In the middle is a fixture I made to help with alignment.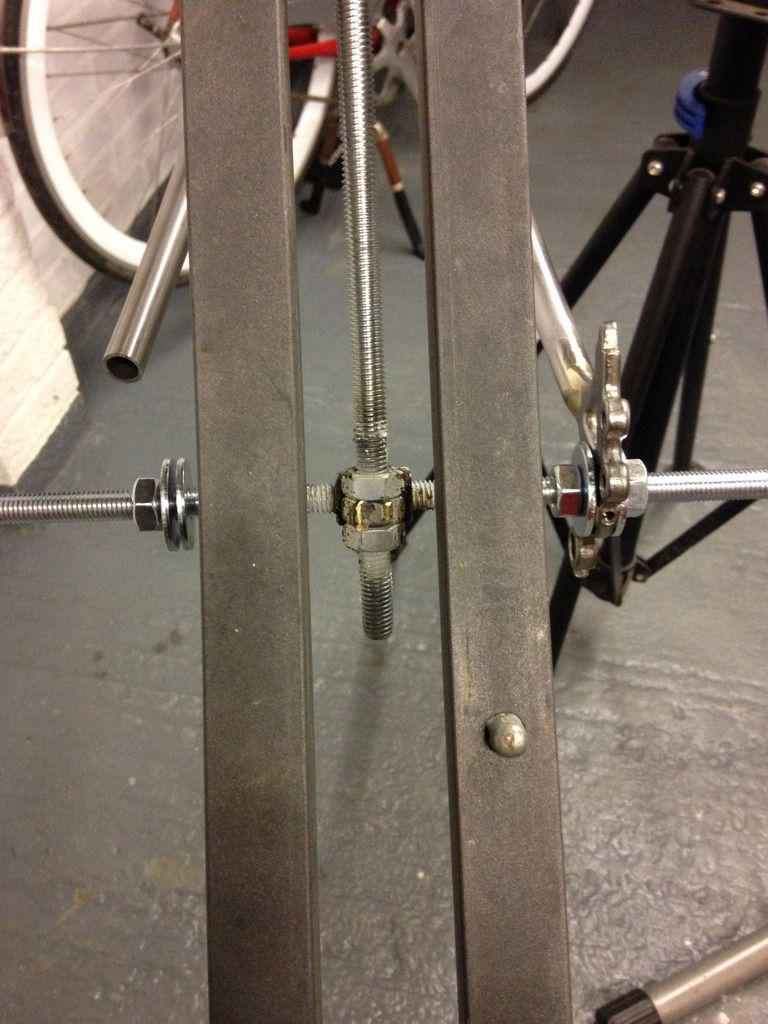
A set of nuts brazed together then another set brazed at a right angle. Threaded bar goes through and can easily be adjusted, and makes it fairly easy to measure and find the centre.
Will be doing the other dropout tomorrow (After an early morning ride!)0 -
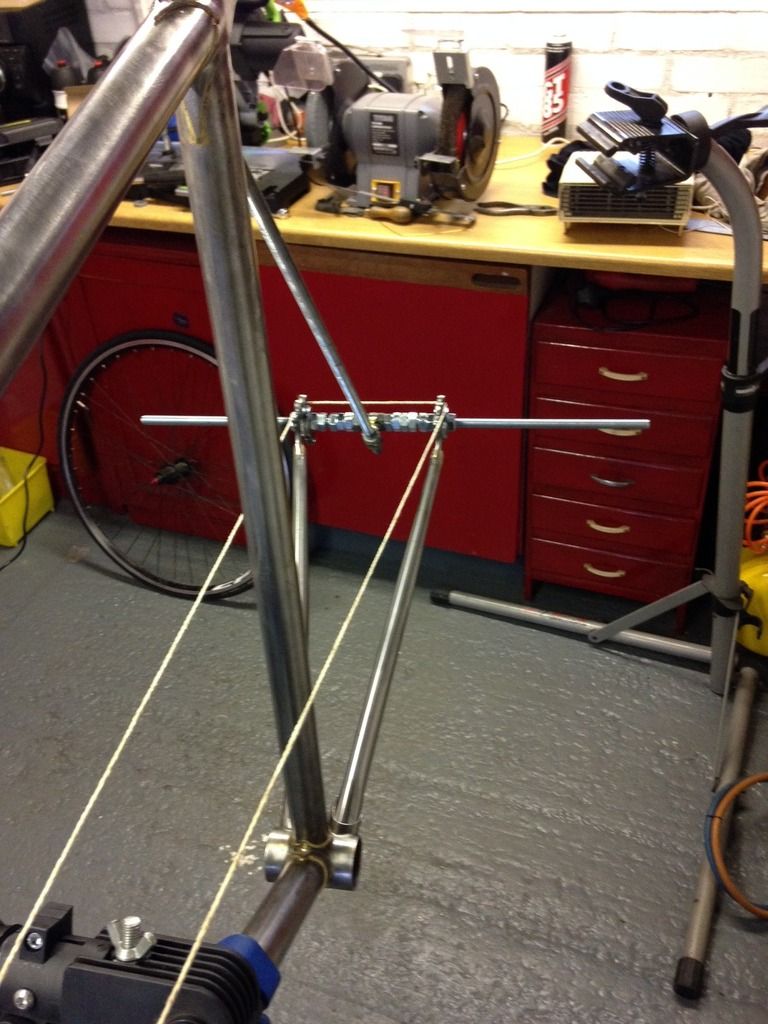
Both dropouts now brazed into place, and some string to help check it's straight before brazing the chainstays into the bottom bracket.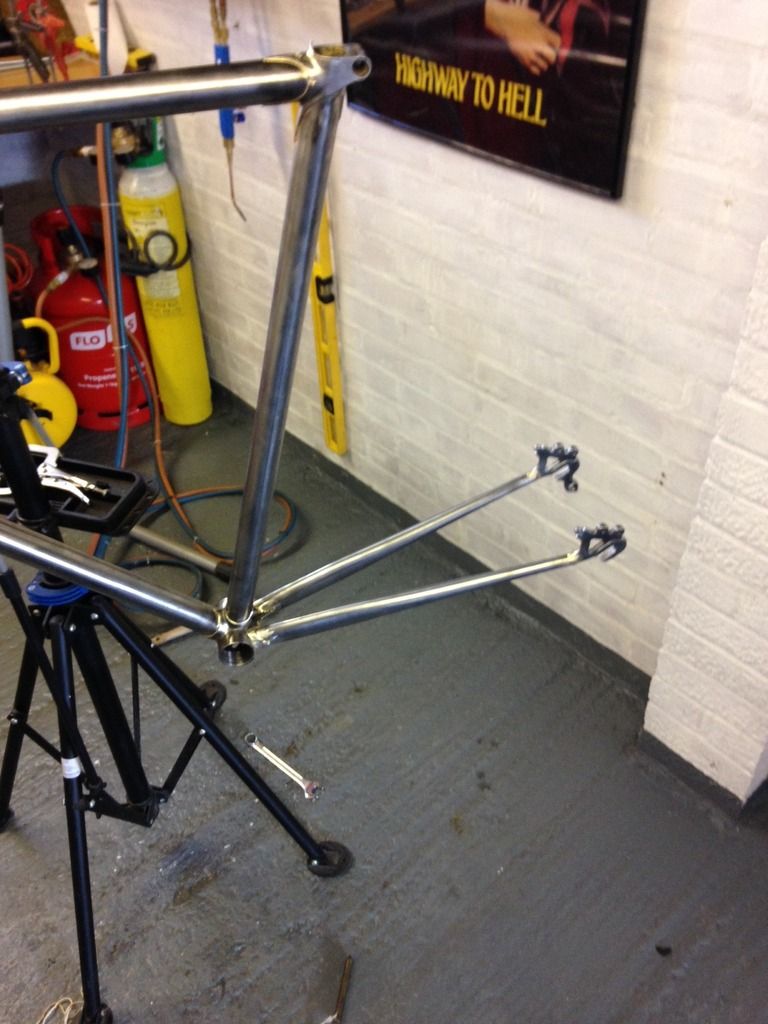
The chainstays now brazed into place. Alignment seems good at the moment, might all change when I add the seatstays though!!0 -
Loving this thread and like many others I've subscribed to make sure I get the update.
Brilliant job.0 -
Hi Norwich Danny
Been almost a month since the last update. Interested to hear what progress if any you'very made since end of Jan0 -
Any more updates on this one, Norwich Danny??0
-
Hi all, sorry for the lack of updates, work has completely taken over of late leaving me very little time. So had a couple of days this weekend and carried on with the build.
So when i left off this is where I was up to, the chain stays fitted.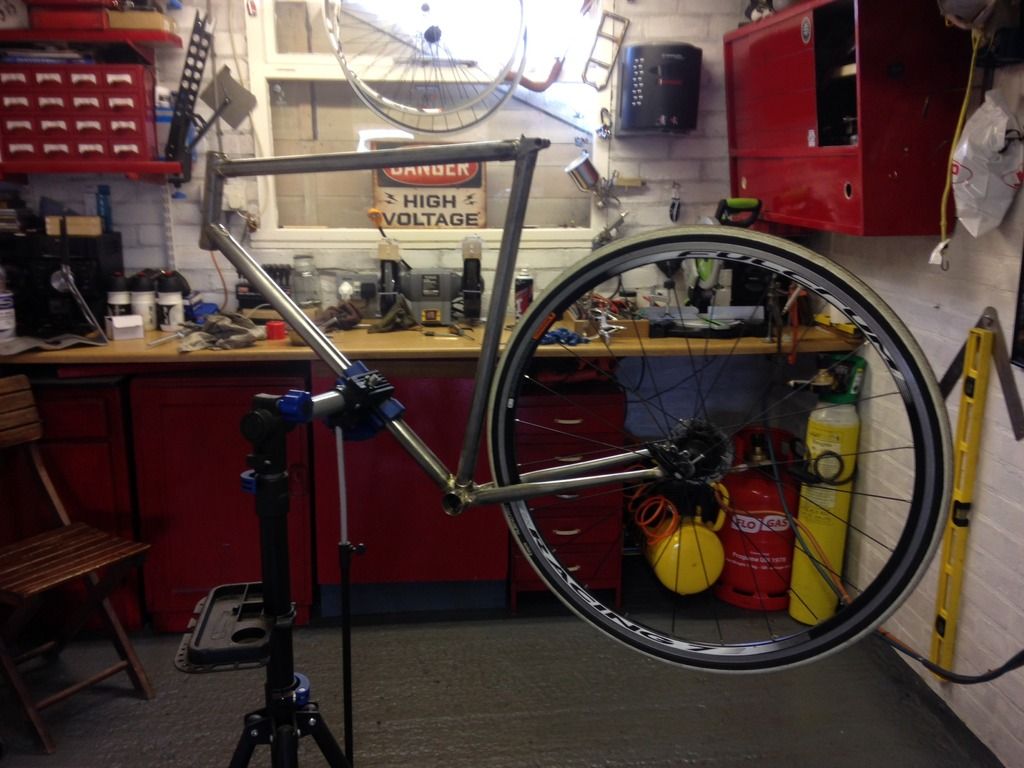
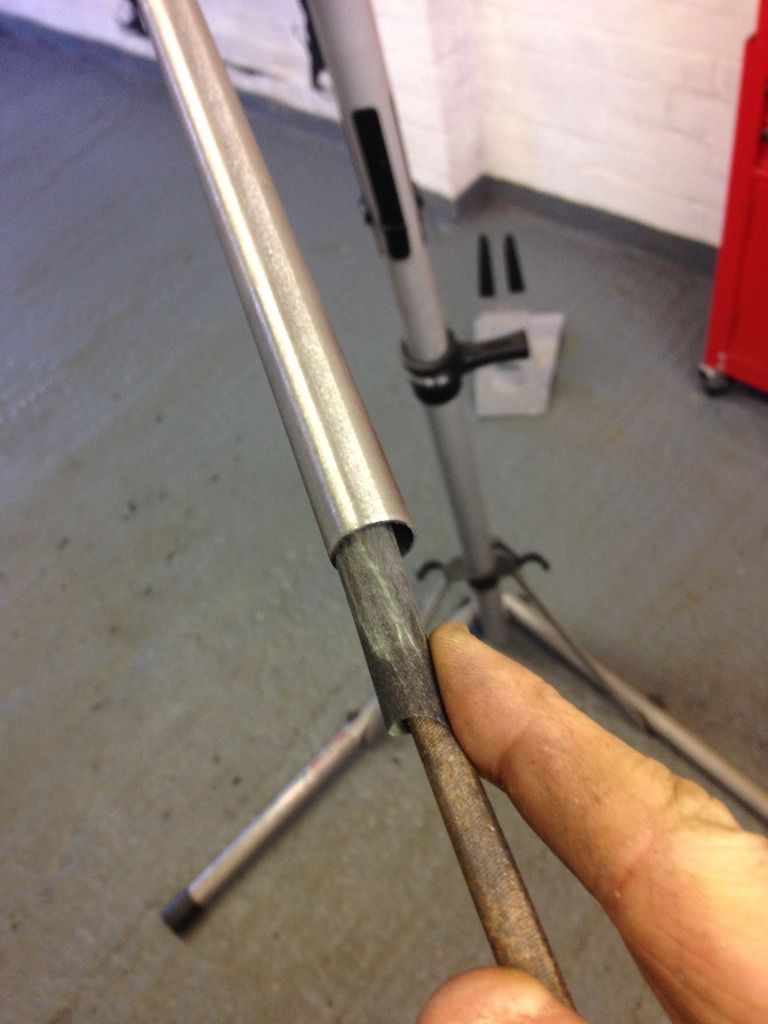
...and now on to the seat stays, starting with fitting the top eyes into the stays.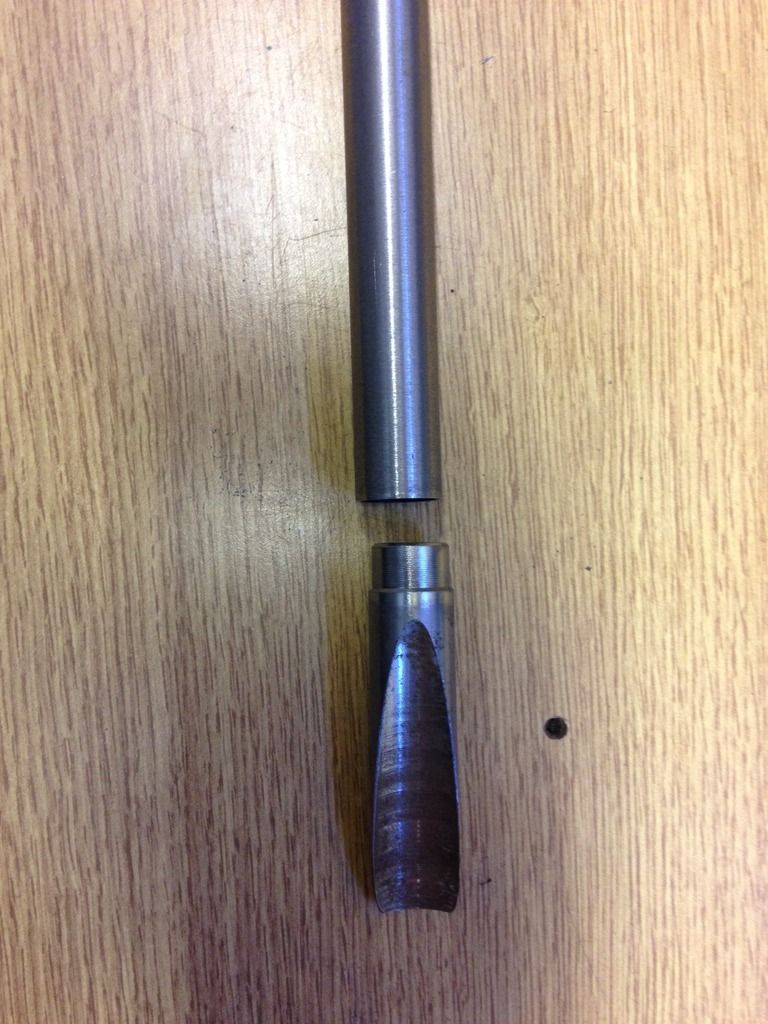
Some gentle filing for a snug fit.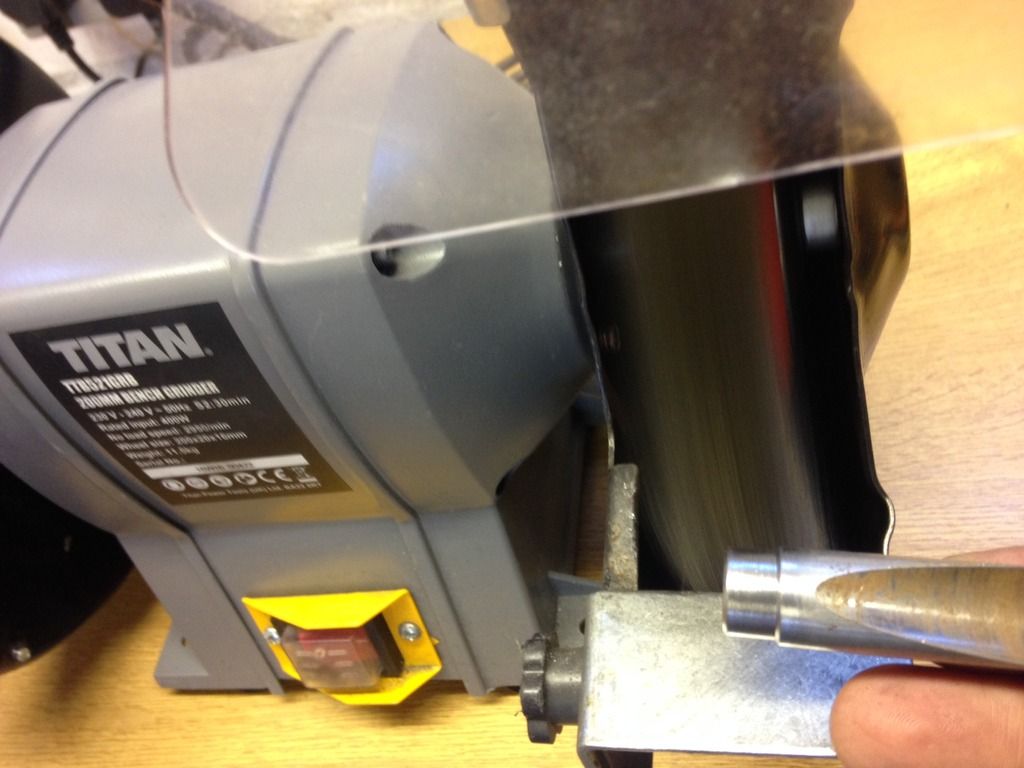
Brazed into place and cleaned up.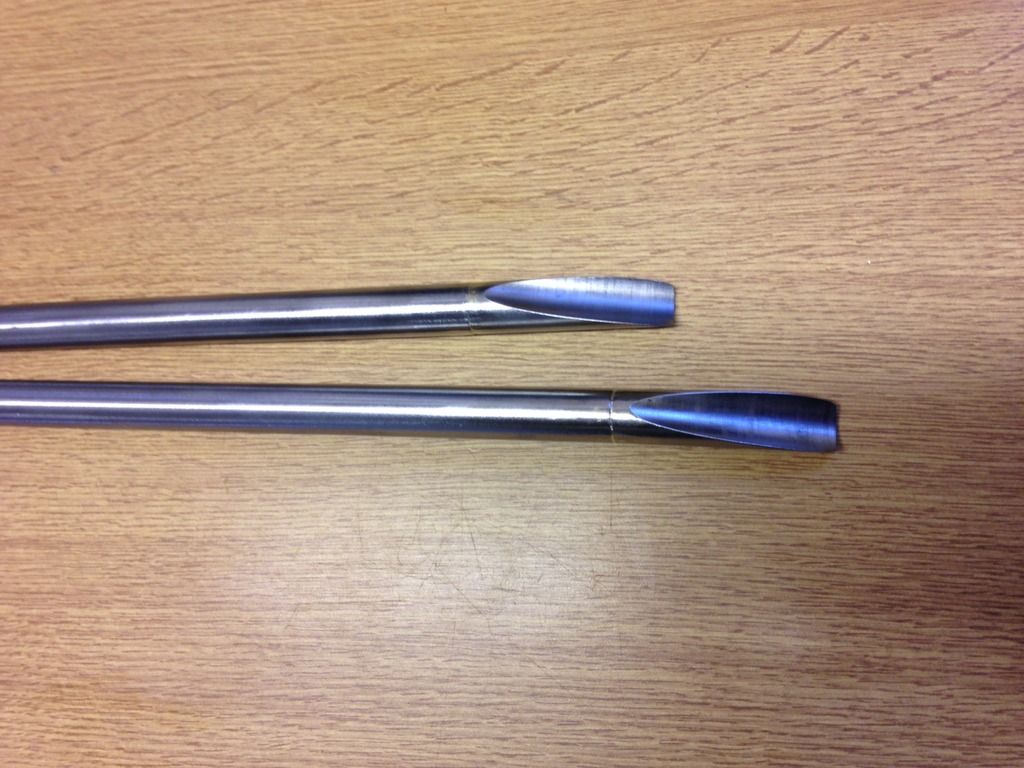
Some careful cutting to fit on to the dropouts.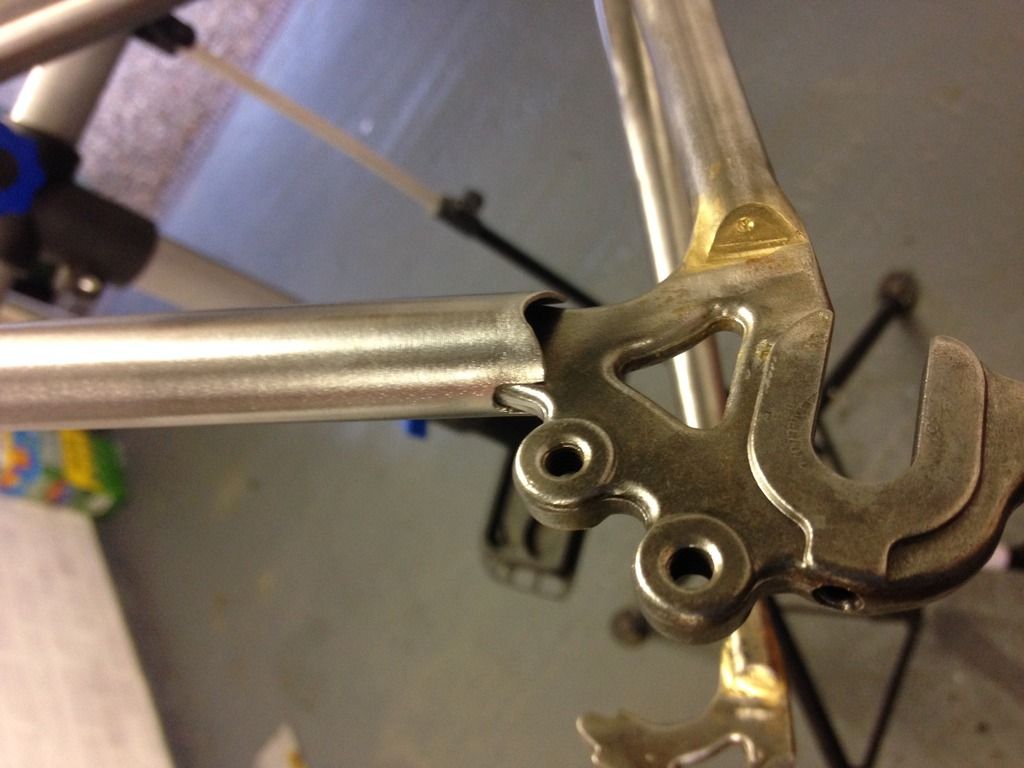
Filed a small ridge so the stay sits nicely on to the seat lug.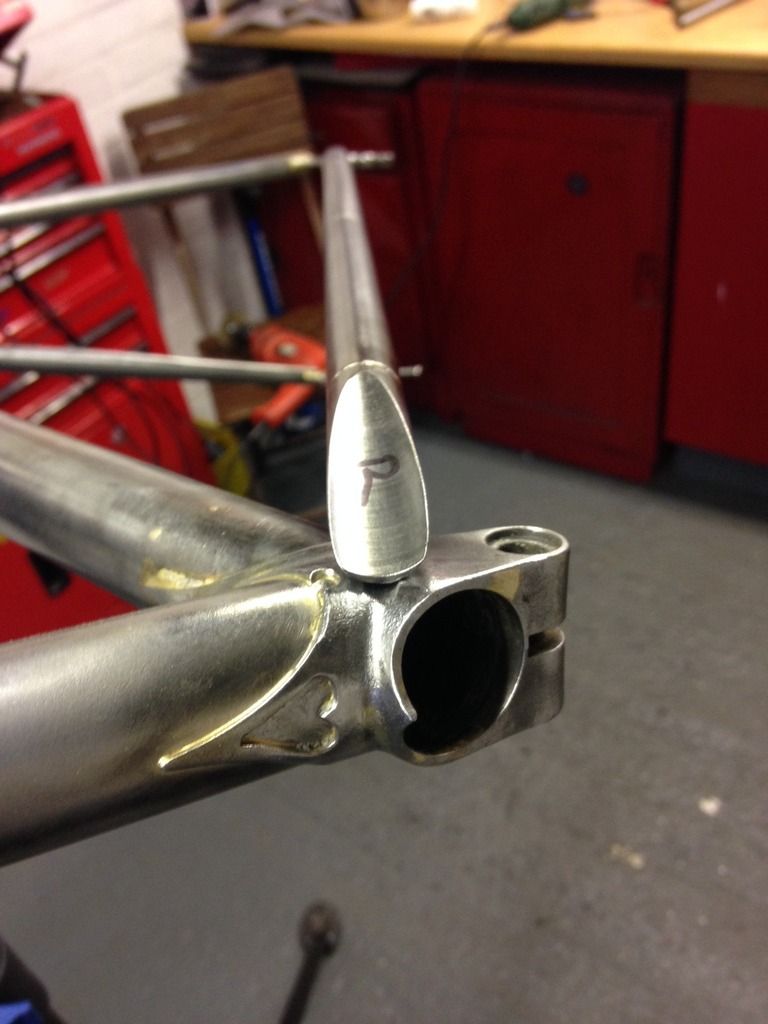
The dropout end brazed and cleaned with the wheel fitted.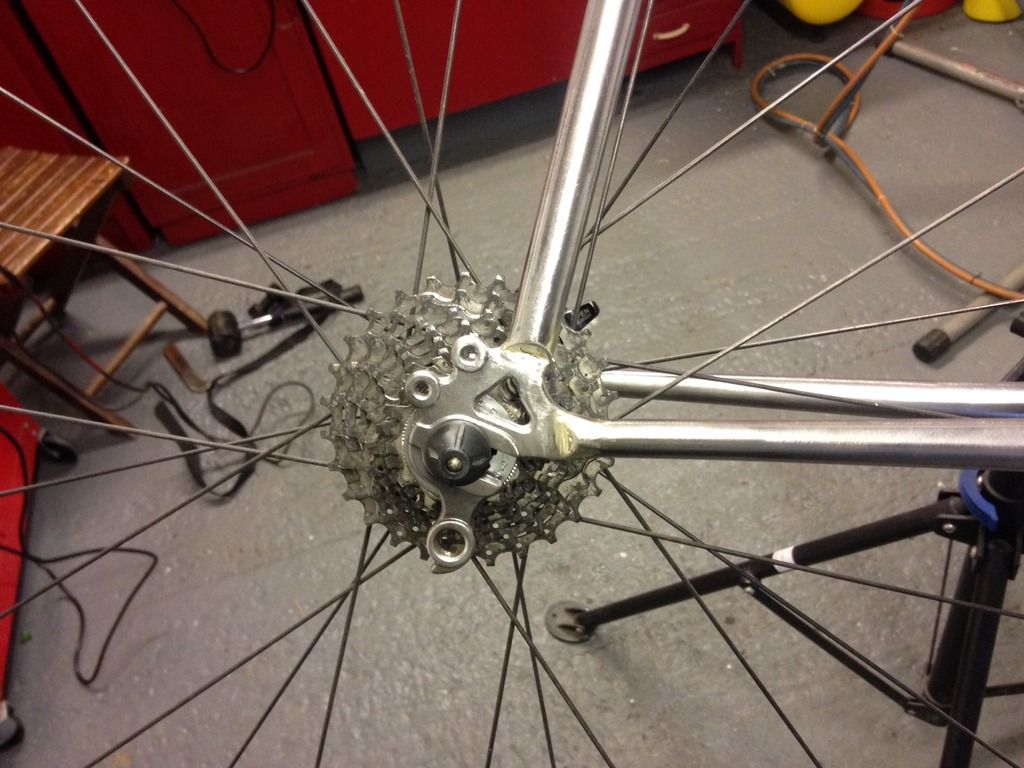
The drive side seat stay now brazed on and cleaned. The wheel seems pretty straight at this point, but can easily be pulled away while heating joints so need to be careful with the other stay which I will fit later in the week. 0
0 -
Love this thread.0
-
Any updates on this?0
-
So after another break I've had a couple of good days in the garage and got a bit more done.....
Added the second seat stay and the rear brake bridge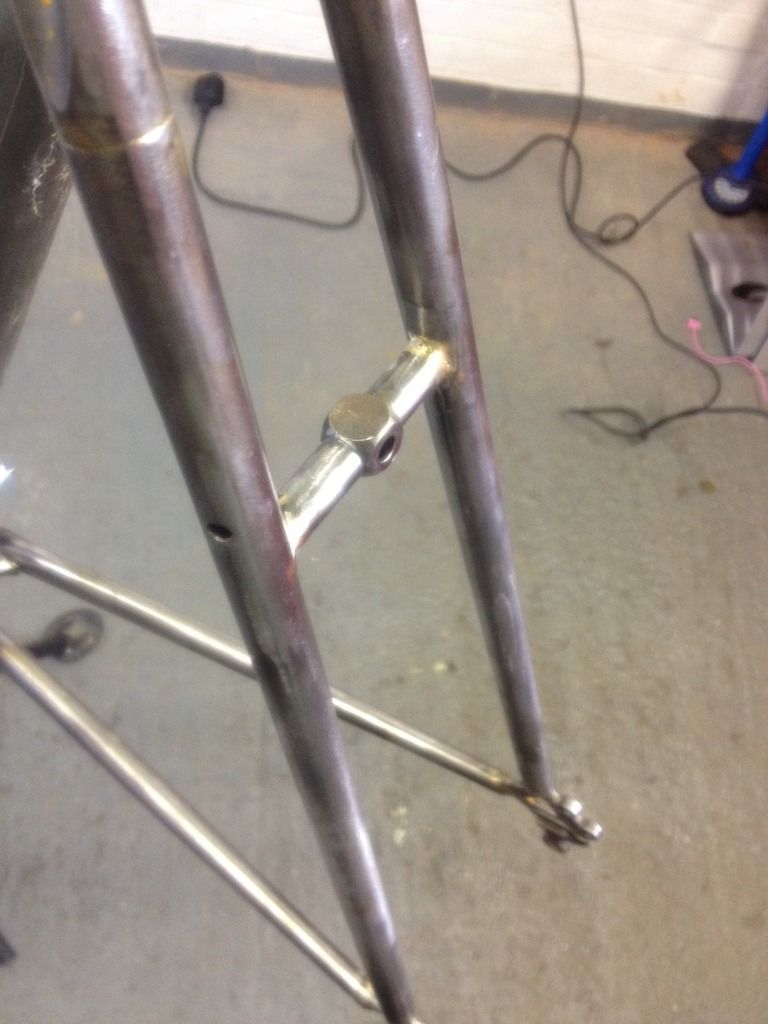
And the chain stay bridge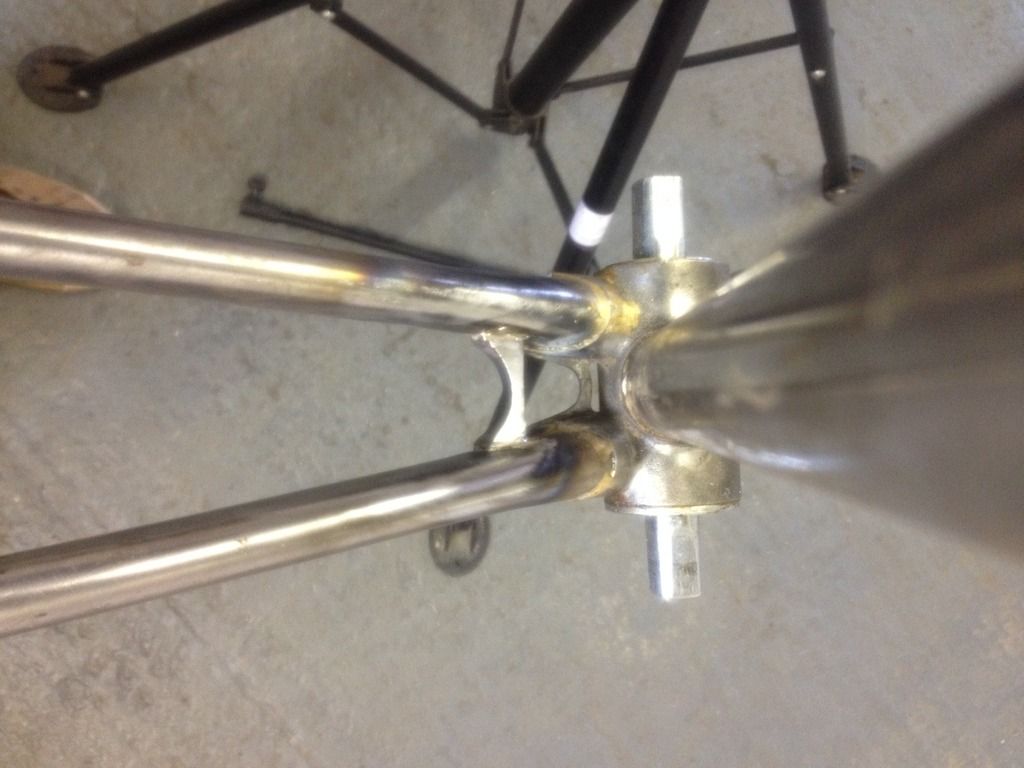
And I have found it unbelievably hard to bend one fork blade perfectly let alone two. I tried a straight blade fork but it looked terrible. Then I was walking my dog and outside someones house was an old steel(reynolds!) bike for sale, and with a bit of cleaning, and paint stripping, it's a perfect fit. I fully intend to build a fork at some point but for now I will settle for this.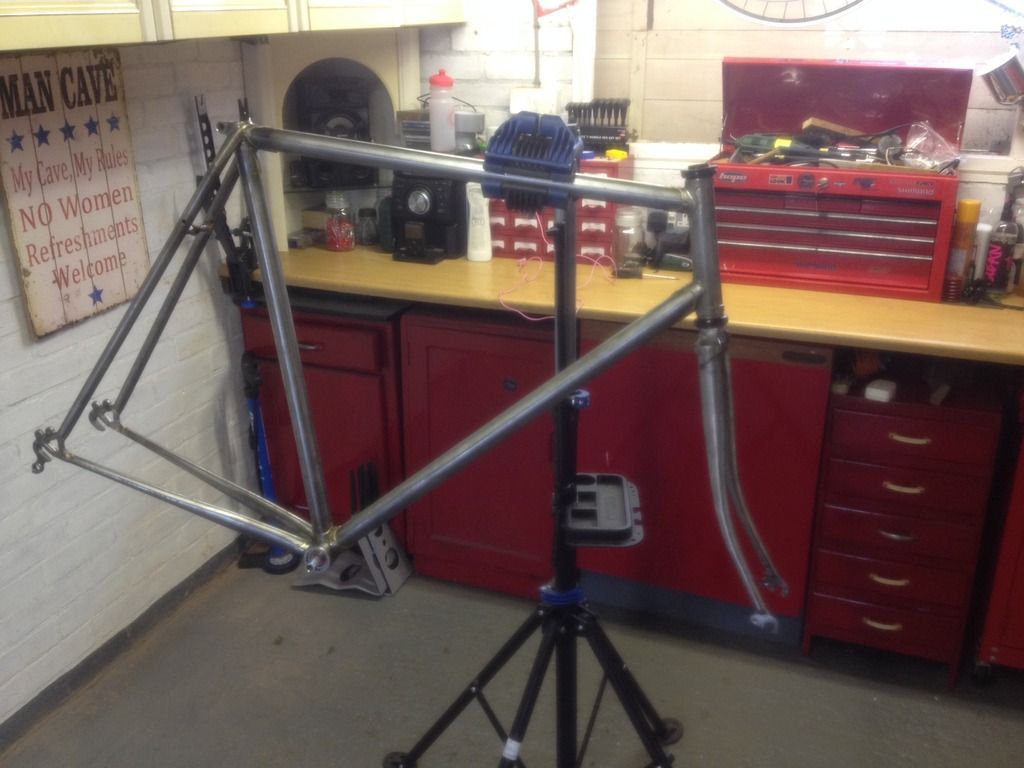
Then I had a bit of a fit up to see how it rode.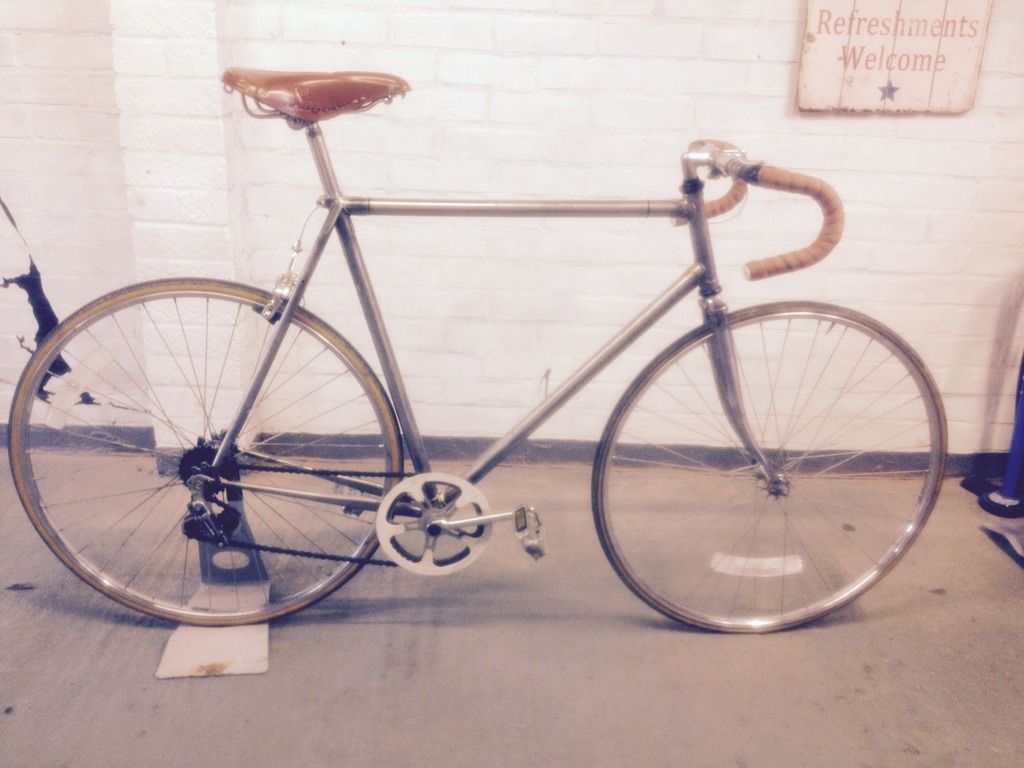
I am really pleased so far, and was riding around for a few hours! The rear brake is only just functional for now and although the rear mech is on it is not connected to anything so sits in one gear! Still enjoyed riding it though!
Then started to add some small parts.
First the cable stop for the rear mech. I'm planning on an old school friction shifter mounted on the down tube, and no gears at the front. This will be no climbing machine!!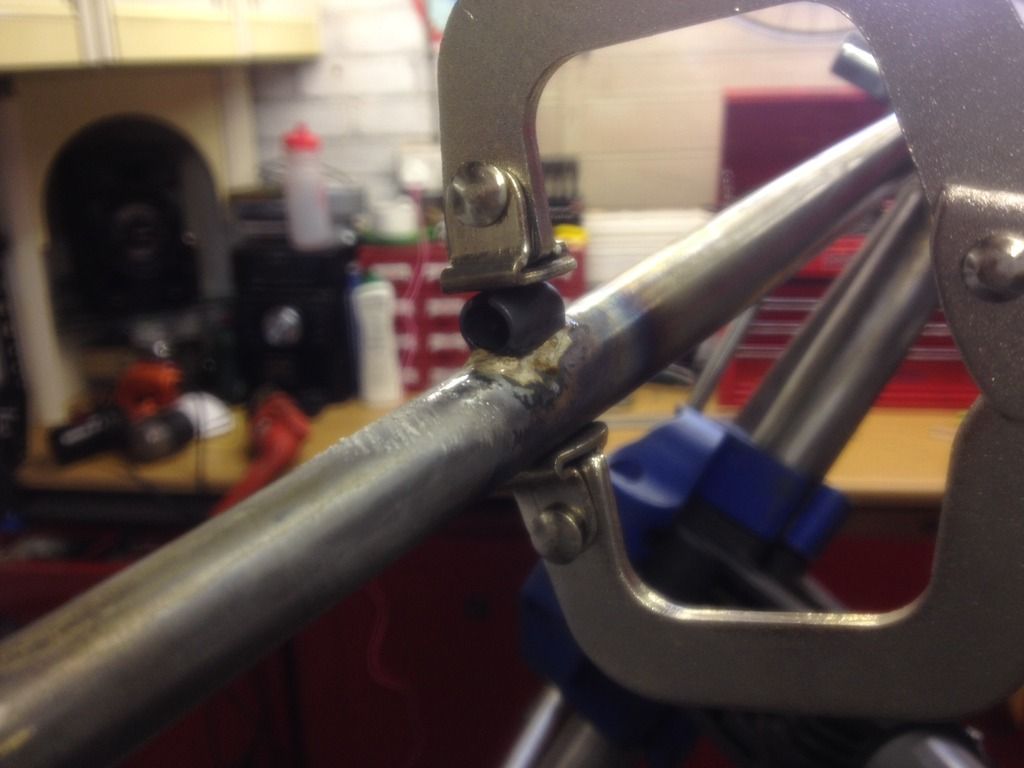
Drilled some holes for the bottle cage bosses.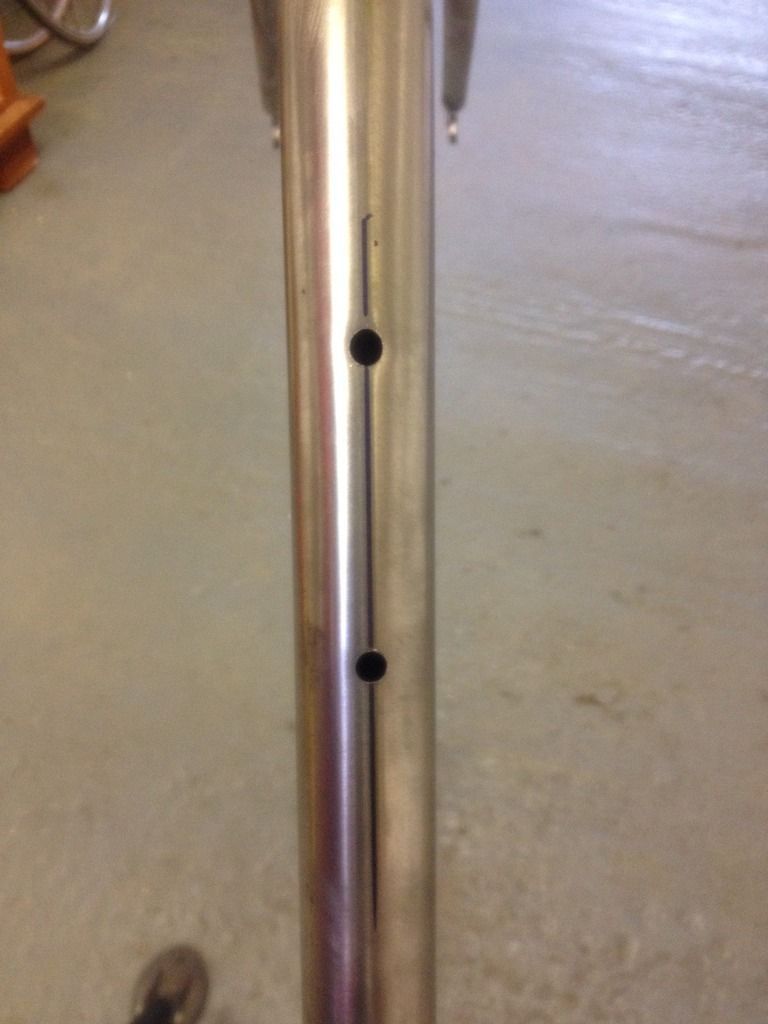
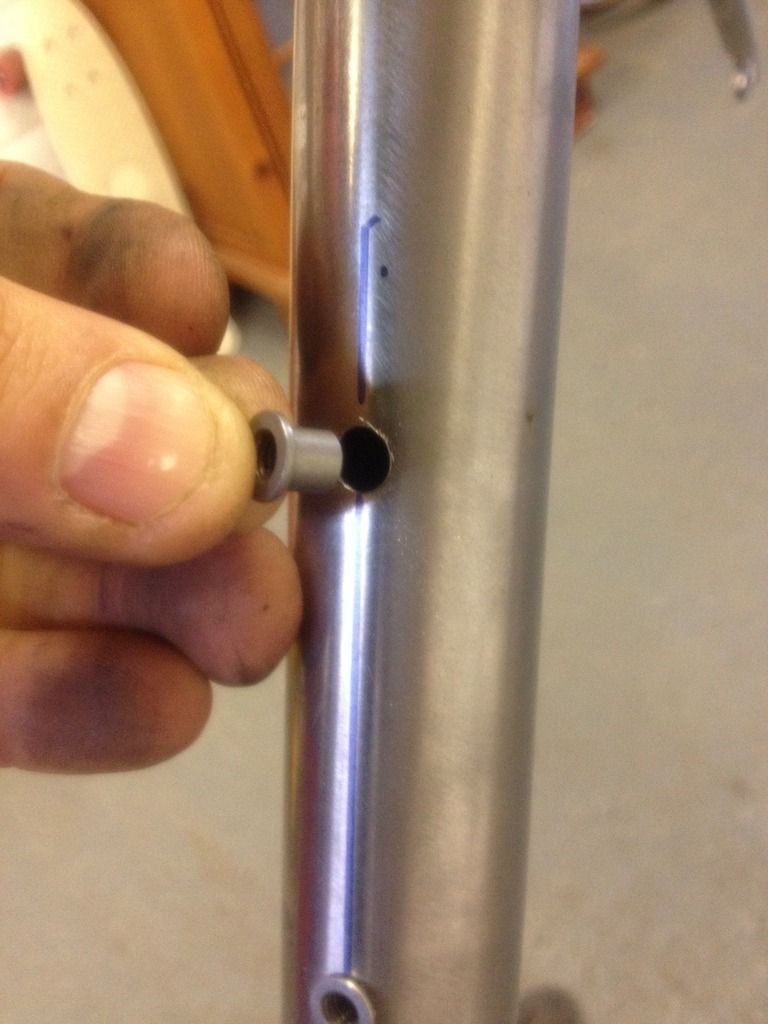
This just leaves the rack bosses to go on the seat stays, but just as I started my oxygen ran out so will be another break now until I can get a refill!!0 -
As usual, very nice...
WHy did you go for such a crazy tight rear tyre clearance... those are presumably 23 mm tyres and you have a couple of mm to the seat tube...left the forum March 20230 -
Looking great. The tyre clearance to the seat-tube is incredibly tight though, isn't it?ROAD < Scott Foil HMX Di2, Volagi Liscio Di2, Jamis Renegade Elite Di2, Cube Reaction Race > ROUGH0
-
How have I only just discovered this thread. It's brilliant.Trail fun - Transition Bandit
Road - Wilier Izoard Centaur/Cube Agree C62 Disc
Allround - Cotic Solaris0 -
Can you get the rear wheel in/out when fully inflated? Agree, it looks very tight.0
-
Reminds me of when Rourke built my bike, but they have a tad more experience. Splendid post!WyndyMilla Massive Attack | Rourke 953 | Condor Italia 531 Pro | Boardman CX Pro | DT Swiss RR440 Tubeless Wheels
Find me on Strava0 -
Hi, yes the wheel goes in inflated, there is a bit more room than shows on the picture, the wheel can move back a bit more, it's just roughly bolted in! I'm planning on shortening the head tube at the bottom to reduce the front height a bit.0