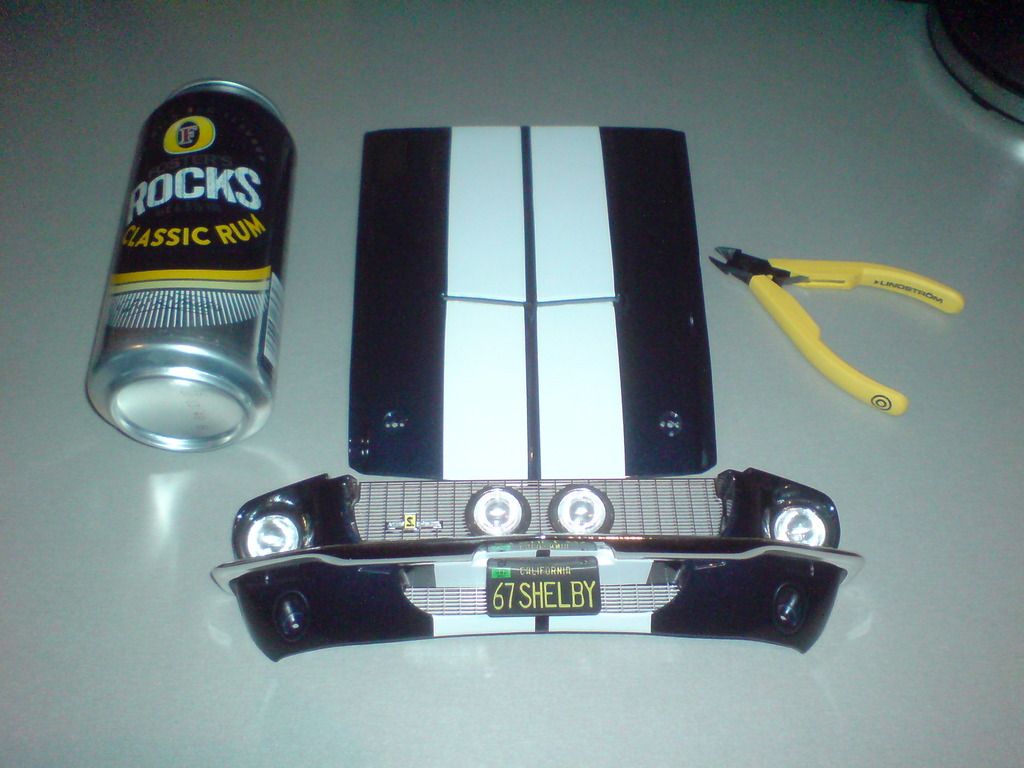
Shelby GT500 1:8
Comments
-
Well going for a look at the weekend, got a few kits I'm looking at but it depends on what they have.
Either the YZF-M1 Team 09, the RGV, Ford Focus RS WRC 2001- Montecarlo 1/24, The 1/100 shuttle or a large scale F-14.
Never used a airbrush kit before. So lots of research to do, but from what I can see i'm looking at £150 min for one. Heard mixed reviews on the AK metal paints. Will be interesting to hear how you think it compares to a normal pot of aluminum paint.
You have to make the exhaust look "burnt" with that lovely blue color it takes on.
Not done a build for ages all of the previous builds have been damaged moving so most went to the bin.
Think it would be cool to do a Rossi collection, but the minichamps seems more preferable for that.0 -
Oooh the focus could be good! The large F14 will have a load of etch, well I would hope it does at least.
I tried the AK extreme polished aluminum last night. Comes out a touch darker than Tamiya Aluminium but being enamel im leaving it for a while an doing a recoat. ive done the upper half of the radiator so its easy to compare, doing it with a brush at the moment though.
Airbrush wise I did end up going for an cheapish compressor but an Iwata airbrush. Ill get a better compressor but for now it does the job.
Started on the filler last night just applying it then ill start sanding off tonight on the exhaust an couple of the panels, mainly where i glued an theres a notable seam line that wont sand out.0 -
Yeah the Focus will be good, want to do it as it would be on the stage diorama.
Large F14 I will leave for now after I seen the price, will wait unit I know I can do it justice lol as it will need lot's of aftermarket parts.
Would like to see how the AK looks once your happy with it.
Airbrush, I'm going to do some reading first but think I will end up getting a cheap'ish one to start with.
Hate sanding and filling, reminds me of the dreaded shuttle lol.
Well the Shelby is coming on nice (slow) but look at the scale and this is just the bonnet, it will be a monster.
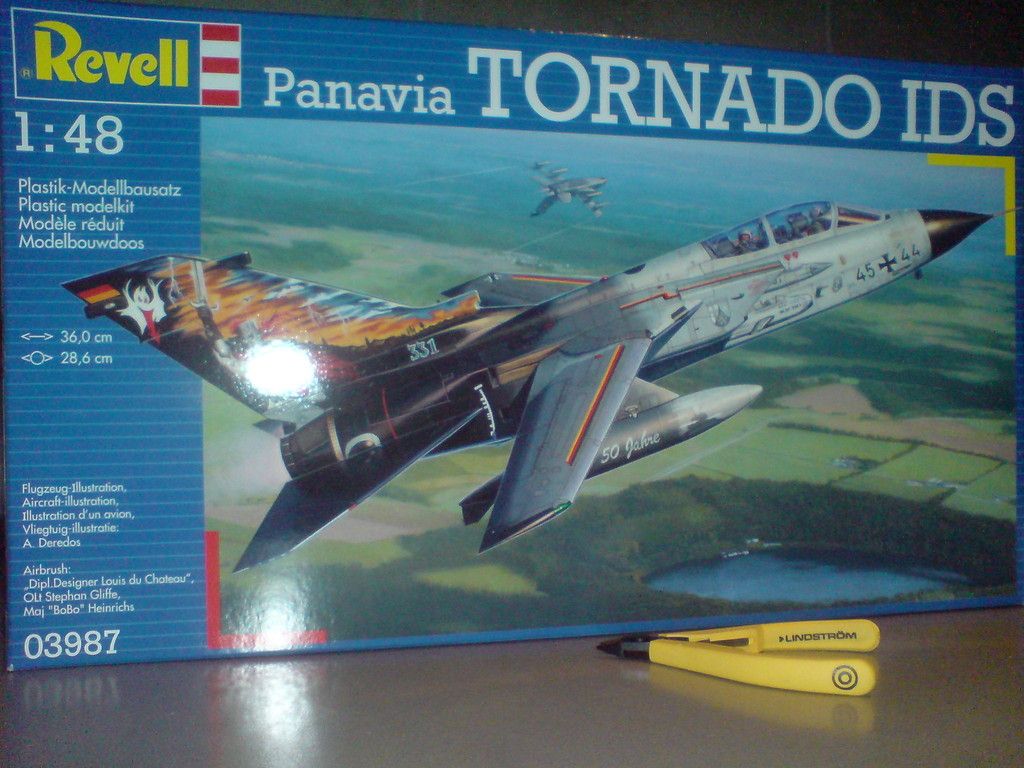
Also had a look in the local shop today was a waste of time as couldn't find anything I wanted. But came away with this.
Newest molding (2014) adjustable flaps and slats etc, and detail looks amazing. Hate the livery though, so it's going to be an RAF one, once I order some paints (none in stock at shop).0 -
Thats big that shelby! Yeah start with a smaller Jet first, you should be able to get a different decal set for that one someone like ModelsRgo or similar do kits.
Took a break from the bike this weekend needed to hone my etch skills so set to on a tank. Zimmermit body panels and tonnes of detail parts snapped a blade which ended up in my finger which was fun. still all fun an games, ill get a photo of it the etch panels make everything so shiny on it.0 -
It will be a big build, but 100 weeks to wait sucks, decided on just keeping all parts in the box until complete.
Yeah going to have a good practice with this one (only done one fighter jet before), looked in to after market parts for this. But all of the builds I have seen say it doesn't require any as the detail is good enough. Ordered some paints got this for the overall body https://www.emodels.co.uk/tamiya-as-10-ocean-gray-raf-100ml-spray-can-86510.html going to do some panels lighter/darker and do weathering and chipping.
Made a start this morning and only got the tail done before I was introduced to "The Blacklist" series. Impressed with the mold so far. Have you tried the mr putty before? Would like to fill the panel joins, have only used in the tube filler stuff previously, but the panel joins are quite small on this.
Yeah get some photos up. Found some decals for it quite easy.
Going for this look nice and dirty and in "landing config" but canopy will be shut with a pilot and rio and the rear wheels just touching down.
http://hsfeatures.com/images/tornadogr4pds_title.jpg0 -
Yeah best of waiting my experience is youll start a part say the engine then they will start doing rear suspension parts so youll end up with loads of small assemblies.
Putty wise ive only used Squadron green and Humbrol grey, prefer the Humbrol squadron seems to dry to work properly to me. but thats probably me being rubbish. That said all the Mr Hobby stuff ive used has been really good quality an the putty seems quite popular.
Ill pop some photos up at the weekend got a few sheets of etch to cut an fit everything from a new 70 tonne jack to gun sights. Also some spots of filler needed on the zimm panel joints.
An the idea sounds good on that one most ive seen tend to be pre flight tags etc in place
Little shot of the back of the Tiger 0
0 -
Looking good, is that the AK paint on the barrel?
Yeah they are all going in the box from now on, will just be patient.
Started the build of the Tornado today, really surprised at how easy and close fitting the parts are, minimal panel gaps. Might be my best kit from Revell so far but it is 2014 tooling and molds. I have the humbrol grey too and yeah it is dry to work with, tried it on some panel gaps today and was too try and thick to really get in to them.
So an order has gone in for some of the Mr Putty, reviews seam great for it, plus ordered all remaining paints I need, so main fuselage is on hold until the parcel arrives will continue with what I can for now.
I've seen a similar idea before somewhere forgot where, might have been the Space Shuttle on blast off, but a small patch of runway and it just landing with smoke from the rear wheels, think it will set it off. Ordered the Revell 1/48 Eurofighter too so that will be done in RAF decals too.
The only thing that is phasing me so far is the weathering, got some old kits to practice on so going to try a few different products.0 -
Its not thats just a turned metal barrel im afraid. Loads more etch to fit an some on the muzzle too.
The humbrol I used was a really nice consistency while the squadron dried to quick to finish working which was annoying, ive got some weld line to make so ill probably use the grey again for that.
Mocking up a runway isnt too hard concrete squares with some weeds and rubber stains should do the job
Weathering is quite easy pin washes an streaking, I'm not too bad with mud I cheated a bit using a Tamiya stick but mixed some decal fix and powders to do mud an dust. exhaust soot an burning I do with a tamiya weather master kit, think eye shadow packs an your there but no mirror. Get something cheap an weather the hell out of it.0 -
Got plenty of old broken kits that I was going to repair, so will weather the hell out of them, can do an ok "basic" job but want to go OTT on this one. Just can't wait for the paints and mr dissolved to arrive. Not had to remove any flashing so far and fit is almost perfect on this, still really surprised going from my past Revell builds.
The humbrol I though dried too quick, but I forget how long I have had it so not suprised. As I said the fit is so good you can only see faint panel lines. Thats what I'm thinking for the runway with it landing on the "touch down zone" and thinking of doing working runway lights (but that maybe stupid, as I have already started the build and can't fit some on the plane).
General weathering I should be ok, it's just the tail, from the photos I have seen it looks rather dirty. Can only presume this is from the reverse thrust.
Post some more pics when you have them. If you like modern jets I would highly recommend this one.
Got told off today when I went in to the local AFCO to talk about my application, made the mistake off referring to it as avionics technician (fine I thought) but the recruiter was not happy and promptly reminded me it is not the RAF and I should refer to it by the proper name Air engineering technician.
Have you decided on Rossi or Lorenzo yet?0 -
Surely if they stop a model before the end of the run, they would be obliged to refund all the money you have spent on a half finished model ?Trek,,,, too cool for school ,, apparently0
-
No idea, in the past there was a piece of paper included with the build. Happened twice before. But so far this has gone past the few few initial issues. So fingers crossed.0
-
Yeah I'll sort those photos later hoping to get some biking done as it's not going to be windy or peeing down.
Bike wise still not sure Rossi looks more tempting at the moment though. Still not started that chain either haha. Going to sort some of the fairings over the weekend fill an sand smooth.0 -
Lucky you, cr@p weather here so no chance.
Missed the parcel man today, annoying now have to wait till Monday.0 -
Right didnt get that far im blaming how fiddly some of this stuff is. Photos with the flash on so it shows up more
Rear deck, few bits more to go on, loading/escape hatch needs the internal cover still and mounting, riased grills under the tirret are not glued in yet but total pig to form over the plastic kit parts hence the pegs
Shot of the rear Zim
Part of a tiny sight, crosshair type part to go on on part of the turret, lots more etch parts around here too, plus all the periscopes an MG and mount. 0
0 -
Looking impressive, the Tornado is coming on fast and well. Just need to detail the cockpit before I can attach the nose. Then mask and prime and final assembly and weathering. I'd say 70% of the build is done so far. Minimal gap lines throughout, some filling and sanding to do but not much.
Haven't painted the engines yet, but did the "air intake fans" in a revell metallic aluminum with a slight wash to add detail. Impressed but you will never see unless you look in the air intakes.
The etching does look really cool, not worked with it before so no Idea how it is to work with. But the extra detail makes it look worth while.
I have some fine gauge wire I am going to try and incorporate in to the landing bays.0

