Ragley Piglet - Beef injection
frankspencer1979
Posts: 525
I've been thinking about getting a Piglet for a while now. After reading plenty of reviews and write-ups over the past year or so, it sounds like the ideal bike for me. There's nowt wrong with my current bike really, it's served me well, but I like the idea of building something up myself, and I want to see what a steel frame is really like.
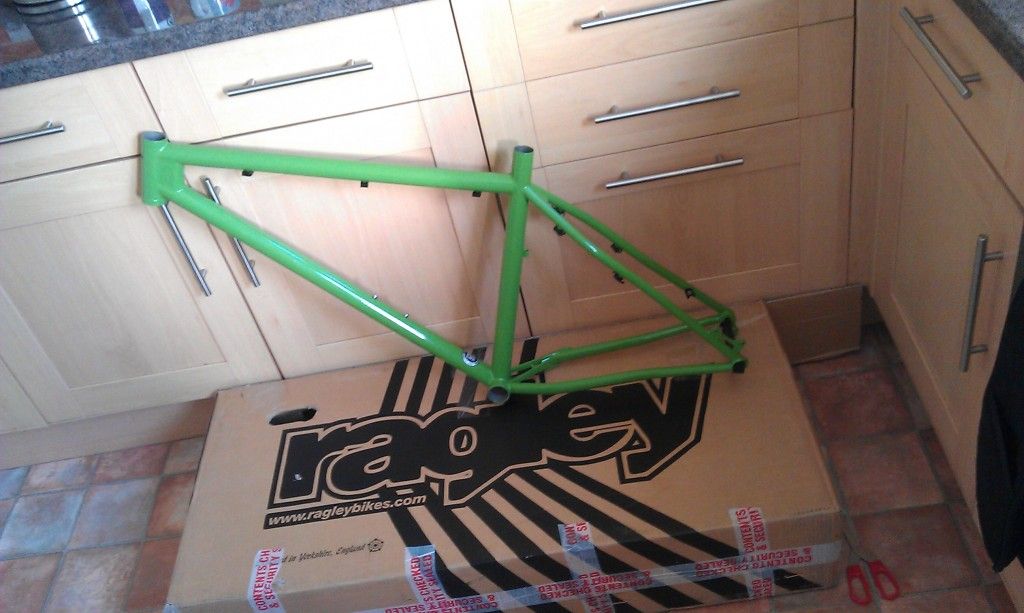
When a cheap 2011 Piglet frame appeared on CRC I was too tempted. I know the 2013 models will be out sooner or later, but I've saved the best part of a ton and I can live without ISCG tabs, even if they do appear on the new frames; and I wanted a green one anyway! So here it is.....
I'm gonna transfer as many components from the Vitus over as possible.....
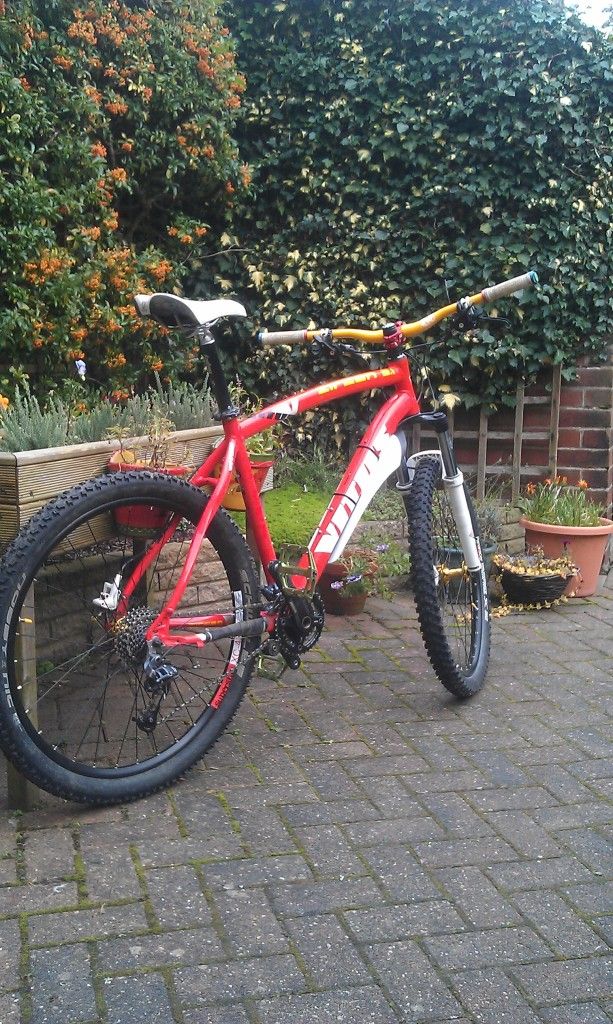
and then upgrade any as and when I think it's necessary. Need some new components, first ones arrived today.....
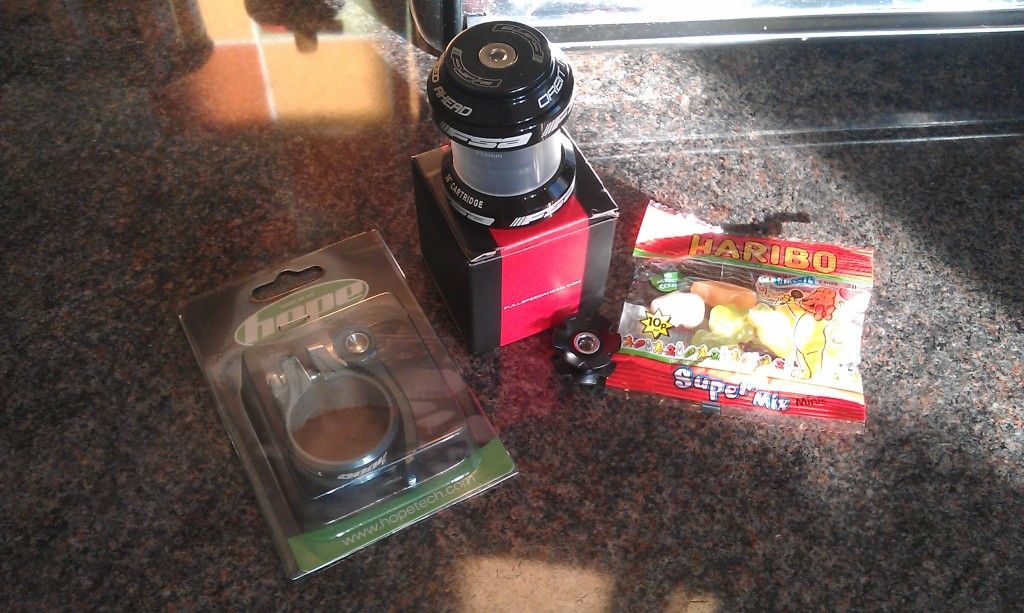
The frames is in the LBS this week to have the headset fitted. I'm gone strip and clean up the Vitus tomorrow, then cobble it all together once the headset's in. Think I'll probably get stuck with gear and brake cables and I know the rear caliper mount will need changing too. What I'll probably do is get as far as I can, make a mess of it then take it all into the LBS for them to fix! :roll:
When a cheap 2011 Piglet frame appeared on CRC I was too tempted. I know the 2013 models will be out sooner or later, but I've saved the best part of a ton and I can live without ISCG tabs, even if they do appear on the new frames; and I wanted a green one anyway! So here it is.....

I'm gonna transfer as many components from the Vitus over as possible.....

and then upgrade any as and when I think it's necessary. Need some new components, first ones arrived today.....

The frames is in the LBS this week to have the headset fitted. I'm gone strip and clean up the Vitus tomorrow, then cobble it all together once the headset's in. Think I'll probably get stuck with gear and brake cables and I know the rear caliper mount will need changing too. What I'll probably do is get as far as I can, make a mess of it then take it all into the LBS for them to fix! :roll:
0
Comments
-
Nice! I built one up last year and its a great bike, looking forward to see how yours looks!0
-
Main things to check will be seatpost, seat clamp, front mech and bottom bracket. The cable lengths should hopefully be okay!0
-
So I've started building today. This being my first build, there's plenty of stuff gone wrong; being frigging clumsy doesn't help either. Began by stripping the old bike on Sunday
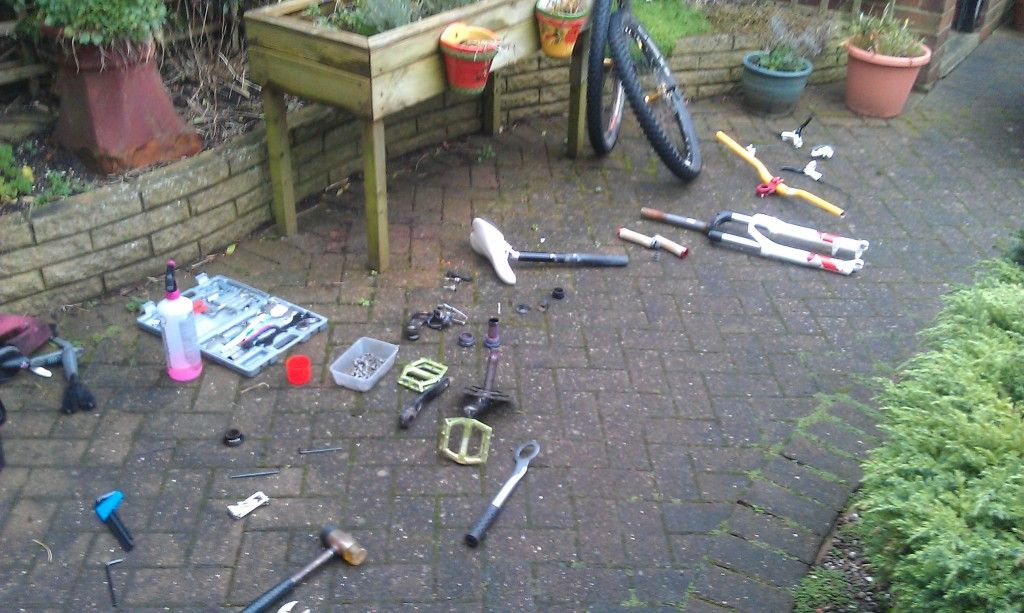
At this point, I thought "Christ, what am I doing!?"
Frame went in the LBS today and had the headset fitted, and now it looks like this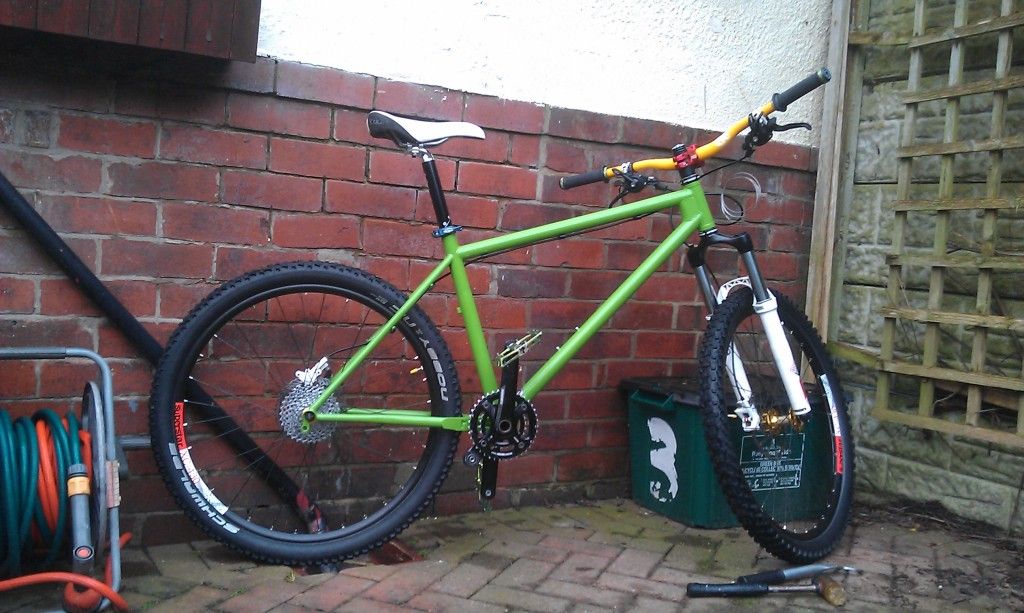
But there's problems....
1. I've dropped half the power link from the chain down the drain :oops:
2. The drive side of the BB (Hope stainless) seems to have almost seized since taking it off the old bike where it was working perfectly. Now when I fit the cranks, they barely spin at all, let alone spin freely. :?
3. I took the stem and top cap off to adjust the stack height, this resulted in the fork dropping out, and now the headset feels loose again :roll:
4. The seat clamp didn't come with a shim so I can't clamp it tight enough :x (queue Hope bashing!)
5. I haven't got a clue how to tackle gear cables
Oh well, it's a learning curve ain't it. On the plus side, the brakes went on straight away and work nicely! And sizing isn't going to be an issue, it feels like it'll be bob on. Think it'll look nice too, despite being a mix n match of parts. Will post full spec once it's finally done.0 -
1. MTFU and get it out (or ask lbs nicely)
2. Too many spacers on the bb probably, measure the BB shell. One driveside for 73mm and two drive one non drive for 68. Remove one of the driveside spacers if your chain device is bb mounted.
3. Undo the stem and re-preload the headset, see park tools for instructions.
4. Return to retailer and procure correct size seatclamp presumably
5. Park tools is your friend!
Looks like it's going to be lovely when built up though!0 -
I think it's the frame that should have come with a shim for the seat clamp, my bagger did at least.
Build looks nice though 0
0 -
Looks great. At least you're having a go yourself, which'll be worth it and all the more fulfilling once you finish it, I'm sure.Family, Friends, Fantastic trails - what else is there
viewtopic.php?f=10017&t=12898838
viewtopic.php?f=10017&t=128973740 -
ride_whenever wrote:2. Too many spacers on the bb probably, measure the BB shell. One driveside for 73mm and two drive one non drive for 68. Remove one of the driveside spacers if your chain device is bb mounted.
Only needs one spacer on the drive side for a piglet- so if you've got more than that take em' out!0 -
I was in the same situation as you when i built my bike up, i just thought i'd give it a go. I also felt the same about the gears but once you get stuck in its not so bad. When i did my gears it gave me a much better idea of how everything interacts so when things have started slipping since building it up i have been able to sort it (kind of).0
-
Thanks for all the responses, gonna have another crack at it tomorrow afternoon (got no garage so have to do it in the garden.)HarryK wrote:ride_whenever wrote:2. Too many spacers on the bb probably, measure the BB shell. One driveside for 73mm and two drive one non drive for 68. Remove one of the driveside spacers if your chain device is bb mounted.
Only needs one spacer on the drive side for a piglet- so if you've got more than that take em' out!
Unfortunately, it's not this, I got the right amount of spacers (just the Blackspire Stinger in lieu of the drive side spacer.) The drive side cup seems to have stiffened up, I can push it round with effort and it feels smooth, but it doesn't move freely. I've popped the seal off and cleaned it up but it made no difference.
As for the other things, I'm not going in the drain, I'll ask nicely in the shop, I'll check out Park tools for hints and the shim should have come with the frame; tried a bodge with a bit of inner tube for now!0 -
Have you contacted wherever you got it from? Failing that, you can get hold of the shim from CRC. It should have come with a load of stickers as well, it looks like it didn't? That or you've just not put them on yet...
Gears are dead easy once you suss them out by the way, took me a while to figure it out, but once you realise how they work, it's a piece of piss!
pro tip - the cable pulls the mech from the smaller cogs to the bigger ones on the rear. Once you've set where the limit screws make it sit at each end, sit it in the smallest cog, attach cable at a relatively decent tension. Adjust the cable tension with the barrel adjuster on the shifter. Too much tension means it doesn't shift up (harder gears, smaller cogs) properly. Too little tension means it won't shift down properly (bigger cogs, easier gear). Simples 0
0 -
ride_whenever wrote:1. MTFU and get it out (or ask lbs nicely)
2. Too many spacers on the bb probably, measure the BB shell. One driveside for 73mm and two drive one non drive for 68. Remove one of the driveside spacers if your chain device is bb mounted.
3. Undo the stem and re-preload the headset, see park tools for instructions.
4. Return to retailer and procure correct size seatclamp presumably
5. Park tools is your friend!
Looks like it's going to be lovely when built up though!
Today's update
1. Got hold of new power link, no drain/arm contact required
2. Still not solved this
3. Understand this now and tightened it up nicely
4. Frame was ex-display so don't come with sticker sheet/shim, on the case
5. Not attempted yet, need to get bb/crankset installed first before I move onto owt else
Need to crack on with it, I'm itching to ride, it's been nearly a month since I last got out.0 -
If the cranks are GXP they run no spacers at all on a 73mm shell, so installation of a BB mount chain device is not possible.ride_whenever wrote:One driveside for 73mm and two drive one non drive for 68. Remove one of the driveside spacers if your chain device is bb mounted.0 -
bennett_346 wrote:
If the cranks are GXP they run no spacers at all on a 73mm shell, so installation of a BB mount chain device is not possible.ride_whenever wrote:One driveside for 73mm and two drive one non drive for 68. Remove one of the driveside spacers if your chain device is bb mounted.
I get what your saying here' the hope instructions don't specify GXP/non-GXP differences. I'll have another crack!
*edit - had a crack, removed the Stinger and now it all spins nicely. Maybe I spoke too early when I said I could live without ISCG tabs, looks like they'd be handy after all.0 -
let me know if you need the shim, i have a spare
and i could rustle up a few stickers from frames 1 and 2 if you're interestedTrek EX8
Ragley Piglet
Maverick Species I0 -
Signing up - these always get rave reviews so would like to see how yours turns out!
 0
0 -
frank
pm your address i'll pop it in the post
love my piglet, without question THE most fun bike i've ever had Trek EX8
Ragley Piglet
Maverick Species I0 -
frank
hope the shim turned up, went in the post on friday
mine looks like this, or it did this morning
 Trek EX8
Ragley Piglet
Maverick Species I0 -
Shim didn't show yesterday, it'll turn up tomoz I'm sure. Nice Piglet fella, makes me even keener/impatient to get mine sorted. I've encountered more problems than I anticipated during the build, but hopefully I'll have her up and running in the next couple of days. Wanna get out on it whilst the weathers cold and dry!0
-
Wetter than an otter's pocket herefrankspencer1979 wrote:Wanna get out on it whilst the weathers cold and dry! 0
0 -
The Piglet's all done! A few setbacks meant it took a little longer than expected, but now it's all finished.
Waiting for the first test ride.....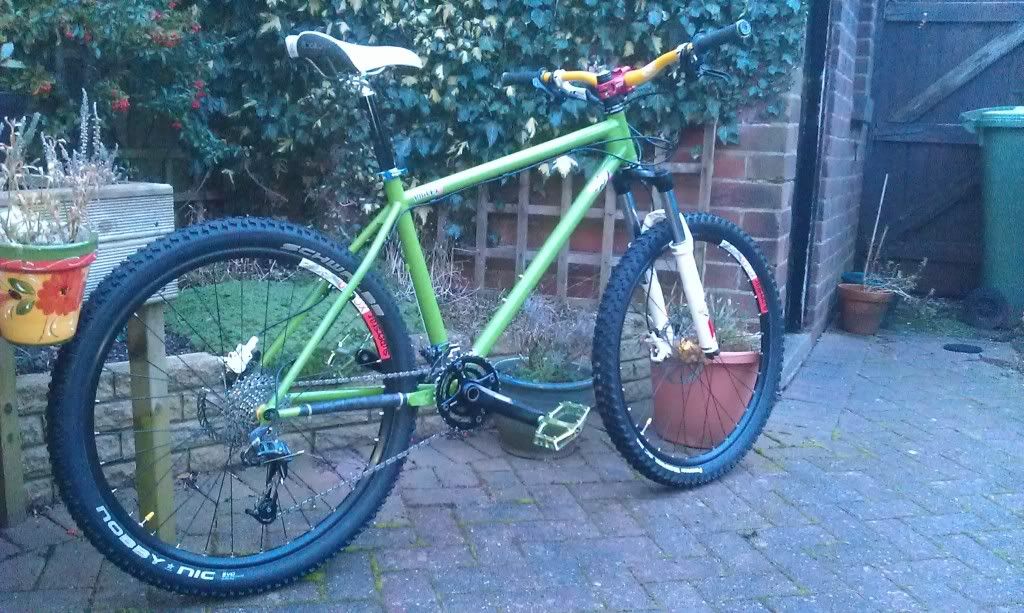
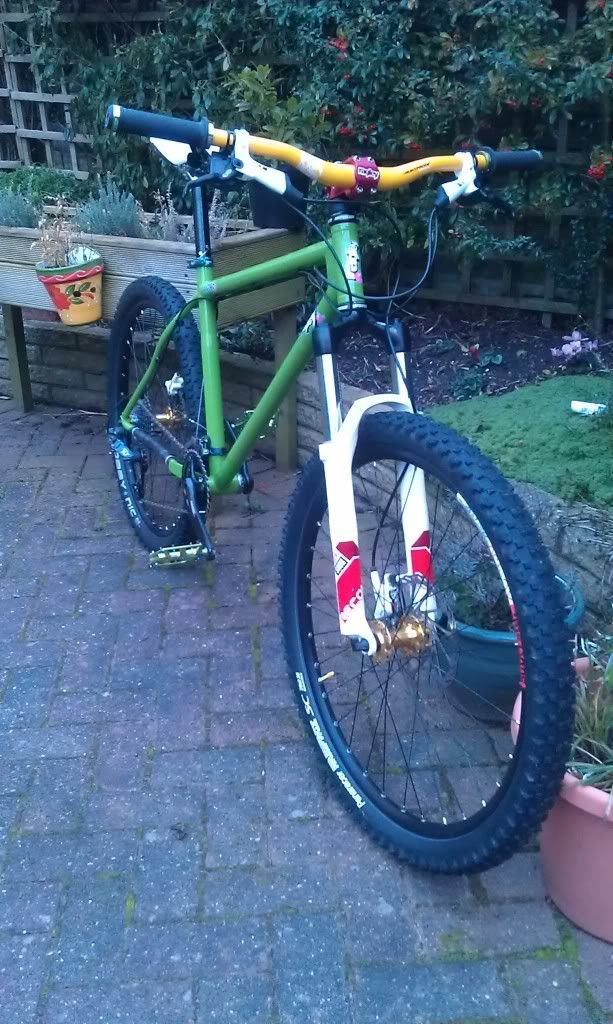
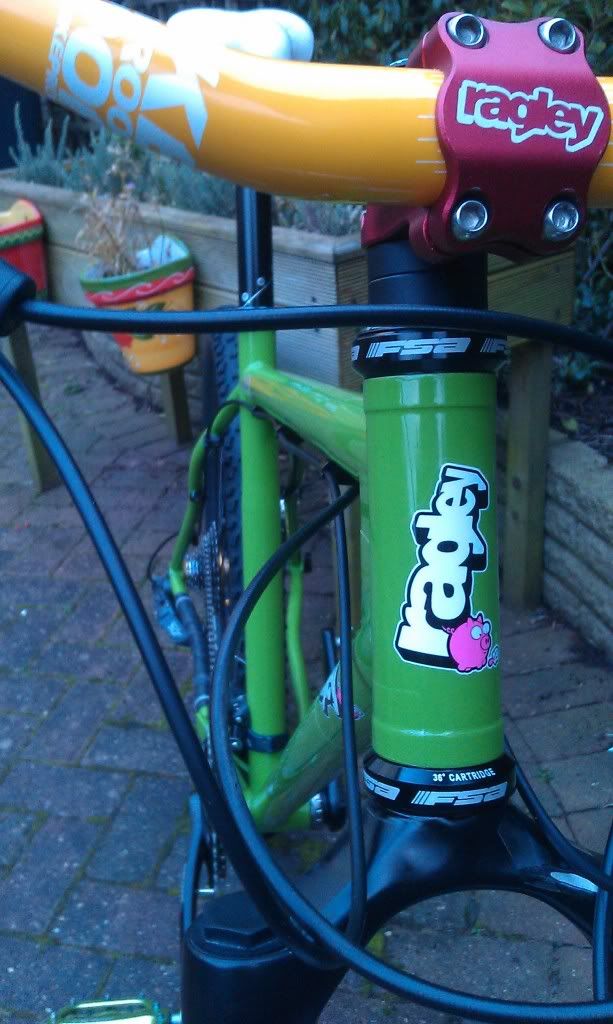
Was gonna go to Gisburn today, but got half way there (I live an hour away) and realised I'd forgotten my helmet, d'oh! Figured it wasn't worth the risk so had to settle for coming home and having a potter round the local park. Everything feels the way it should and it's noticeably quieter than my old bike, no rattles yet! There's nothing taxing round here though, so I can't really give a decent opinion on it just yet.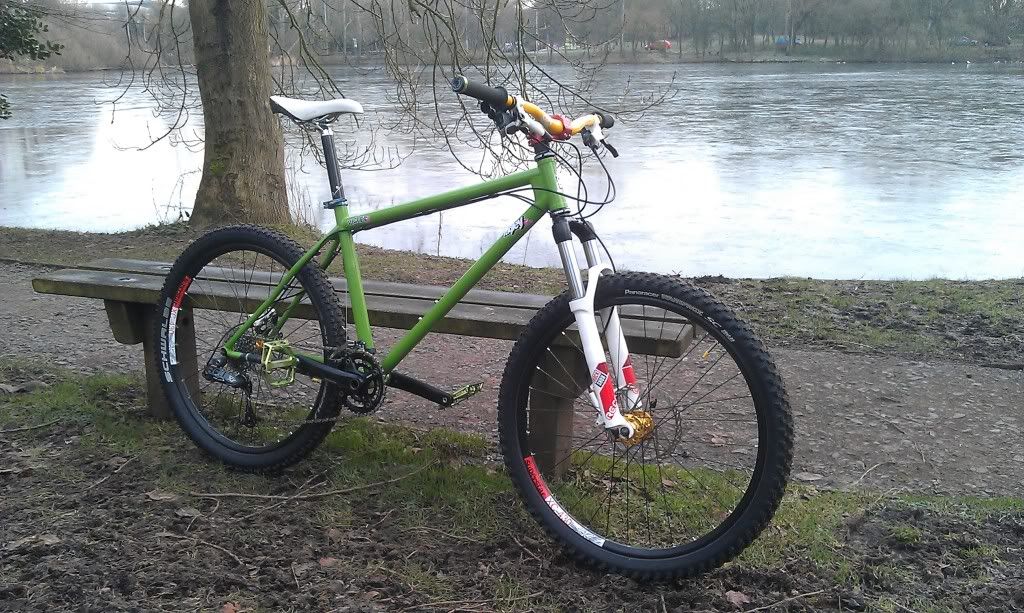
Fingers crossed I'll get somewhere decent next week. Here's the spec....
Frame: 18" Ragley Piglet
Forks: Rockshox Recon Silver solo air 120mm
Bars: Nukeproof Warhead 25mm rise (chopped to 740mm)
Stem: Ragley Stubbing 55mm
Headset: FSA Orbit MX
Grips: Deity Original lock on
Bar Ends: Deity
Brakes: Avid Elixir 3 180mm/160mm
Shifters: SRAM X7
Front Mech: SRAM X7
Rear Mech: SRAM X7
Chain Device: None for now, maybe Bionicon or a homemade one at some point
Seat: WTB Volt for now
Seat Post: Ragley Spike
Seat Post Clamp: Hope QR
Cranks: SRAM X7
Pedals: DMR Vault
Bottom Bracket: SRAM
Wheels: Superstar XC430
Hubs: Superstar Trizoid
Front tyre: Panaracer Rampage SC 2.35
Rear tyre: Schwalbe Nobby Nic Evo 2.2
Weight: Not the the lightest but not too bad, for now
Thanks for looking, and thanks to everyone who offered advice, Thirstynomad for sending me the seat post shim (that got lost) and Steve at The Bike Shop for doing the bits I ballsed up!! 0
0 -
Very nice! Given me some ideas for my build.
 0
0 -
-
Did the shim show up?Trek EX8
Ragley Piglet
Maverick Species I0 -
I got a card through today for a failed delivery due to not enough postage, i think that must be it, d'oh! I'll go collect at the weekend. Still itching for a decent ride, hope i get chance next week.
Edit*- Picked up package from PO, shim now received and it works a treat! Thanks again.0 -
Quick update following the first proper ride at the weekend, went on a trip to Cannock Chase. Despite having no granny ring, I still managed to ride the majority of FTD and Monkey Trail, and the Piglet was great!
I managed to surprise myself by grinding up climbs I'd normally have spun slowly up, so I'm sure that climbing is not gonna be an issue. It might be in my head, but I felt the Piglet encouraged me to be a bit more aggressive on the downs and to bomb along the flats a bit faster than I have in the past. Even did a few runs at Stile Cop! Can't wait to get out again! :P0 -
It defiantly encourages you to ride more aggressively I reckon, and the faster you go the more fun it gets!! Great looking bike mate!0
-
Decided to save up a little and beef up the Piglet a bit. Am gonna make a commuter/hack out of my old Vitus frame which I can make light and easy rolling for the local flat bridleways. So I figured the Piglet could be a bit burlier.
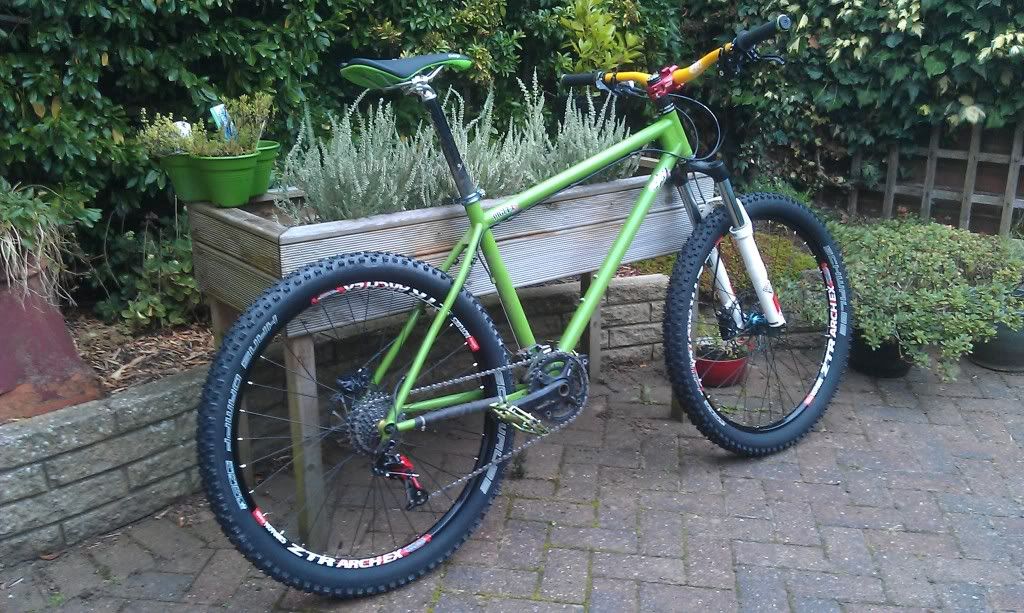
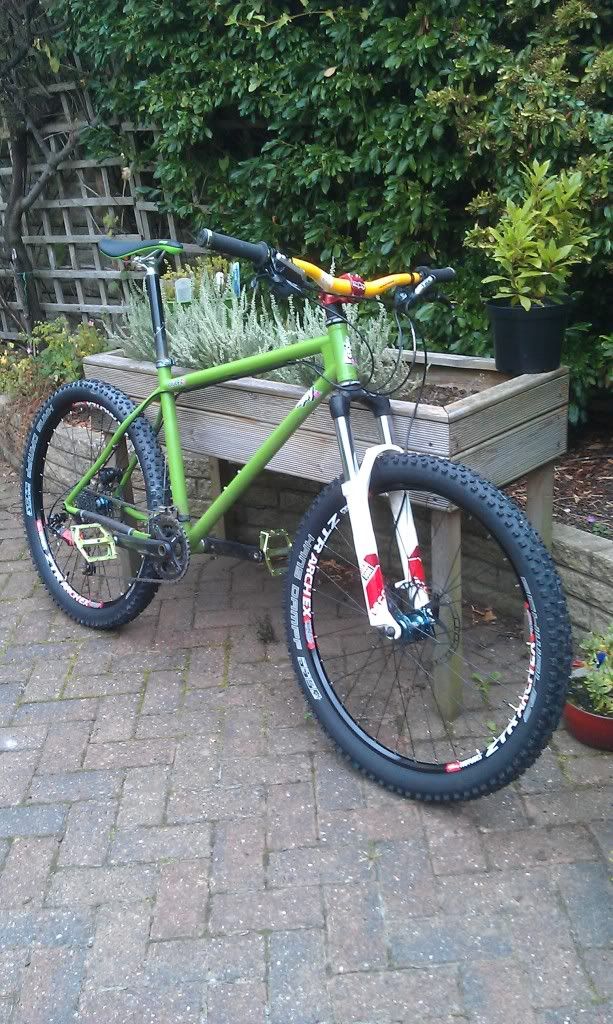
Last time I was in the Lakes I got a pinch flat which put a ding in the rim, so I've gone for Stans Arch EX on Hope Pro 2's with Hans Dampfs which I'm gonna run tubeless. Am still on Qr's at the moment and the Hopes can be converted if I upgrade the fork. The Piglet has to be a bit of an all rounder, days out in the Lakes/Dales, trail centres and a bit of abuse at places like Healey nab.
The elixir 3's felt buggered, so much play in the levers and something dropped out of the right hand lever recently which can't be good. Saw a good deal on SLX brake sets on bike discount and they get great reviews time and again so that seemed to be a no brainier.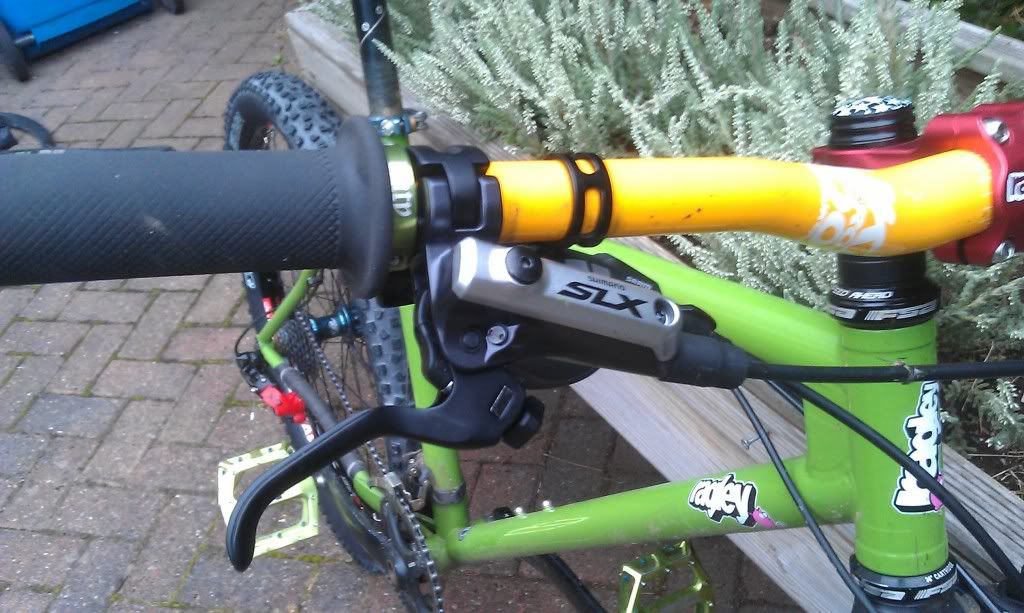
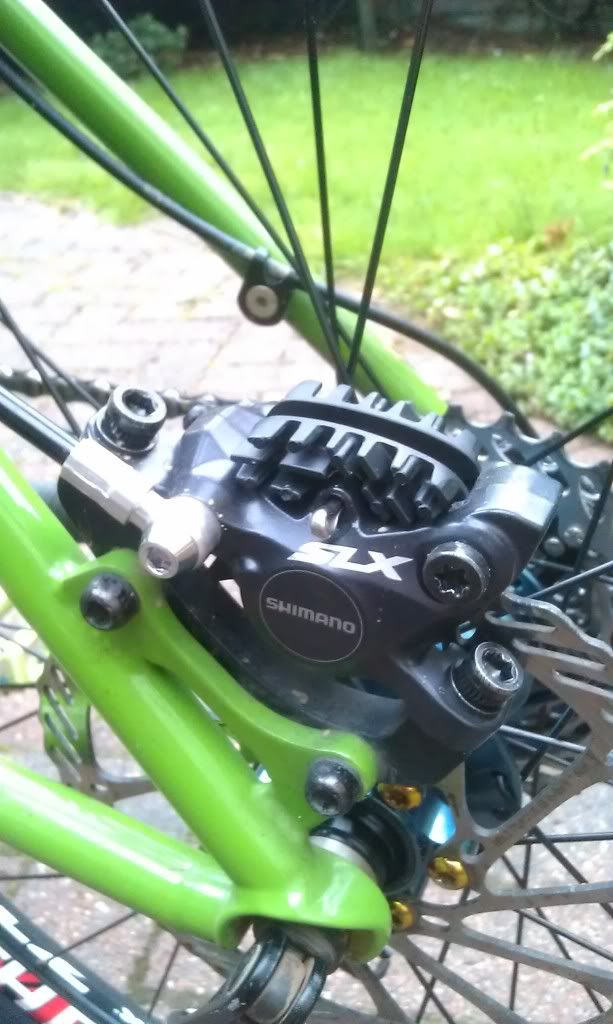
Since I can't run a chain device on the Piglet frame, my chain dropped all the time. It was getting on my t!ts so I decided to give a clutch mech a bash. Got an X9 type 2 medium cage from Taiwan fairly cheap. It's red but I don't really mind! It's been pretty good so far, there's virtually no chain rattle and it's not dropped yet.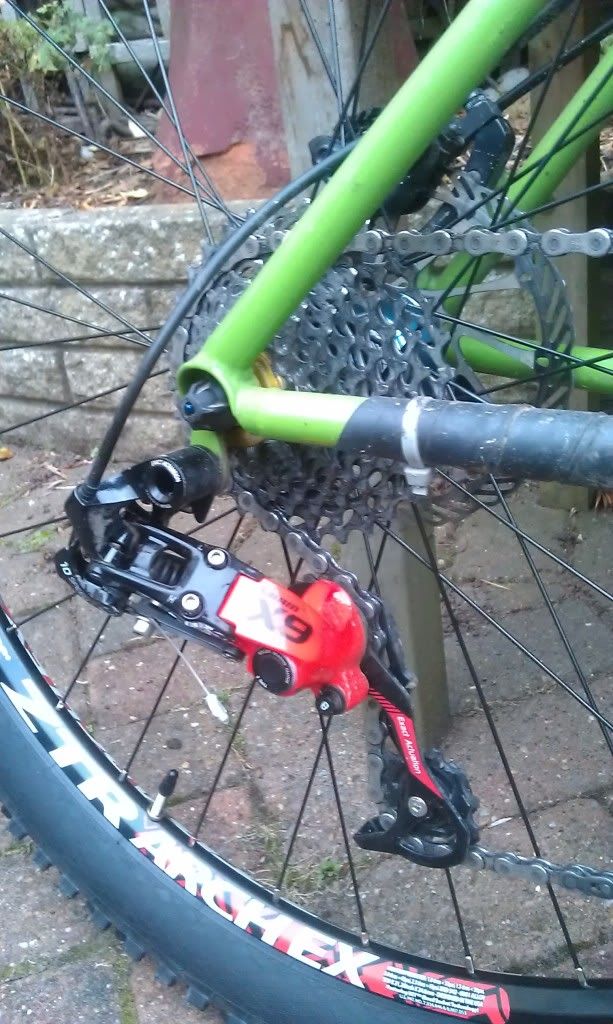
And my saddle was falling to bits, so when I saw the new Charge Scoop in green, well that was a no brainier too!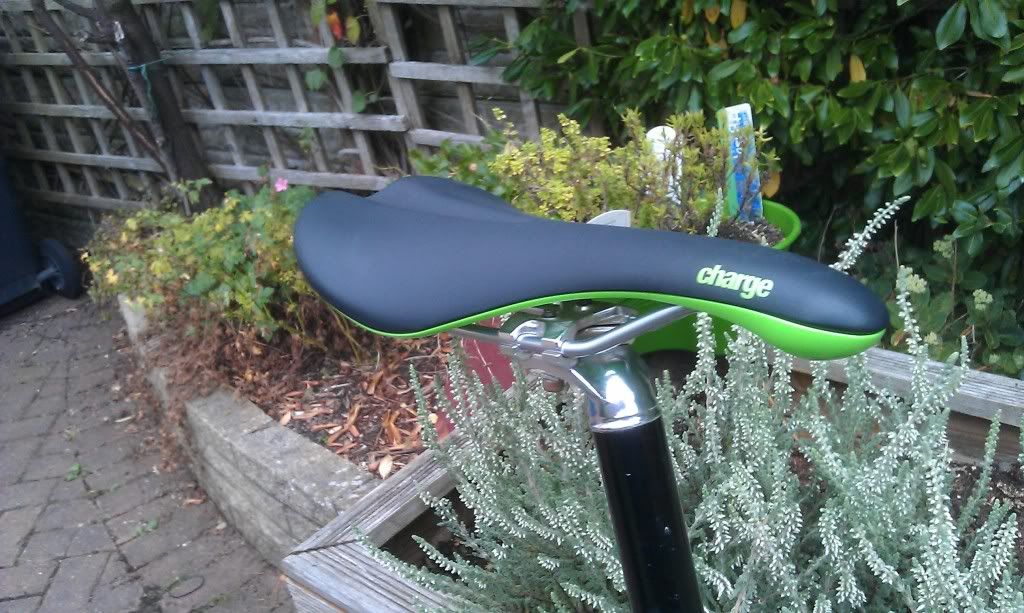
It's pretty hard compared to the old one, but surprisingly comfy. Remains to be seen what an all day ride will be like!
Next upgrade will be the fork if I've ever got the spare cash.0 -
Full spec
Frame: 18" Ragley Piglet
Forks: Rockshox Recon Silver solo air 120mm
Bars: Nukeproof Warhead 25mm rise (chopped to 740mm)
Stem: Ragley Stubbing 55mm
Headset: FSA Orbit MX
Grips: Deity Original lock on
Bar Ends: Deity
Brakes: Shimano SLX 180mm Ashima air rotor front/160mm rear
Shifters: SRAM X7
Front Mech: SRAM X7
Rear Mech: SRAM X9 Type 2 medium cage
Chain Device: None
Seat: Charge Scoop
Seat Post: Ragley Spike
Seat Post Clamp: Hope QR
Cranks: SRAM X7
Pedals: DMR Vault
Bottom Bracket: SRAM
Wheels: Stans Arch EX
Hubs: Hope Pro 2 Evo
Front tyre: Hans Dampf trail star 2.35
Rear tyre: Hans Dampf pace star 2.35
Weight: Heavy, probably0 -
-

